

Application packaging and delivery of an MSIX application
Application Packaging and Delivery of an MSIX Application
This article is updated to demonstrate the new “packagemsix” parameter, available in App Volumes Tools 2603 and later, which uses a single “appcapture.exe” syntax to generate an App Volumes application package for an MSIX application. This command removes the need for multiple manual steps that were required when achieving the same task in App Volumes 2503 and earlier versions.
App Volumes Administrators and Application Administrators responsible for capturing and delivering an MSIX application can leverage this three-step workflow to capture and deliver MSIX applications using App Volumes.
The Three Step Workflow
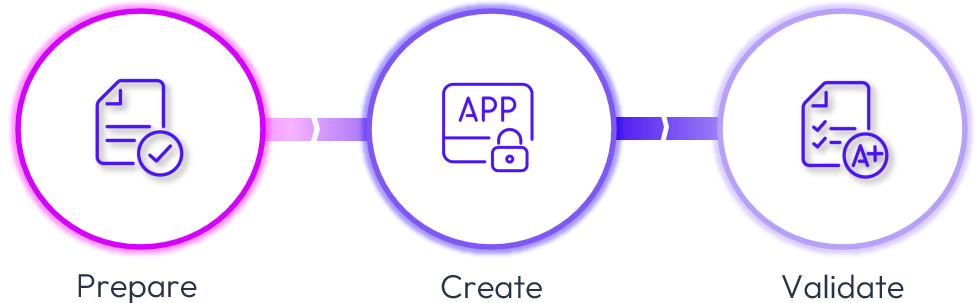
The “Prepare” section will describe the environment used to prepare this guide and prerequisites needed to be successful.
The “Create” section provides step-by-step instructions on converting an MSIX application into an App Volumes application package using App Volumes Tools (App Volumes Application Capture Command-Line Program). Then, upload the two files to the App Volumes environment for assignment. The step-by-step instructions are provided for both App Volumes 2603 and App Volumes 2503.
The “Validate” section is where we test the MSIX application delivery from the App Volumes Manager via an App Volumes user-based assignment, we will then log into a virtual desktop, confirm the MSIX application delivery, and launch the application.
Prepare
The following components are present in the environment which are used to build and validate the scenario.
- Omnissa Horizon 8: virtual desktops built from a Windows 11 Guest OS image using the following method.
- App Volumes 4.x environment
- App Volumes packaging virtual machine built using the guidelines outlined in Preparing a Packaging Virtual Machine, excluding installing the Horizon agent, App Volumes agent, and DEM agent.
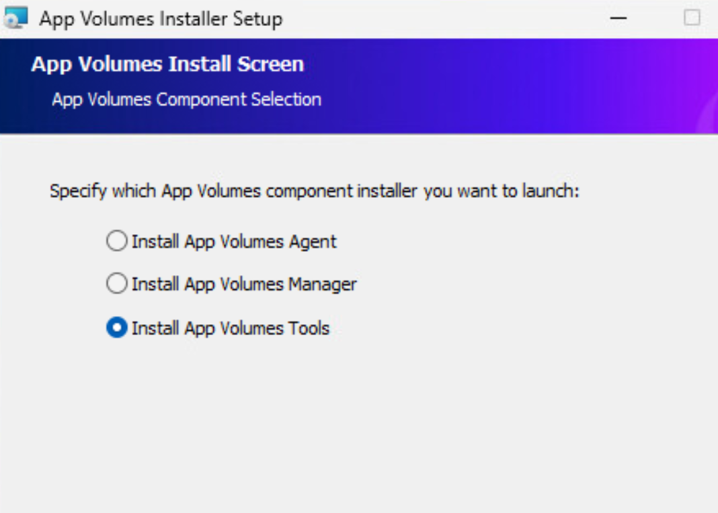
- We have used App Volumes Tools to capture an application, generating output in VHD, VMDK and MSI formats.
Considerations
It is essential to note the following considerations:
- The App Volumes MSIX application package captured by App Volumes Tools can only contain a single MSIX application within the Virtual Hard Disk.
- The certificate used during the capture of an MSIX application should be present in the target virtual desktop for the application to successfully validate and launch.
Create a Package Using App Volumes Tools 2603 and Later
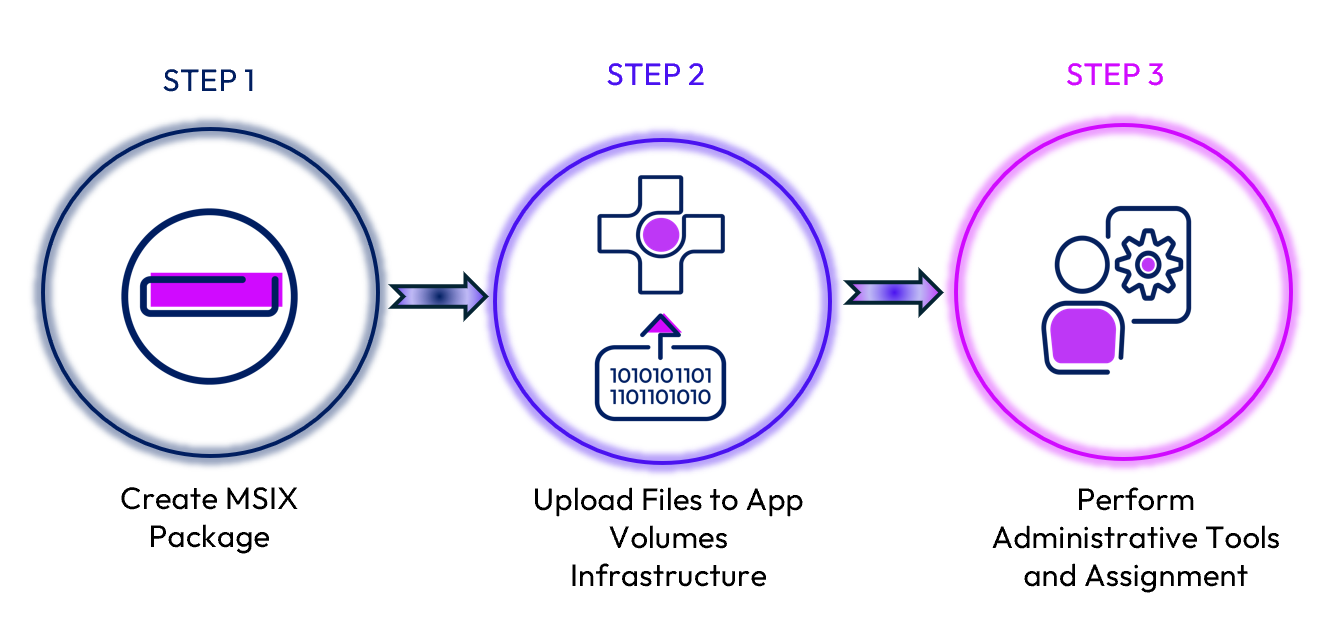
Work with App Volumes Tools
When the appcapture.exe command runs with the new packagemsix parameter, App Volumes creates a sequence of automated tasks, from mounting a new VHD, followed by running the MSIXMGR tool, which unpacks the MSIX application into the VHD, and depending on the type of output formats specified in the command, the corresponding output files, including a JSON file gets generated.
By default, the output files are saved in the following location: C:\ProgramData\Omnissa\AppVolumes\Packages
Prerequisites:
- Create the following folders in the packaging virtual machine:
- C:\MSIXAPPCAPTUREDISK - stores the created VHD, VMDK, and JSON files during the demo
- C:\MSIXMGR - Extract and store the MSIX Manager tool files here
- C:\MSIX_Apps - store the MSIX application here.
- MSIX software package used in this article is Python Manager 26.2
- Optional: Additional software used - An application packager could use a 3rd party software or MSIX packaging tool to capture an MSIX application from an executable or MSI.
Considerations while running the appcapture.exe command
- App capture now requires using
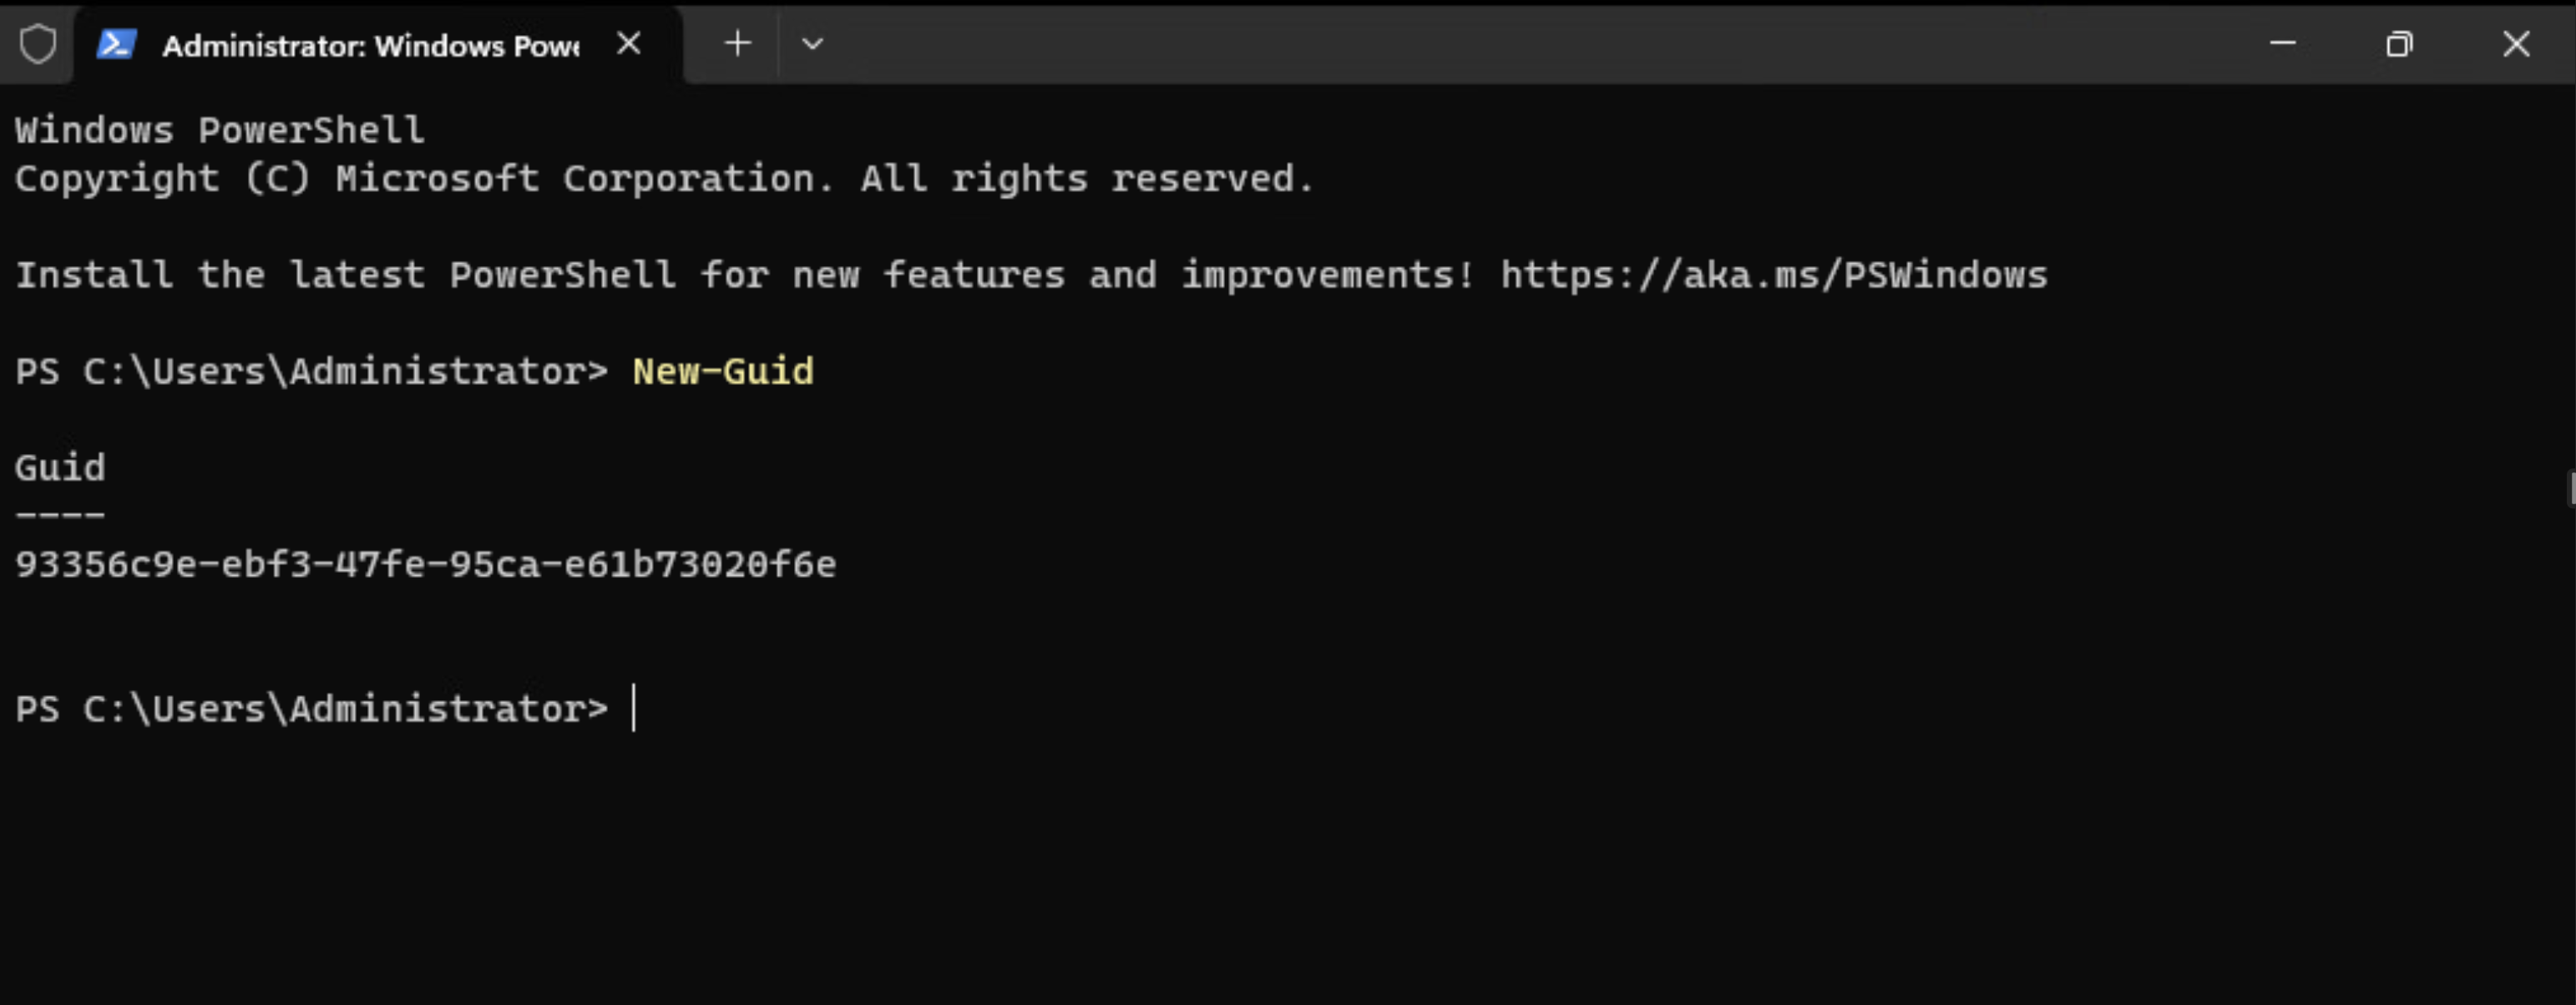
/upgradecodeparameter and is mandatory when using thepackagemsixcommand.- A custom GUID can be provided as the parameter value; this custom GUID can be generated using the New-Guid PowerShell command.
- Location of the MSIX Manager tool executable is stored in the
MSIXMgrToolPathsvservice parameter. In the subsequent usage ofpackagemsix, you don’t have to provide the installer path of the tool. If you provide a path, thesvservicevalue gets updated with the new path. For more information about this parameter, see App Volumes Administration Guide.
Step 1: Generate an Application GUID
Generate a random GUID ID for the application to be captured using PowerShell:
C:\> New-Guid
Capture an MSIX to an App Volumes Package:
For more information about this command, see the Windows Command-Line Arguments for the App Volumes Application Capture Command-Line Program in the App Volumes Administration Guide.
App Volumes ‘appcapture’ Syntax
C:\> appcapture.exe packagemsix /name <packagename> /upgradecode <custom_GUID> /source <path_of_the_MSIX_application_installer> /msixmgr <location_of_the_MSIXManagertool_executable> /format <AppVolumes_package_format>
Note: When App Volumes Tools (appcapture.exe) is installed, the command-line program is registered in Windows as a PATH variable. This will allow the appcapture.exe command to run from any location within an elevated command prompt.
Syntax used in the demo:
C:\> appcapture.exe packagemsix /name pythonpkg /upgradecode 93356c9e-ebf3-47fe-95ca-e61b73020f6e /source “C:\MSIX_Apps\python-manager-26.2.msix” /msixmgr C:\MSIXMGR\x64\msixmgr.exe /format VHD,VMDK,MSI
Output: The following output files are generated: pythonpkg.json, pythonpkg.msi, pythonpkg.vhd, and pythonpkg_workstation.vmdk.
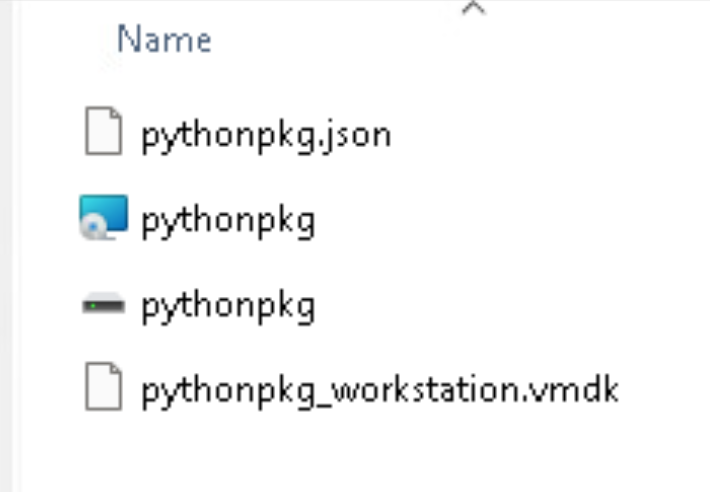
Run App Volumes Tools (appcapture.exe command) to generate the VHD, VMDK, MSI and JSON files:
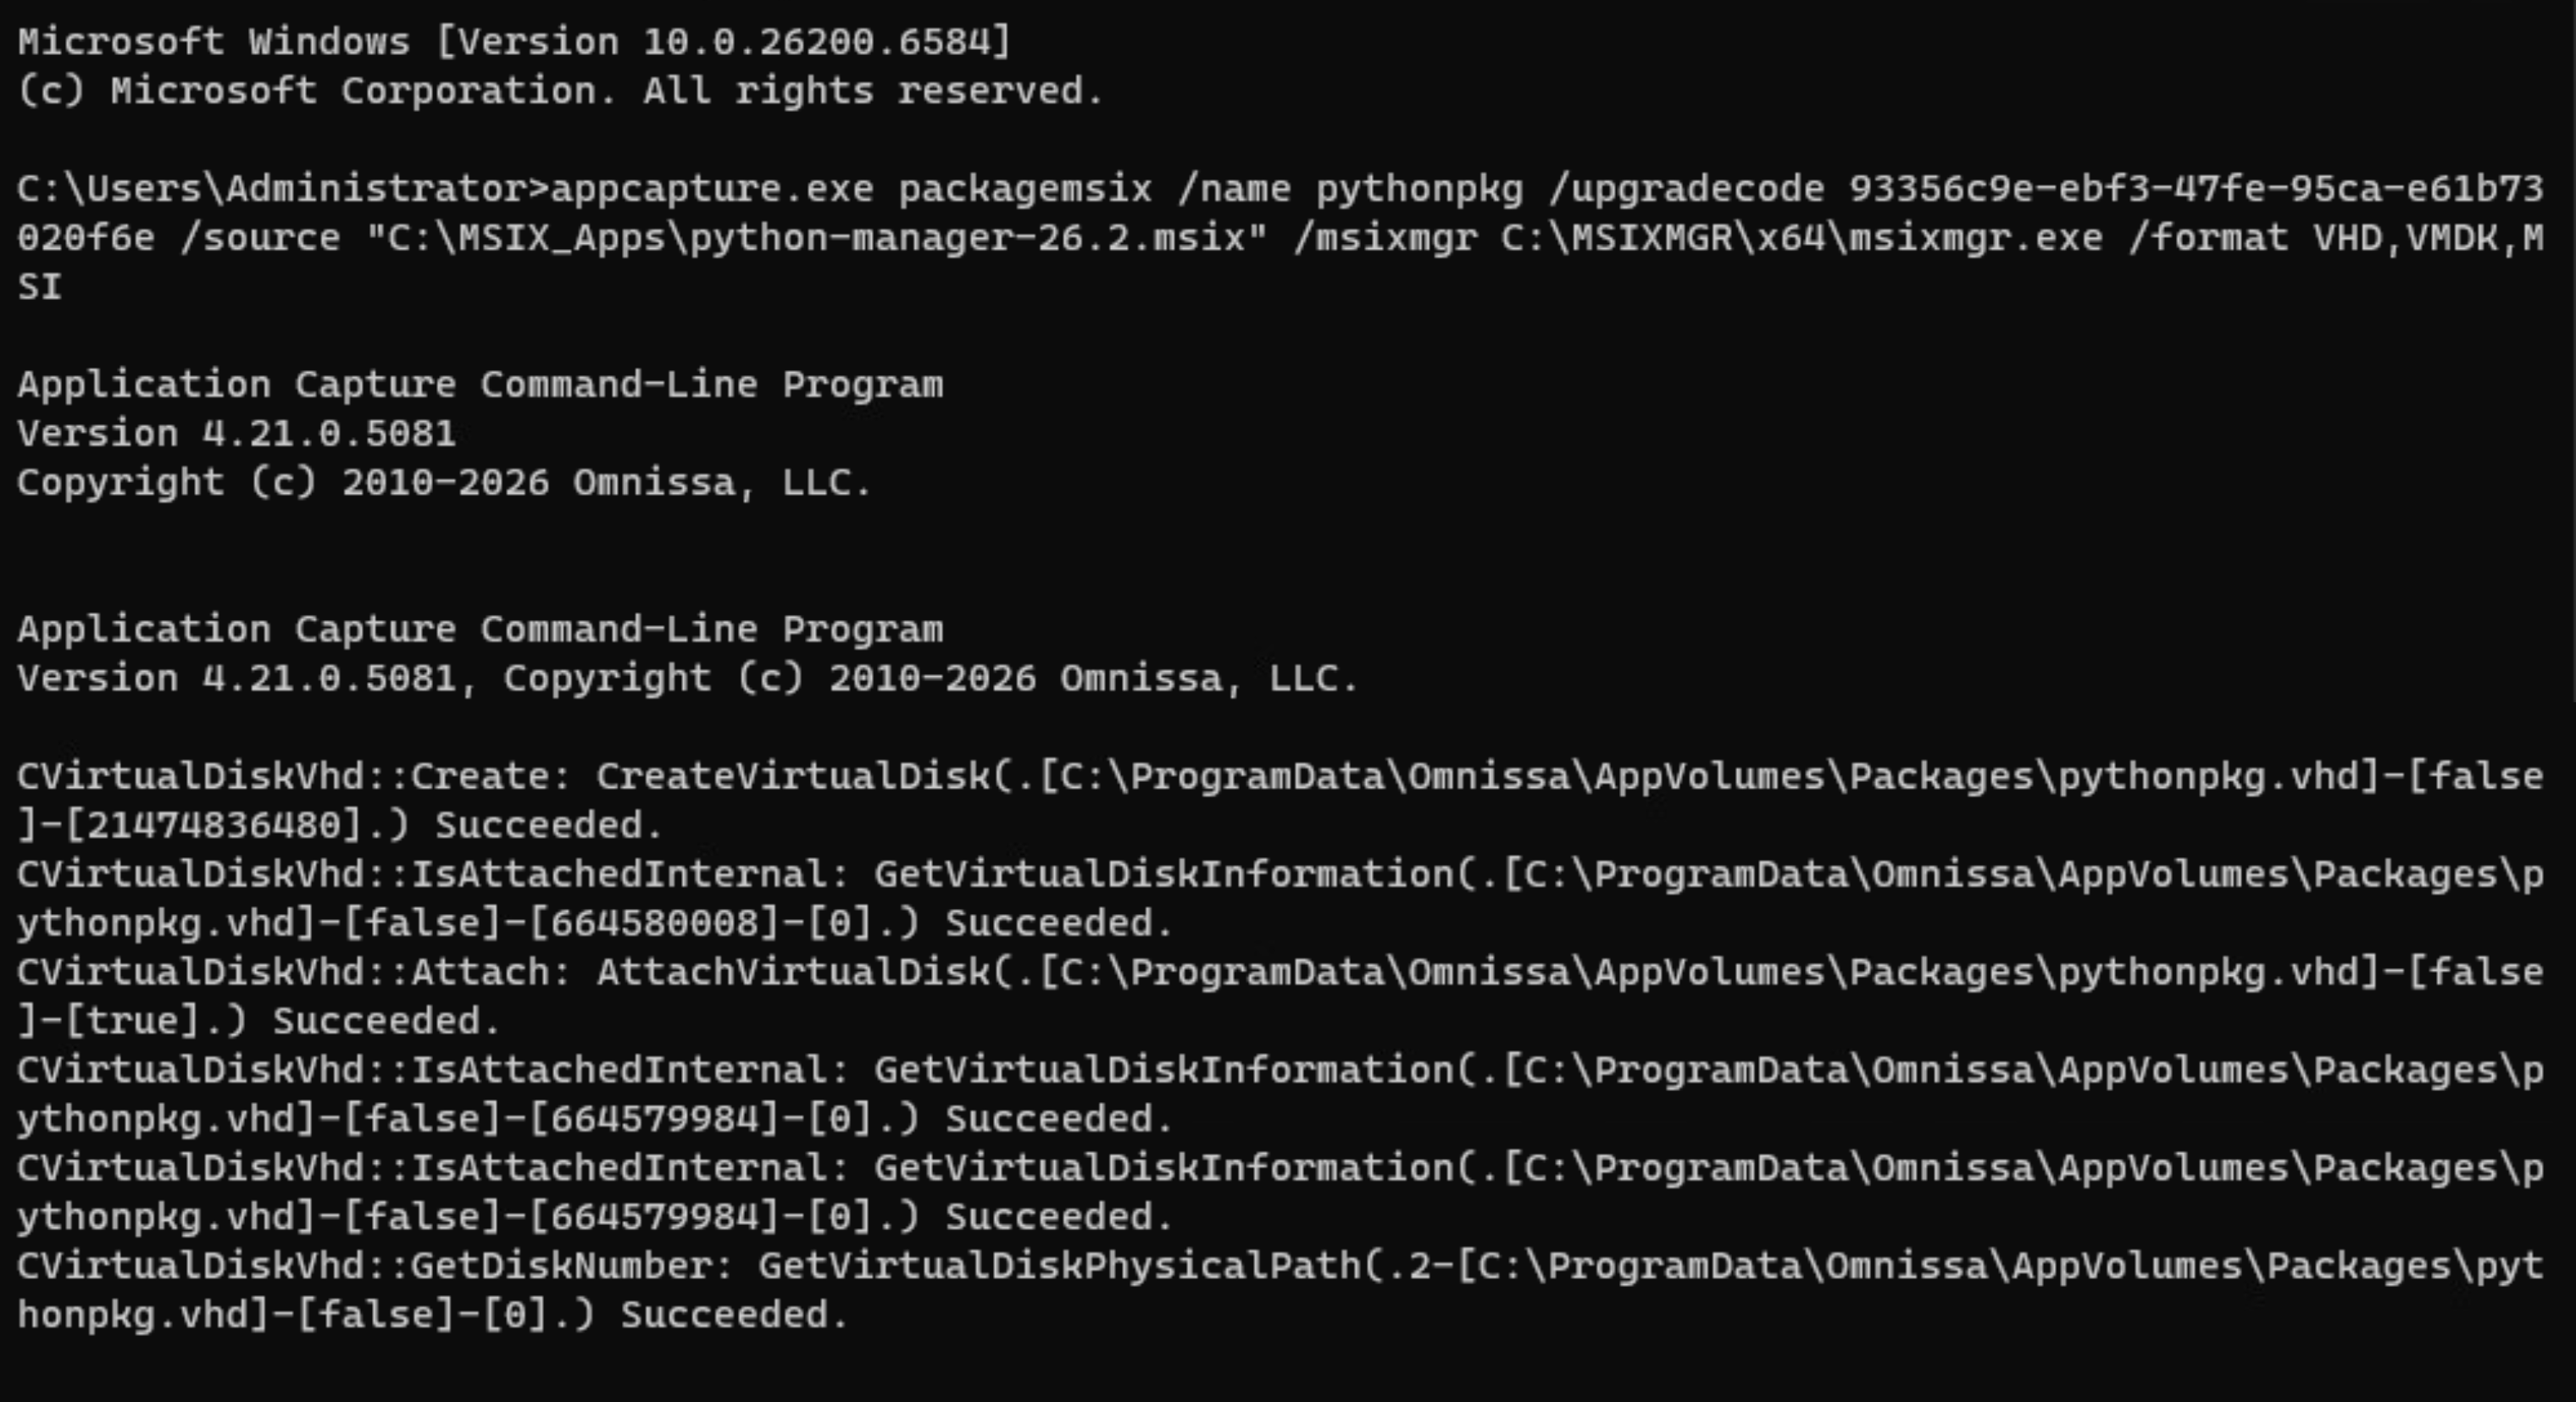
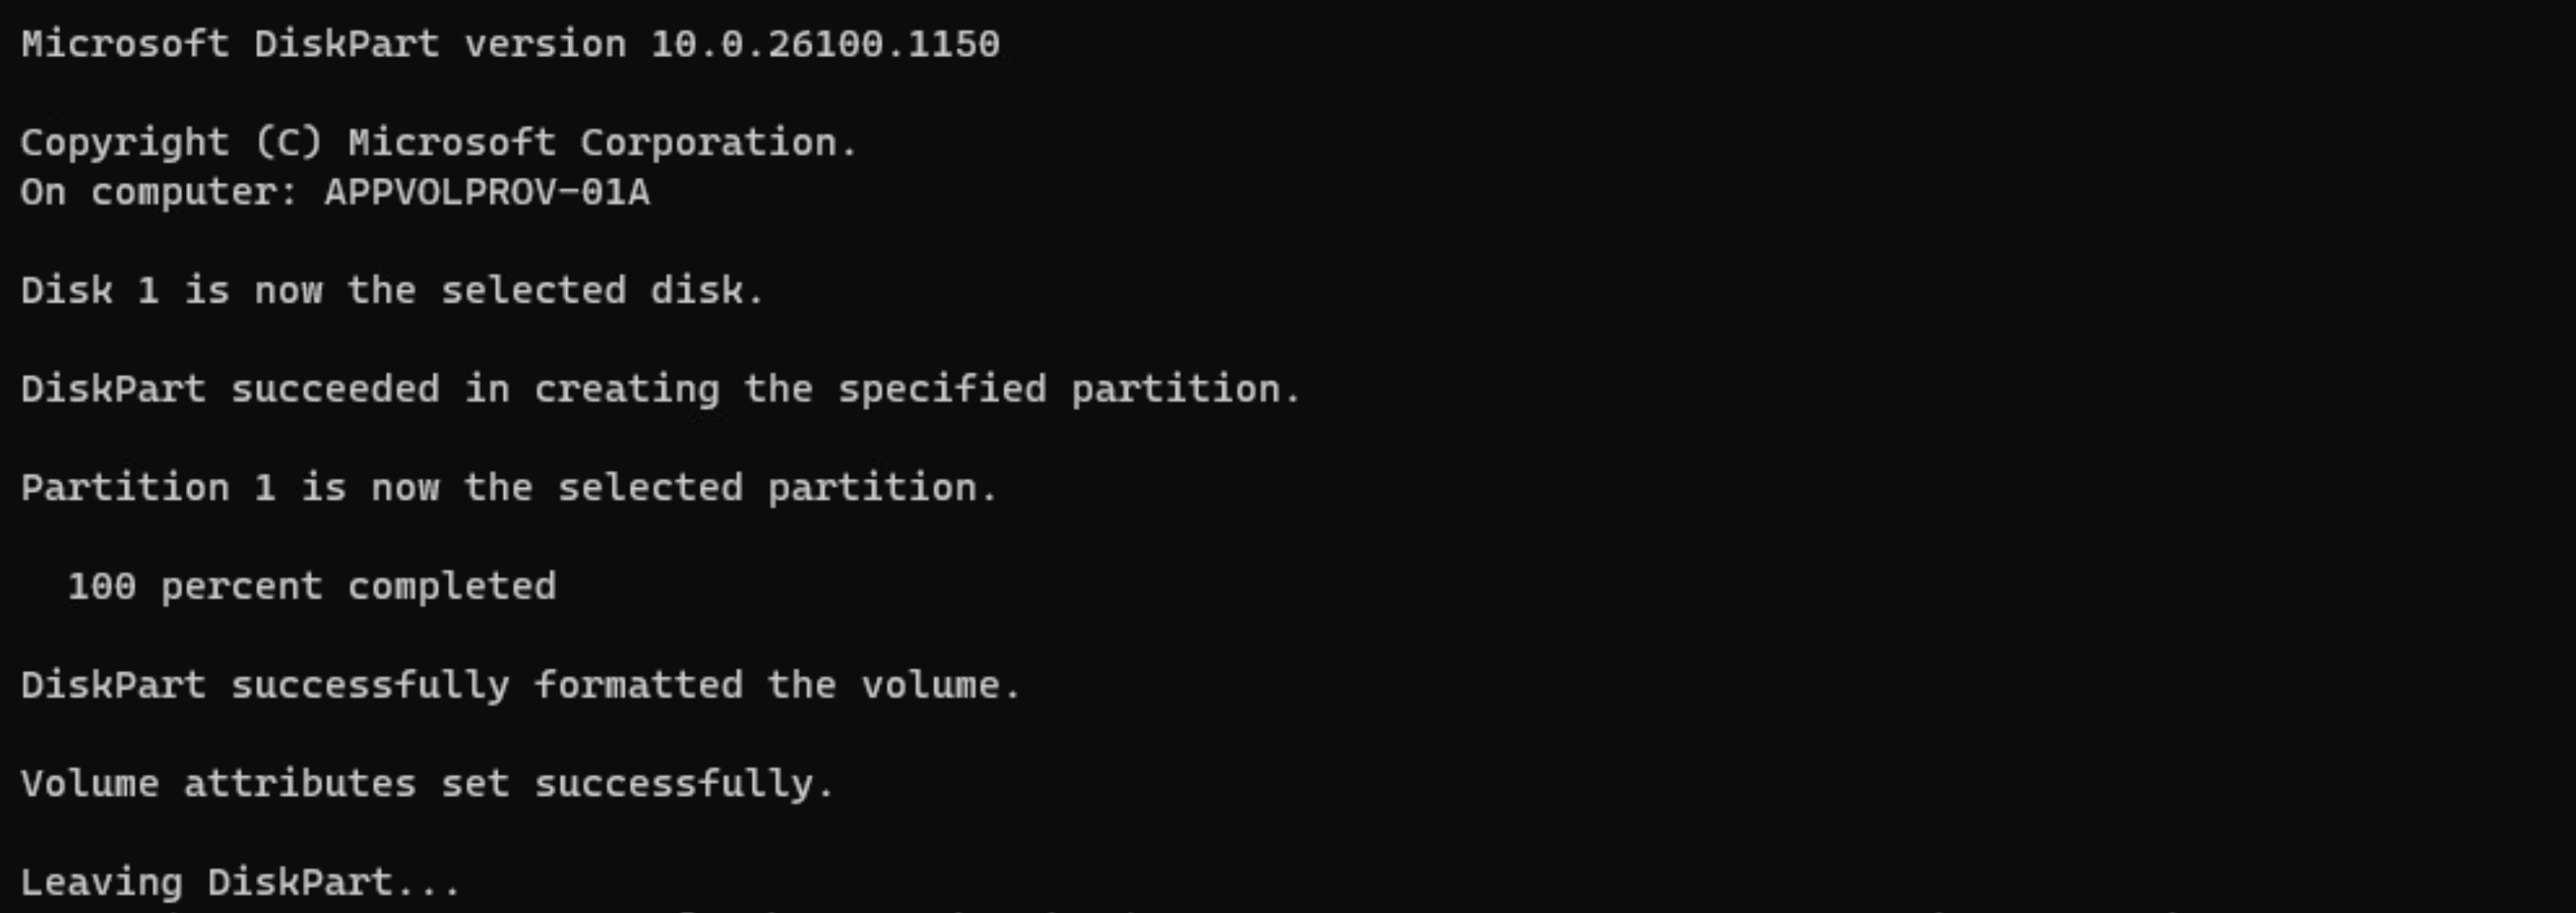
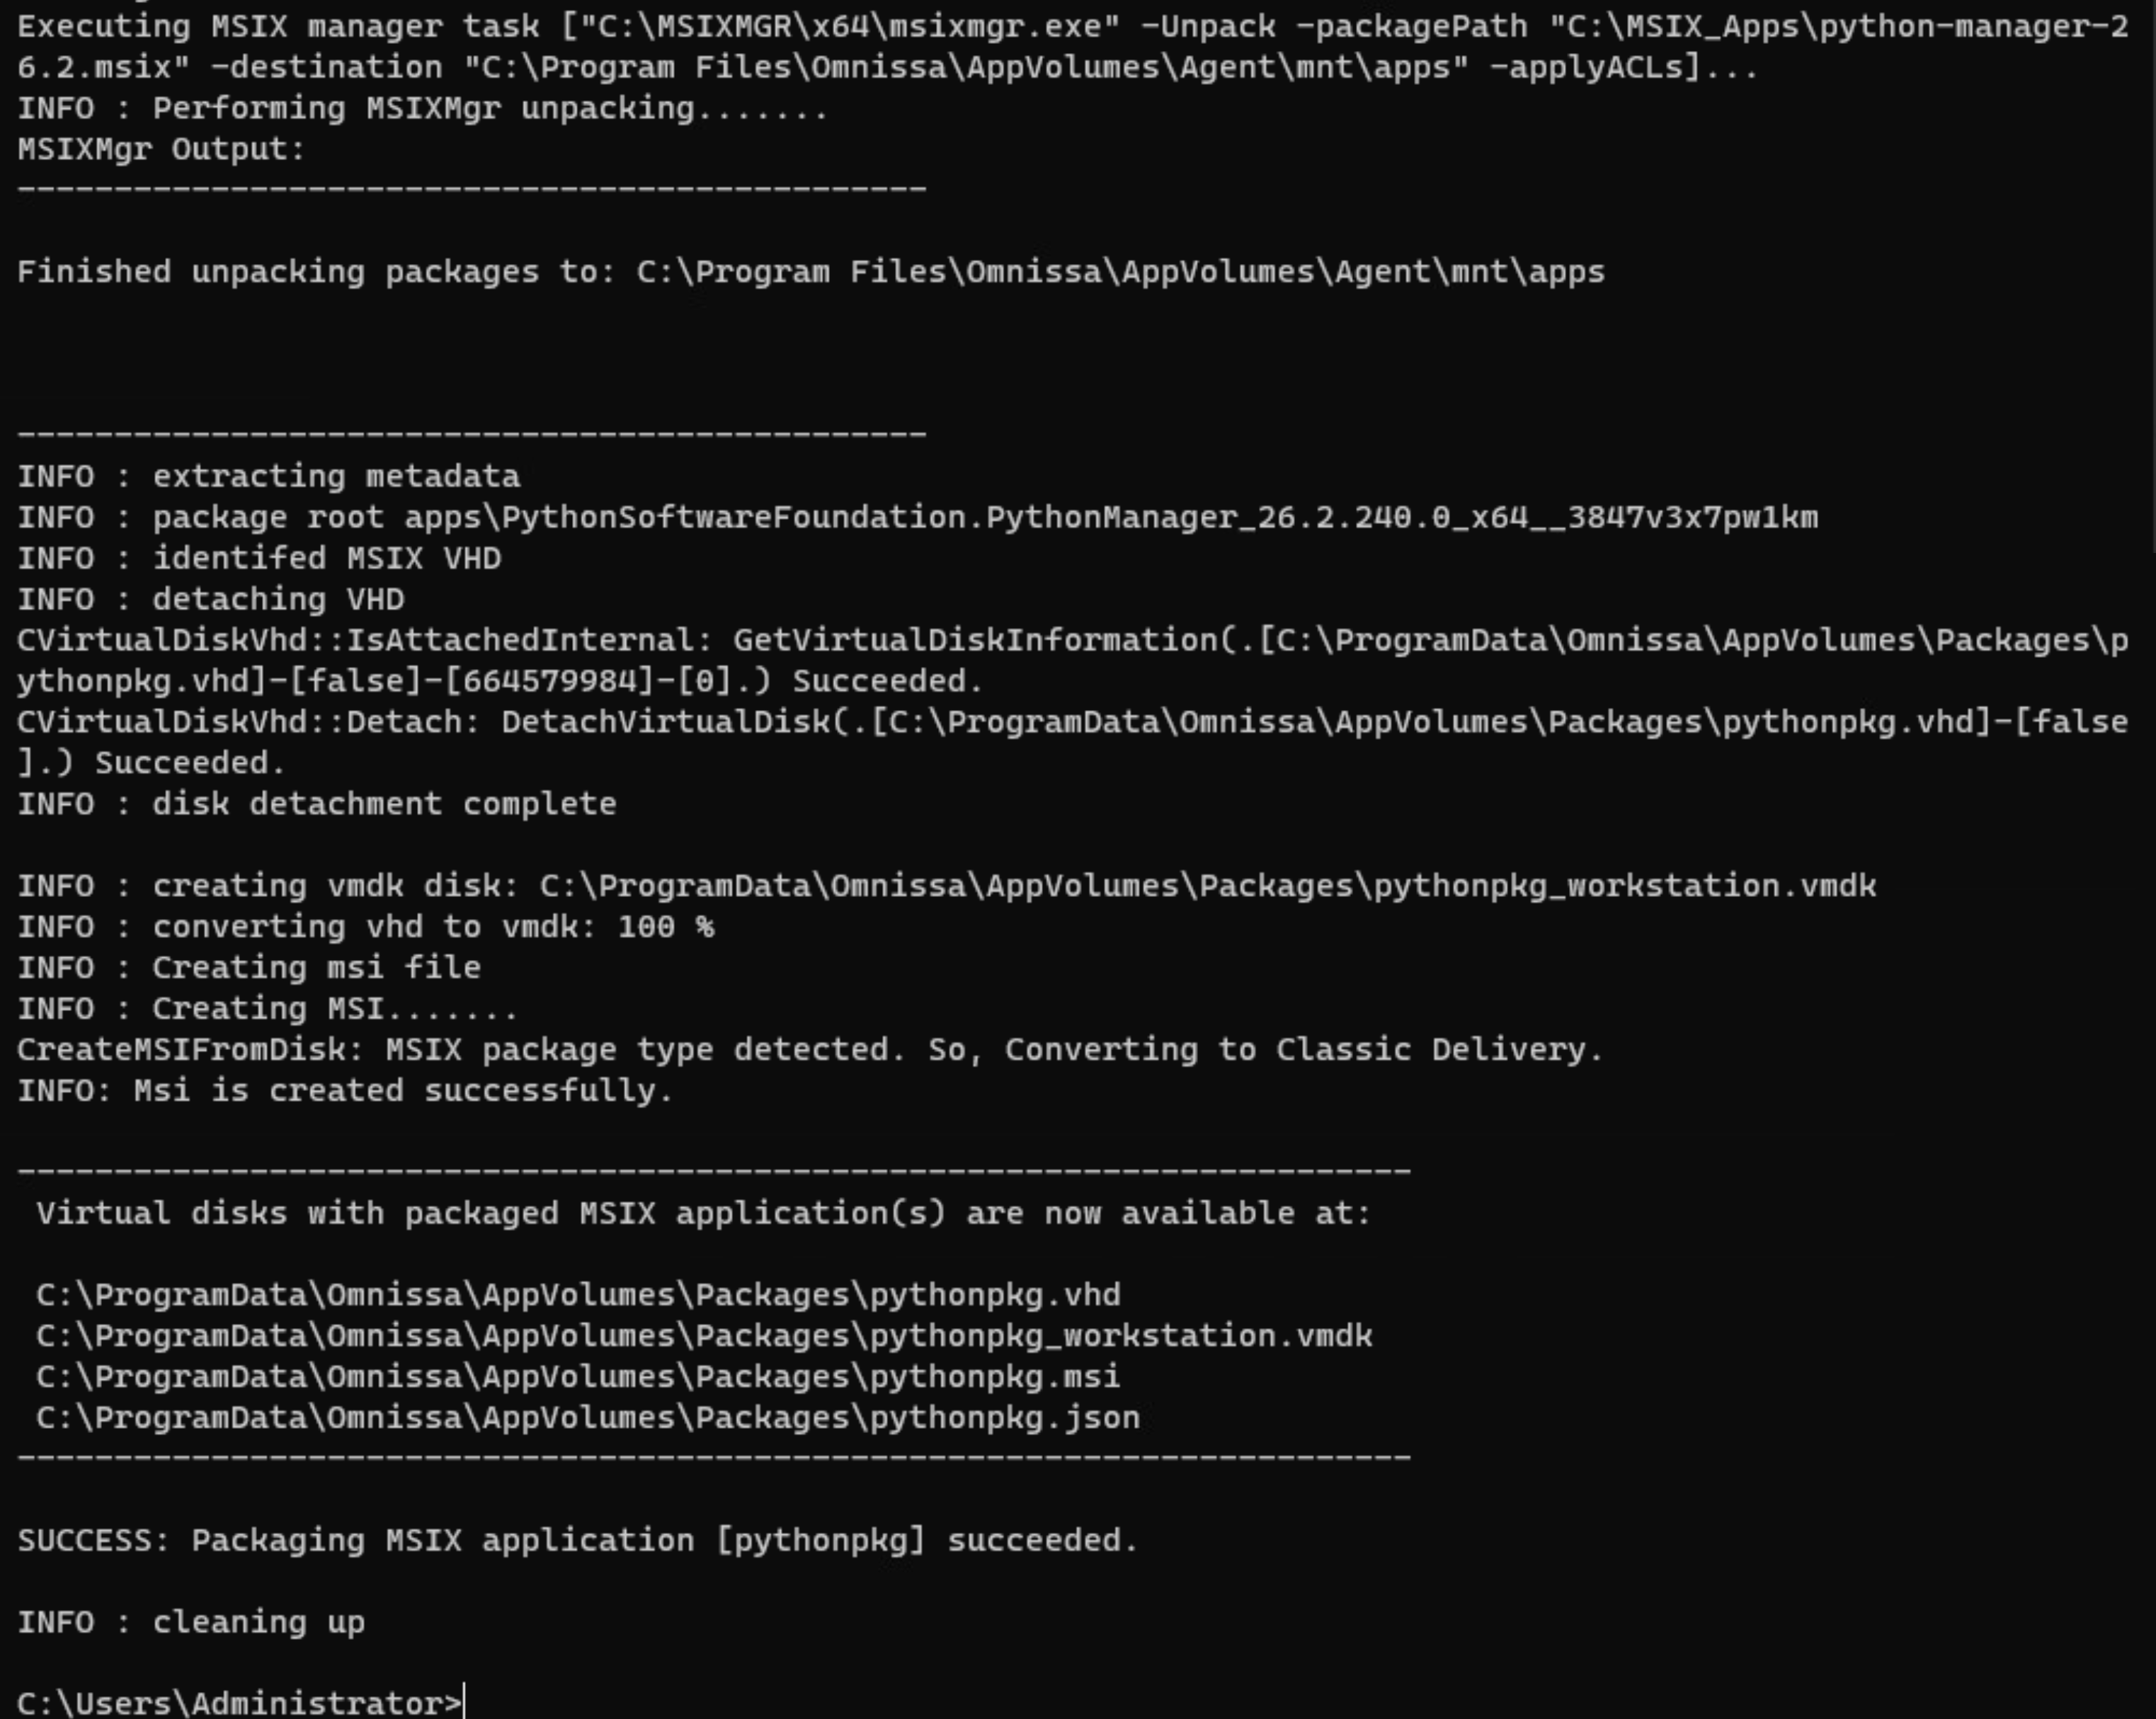
The appcapture.exe syntax using the /format parameter generates all three outputs [VHD, VMDK and MSI] in a single capture sequence, this behavior is a multi-step process in App Volumes 2503 and earlier which is described below.
Steps 2 and 3 are common to both packaging processes outlined here under the Uploading the output files and completing the administrative tasks in this document and are detailed in the sections below.
Create a Package Using App Volumes Tools 2503 and Earlier
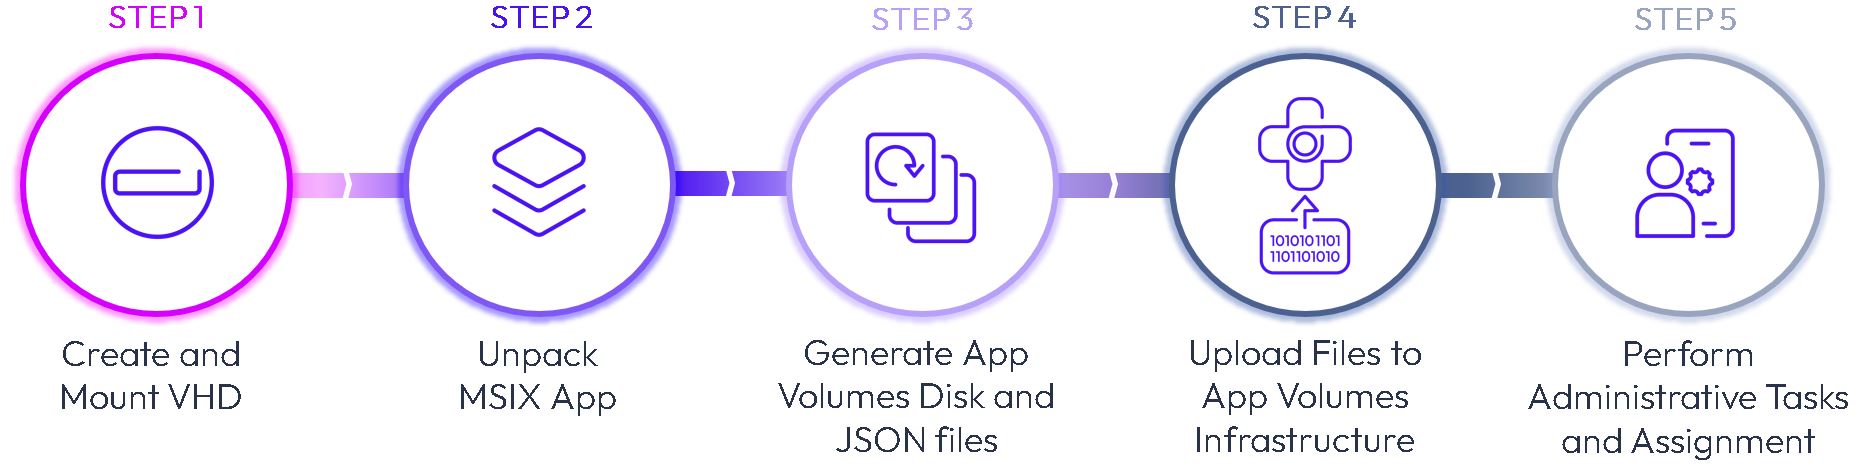
From the App Volumes packaging virtual machine, the administrator/packager initiates the following steps:
Prerequisites:
On the App Volumes Package capture VM, create a folder where you will create the empty Virtual Hard Disk (VHD), convert the VHD to the required App Volumes supported virtual disks (VHD and VMDK), and the JSON metadata files. In the demo, we have used the following folders:
- C:\MSIXAPPCAPTUREDISK - stores the created VHD, VMDK, and JSON files during the demo
- C:\MSIXMGR – stores the extracted MSIX Manager tool files here
- C:\MSIX_Apps - stores the MSIX application here
Step 1: Create and Mount a Virtual Hard Disk (VHD)
- On the App Volumes packaging VM, launch an elevated command prompt.
- Run the following
DISKPARTcommands to create, format, and mount the VHD:
Diskpart syntax:
C:\DISKPART
DISKPART> CREATE VDISK FILE=<VHD File Location.vhd> MAXIMUM=<disk size) TYPE=expandable
DISKPART>SELECT VDISK FILE=<VHD File Location.vhd>
DISKPART> ATTACH VDISK
DISKPART> LIST DISK
DISKPART> SELECT DISK <No. that is associated with the above mounted VHD>
DISKPART> ATTRIBUTES DISK CLEAR READONLY
DISKPART> CONVERT GPT
DISKPART> CREATE PARTITION PRIMARY
DISKPART> FORMAT QUICK FS=NTFS LABEL=<Label Name Optional>
DISKPART> ASSIGN LETTER=<Available drive letter>
DISKPART> EXIT
Syntax used in the demo:
C:\DISKPART
DISKPART> CREATE VDISK FILE=”C:\MSIXAppCaptureDisk\MSIXAPP.vhd” MAXIMUM=10240 TYPE=expandable
DISKPART>SELECT VDISK FILE=”C:\MSIXAppCaptureDisk\MSIXAPP.vhd”
DISKPART> ATTACH VDISK
DISKPART> LIST DISK
DISKPART> SELECT DISK 1
DISKPART> ATTRIBUTES DISK CLEAR READONLY
DISKPART> CONVERT GPT
DISKPART> CREATE PARTITION PRIMARY
DISKPART> FORMAT QUICK FS=NTFS LABEL=”Application”
DISKPART> ASSIGN LETTER=”E”
DISKPART> EXIT
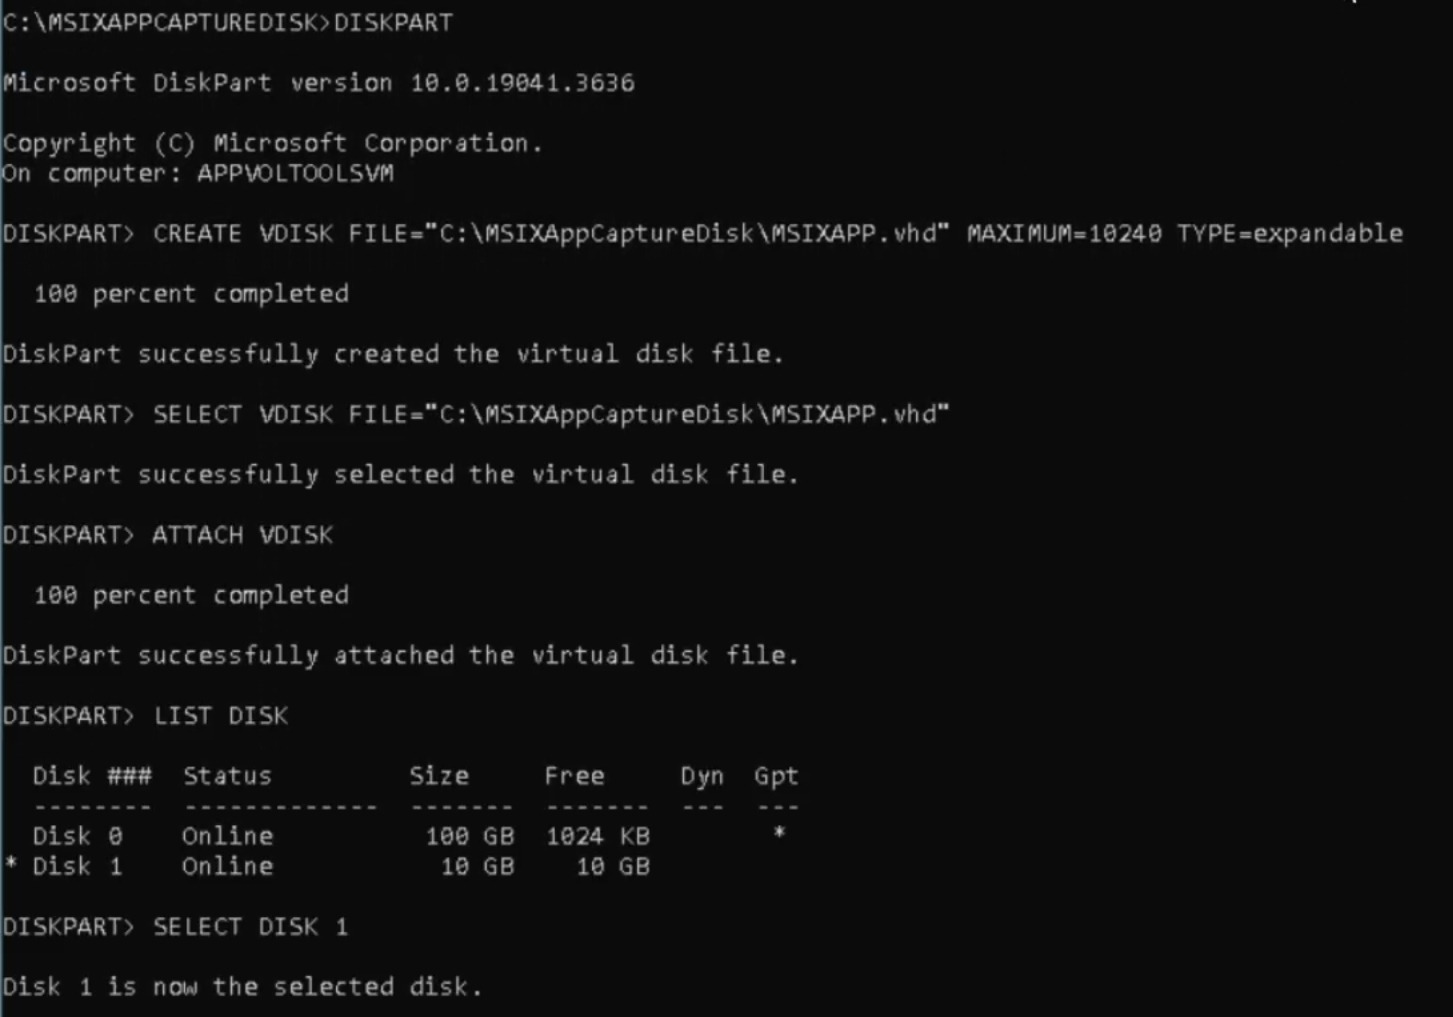
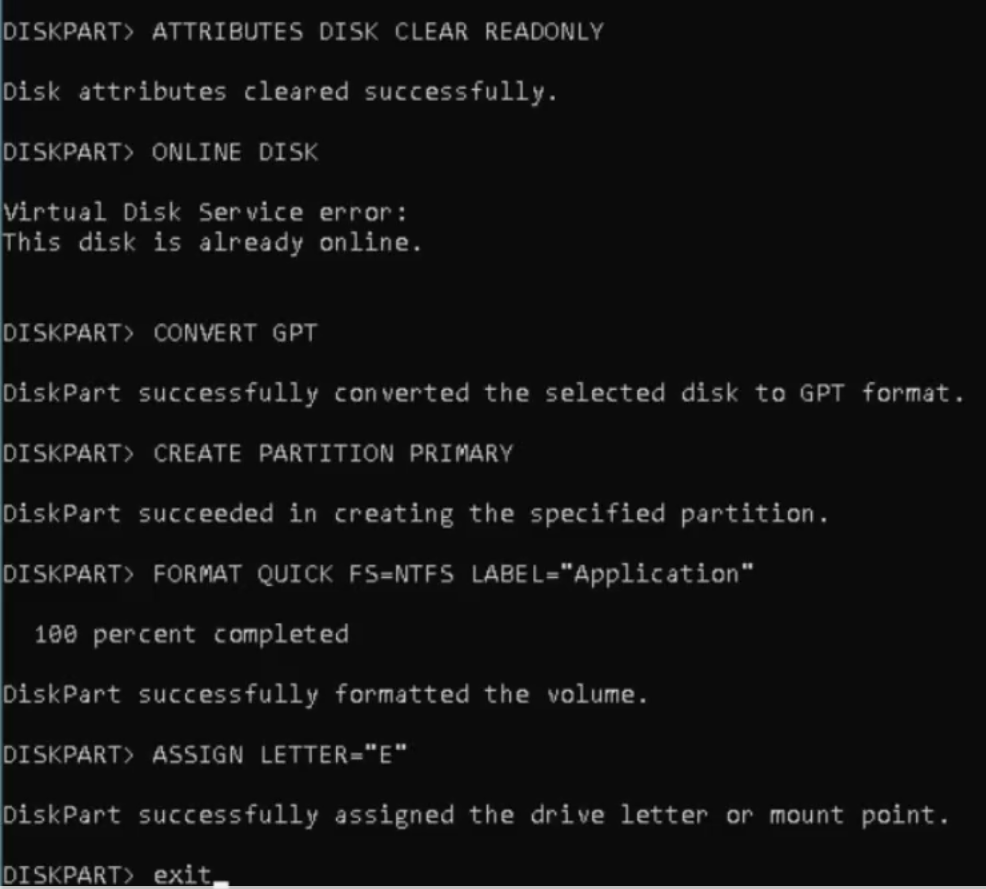
Diskpart commands run on the packaging virtual machine:
Step 2: Use the MSIX Manager (MSIXMGR.EXE)
- Run the MSIX Manager
Unpackcommand to unpack the Python MSIX application into the VHD created in the previous steps.
MSIXMGR Syntax:
“C:\msixmgr\x64\msixmgr.exe” -Unpack -packagePath <Path of the MSIX Application> -destination <Destination Drive\Folder> -applyACLs
Syntax used in the demo:
“C:\msixmgr\x64\msixmgr.exe” -Unpack -packagePath “C:\MSIX_Apps\Python 3.12\PythonSoftwareFoundation.Python.3.12_3.12.1008.0_x64_qbz5n2kfra8p0.msix” -destination E:\apps -applyACLs
Output of the MSIXMGR unpacking the MSIX Application:
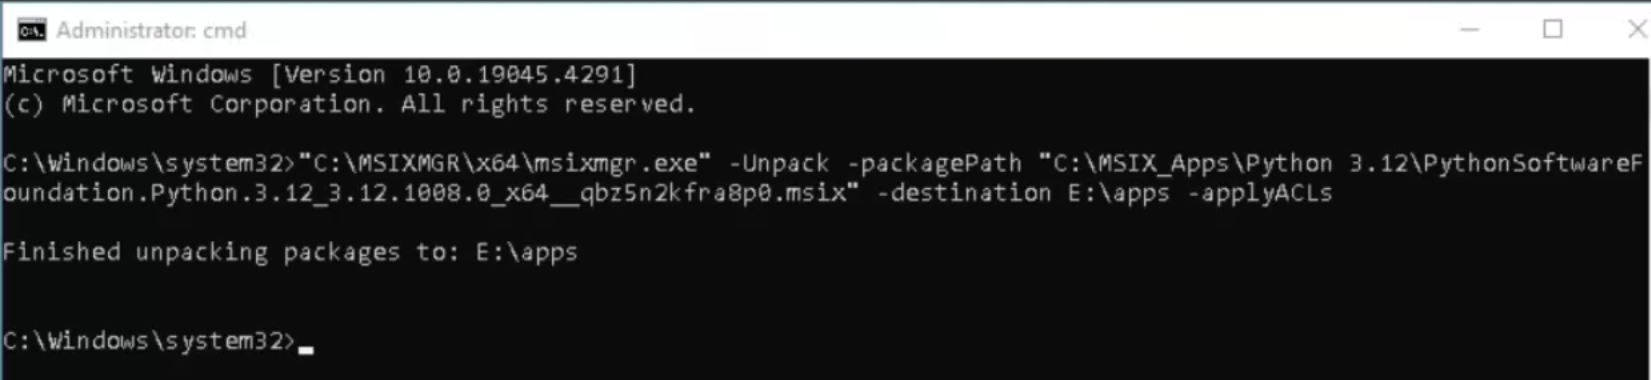
Note: Ensure that the destination drive\path does not contain quotations, like the source package path shown in the above screenshot.
Unmount the VHD
- Launch an elevated command prompt and run DISKPART
- Within the DISKPART prompts, perform the following:
- List the volumes.
- Select the volume mounted by the VHD and seek confirmation.
- Set the selected volume attribute to NODEFAULTDRIVELETTER.
- Select the virtual hard disk (VDISK), which is the VHD file, and detach the VDISK.
Diskpart unmount syntax:
C:\DISKPART
DISKPART> LIST VOLUME
DISKPART> SELECT VOLUME <No.>
DISKPART> ATTRIBUTES VOLUME SET NODEFAULTDRIVELETTER
DISKPART> SELECT VDISK FILE=<VHD File Location.vhd>
DISKPART> DETACH VDISK
DISKPART>EXIT
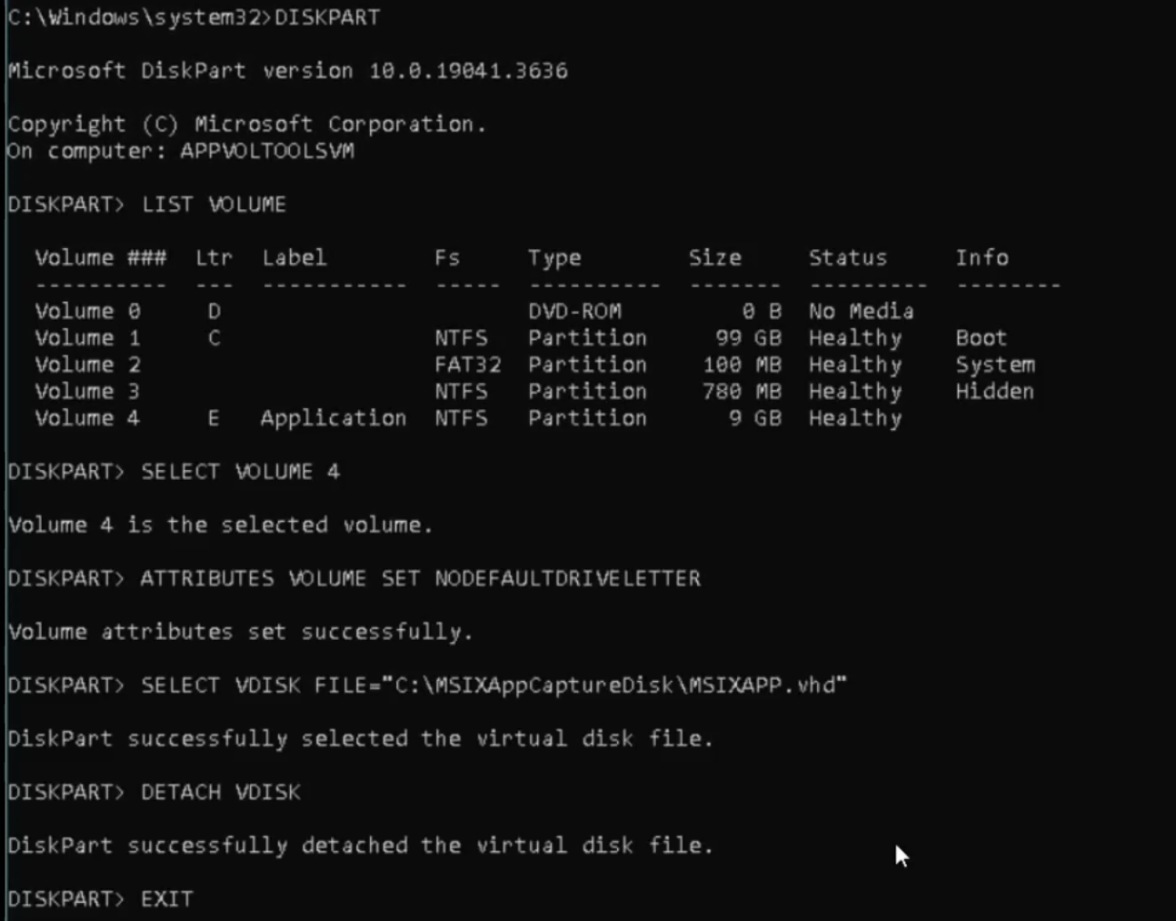
Syntax used in the demo:
C:\DISKPART
DISKPART> LIST VOLUME
DISKPART> SELECT VOLUME 4
DISKPART> ATTRIBUTES VOLUME SET NODEFAULTDRIVELETTER
DISKPART> SELECT VDISK FILE=”C:\MSIXAppCaptureDisk\MSIXAPP.vhd”
DISKPART> DETACH VDISK
DISKPART>EXIT
Diskpart commands run on the packaging virtual machine:
Step 3: Capture the App with App Volumes Tools
- Launch an elevated command prompt and run the App Volumes Tools (
appcapture.exe) shown in the syntax section below:- The first
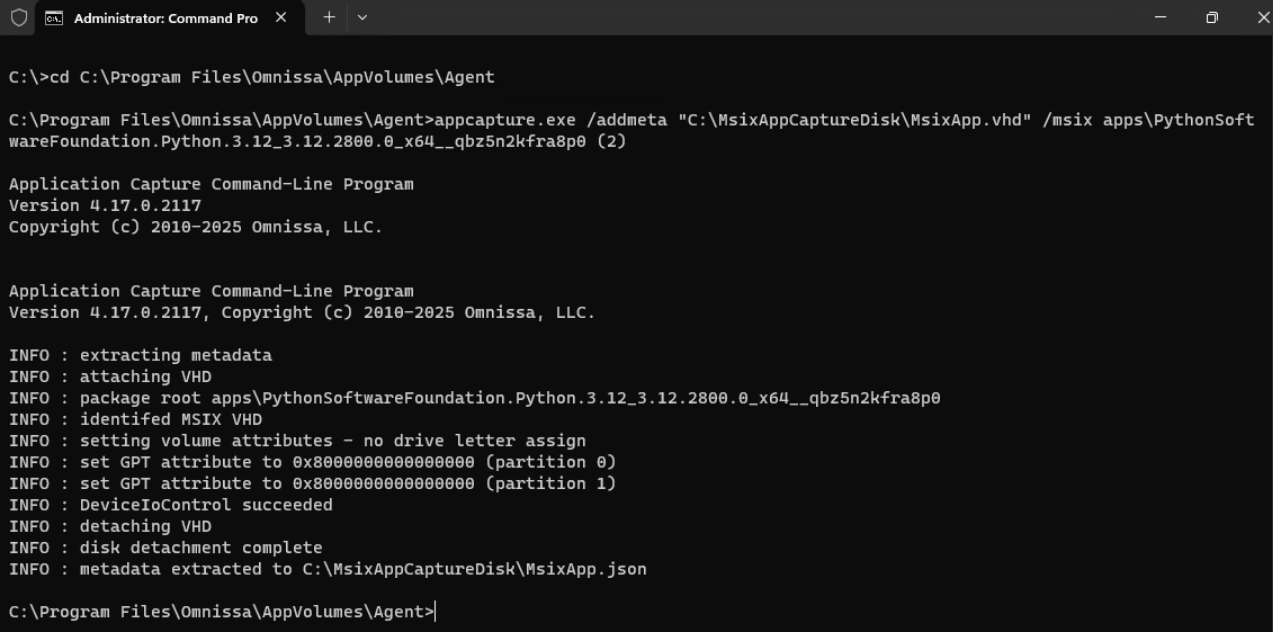
appcapture.execommand executes to generate and extract the metadata to a JSON file. - The second
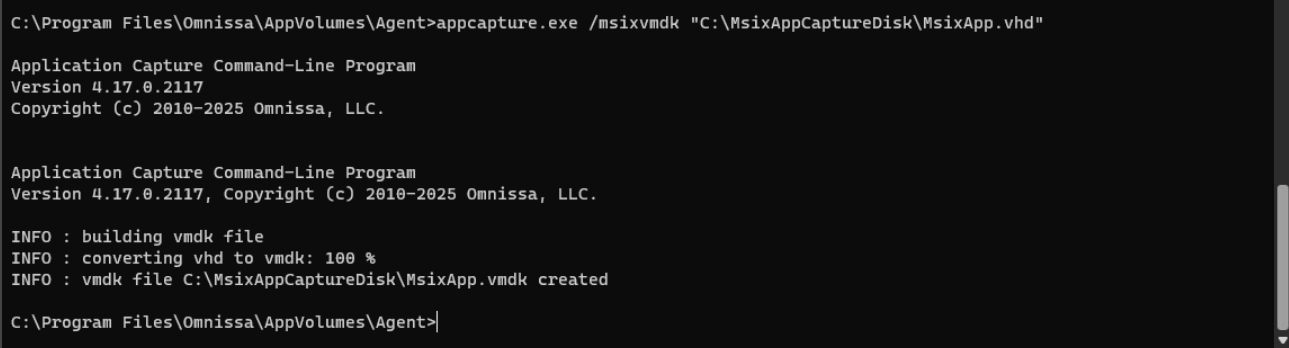
appcapture.execommand executes to generate the VMDK file from the VHD file.
- The first
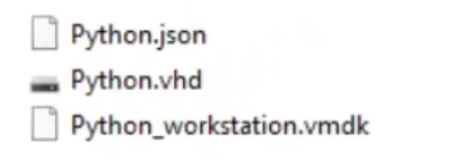
- The next step is to rename the MSIXAPP.* files to Python_workstation.vhd, Python_workstation.vmdk and Python.json.
- Finally, copy the Python.json and Python_workstation.vmdk files to the App Volumes Manager server at the following location
<Installation_Directory>\CloudVolumes\Manager\ppv\packages.
Syntax:
“C:\Program Files\Omnissa\AppVolumes\Agent\appcapture.exe” /addmeta “<Path to VHD>” /msix <Path to install MSIX Package>
“C:\Program Files\Omnissa\AppVolumes\Agent\appcapture.exe” /msixvmdk “<Path to VHD>”
Command used in the demo:
“C:\Program Files\Omnissa\AppVolumes\Agent\appcapture.exe” /addmeta “C:\MSIXAPPCAPTUREDISK\MSIXAPP.vhd” /msix apps\PythonSoftwareFoundation.Python.3.12_3.12.1008.0_x64_qbz5n2kfra8p0
“C:\Program Files\Omnissa\AppVolumes\Agent\appcapture.exe” /msixvmdk “C:\MSIXAPPCAPTUREDISK\MSIXAPP.vhd”
App Volumes tools (appcapture.exe command) run to generate the VMDK/VHD and JSON files:
Upload the appcapture.exe Output Files - VHD and JSON - to App Volumes Storage
The upload of the VHD and JSON files to the App Volumes SMB storage into the ‘packages’ folder is the same when uploading the VMDK and JSON files to the App Volumes datastore into the ‘packages’ folder.
Method 1: Direct upload of VHD and JSON files to storage
A folder structure is automatically created by App Volumes Manager when configuring the target storage for the first time. Administrators having direct access to this App Volumes storage can place the packaging output of VHD and JSON files directly into the file share, into the ‘packages’ folder.
Then the administrator can initiate an import operation of the application from App Volumes Manager console using the ‘Import’ application functionality.
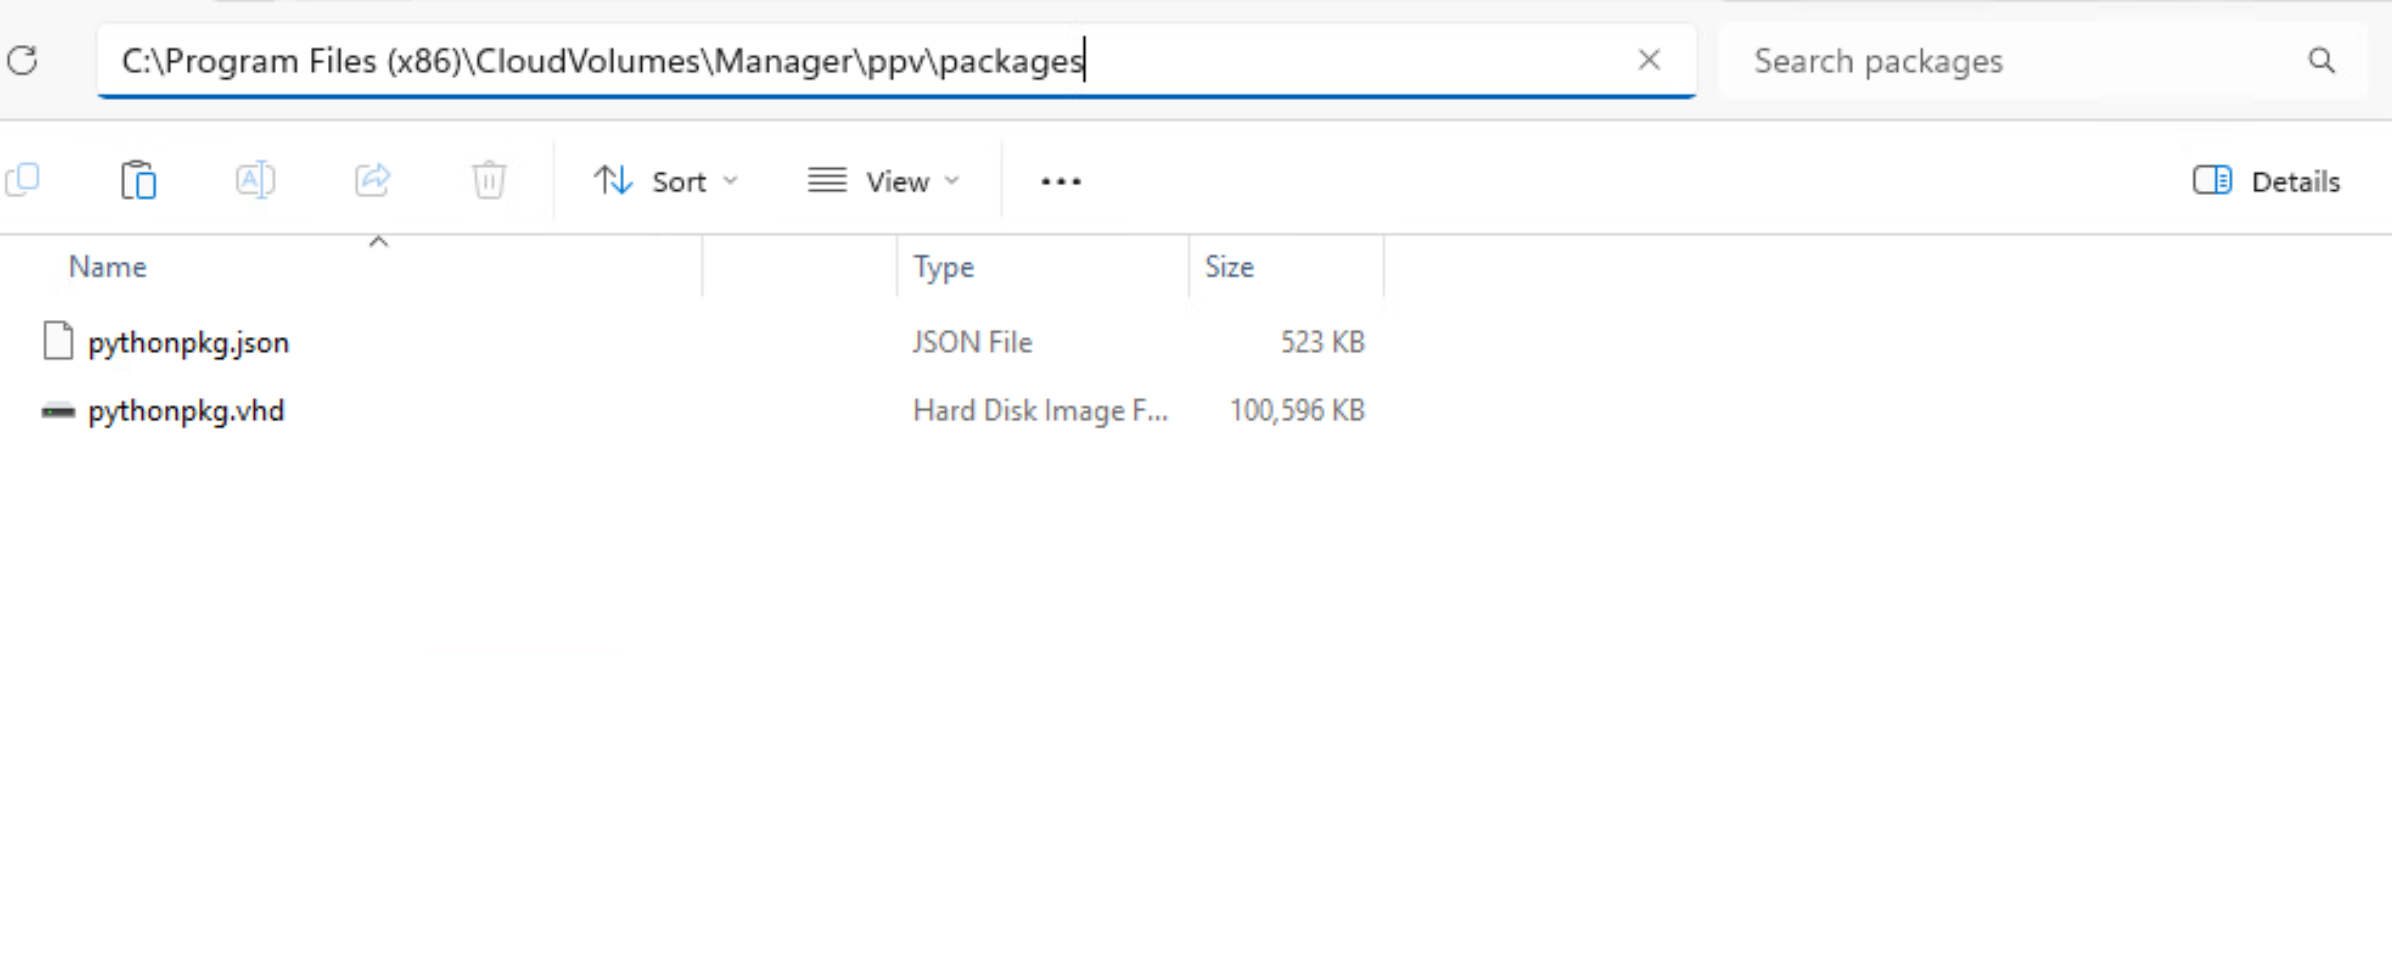
- Place the VHD and JSON files in the <App Volumes Storage>\packages folder.
- Login to the App Volumes Manager console.
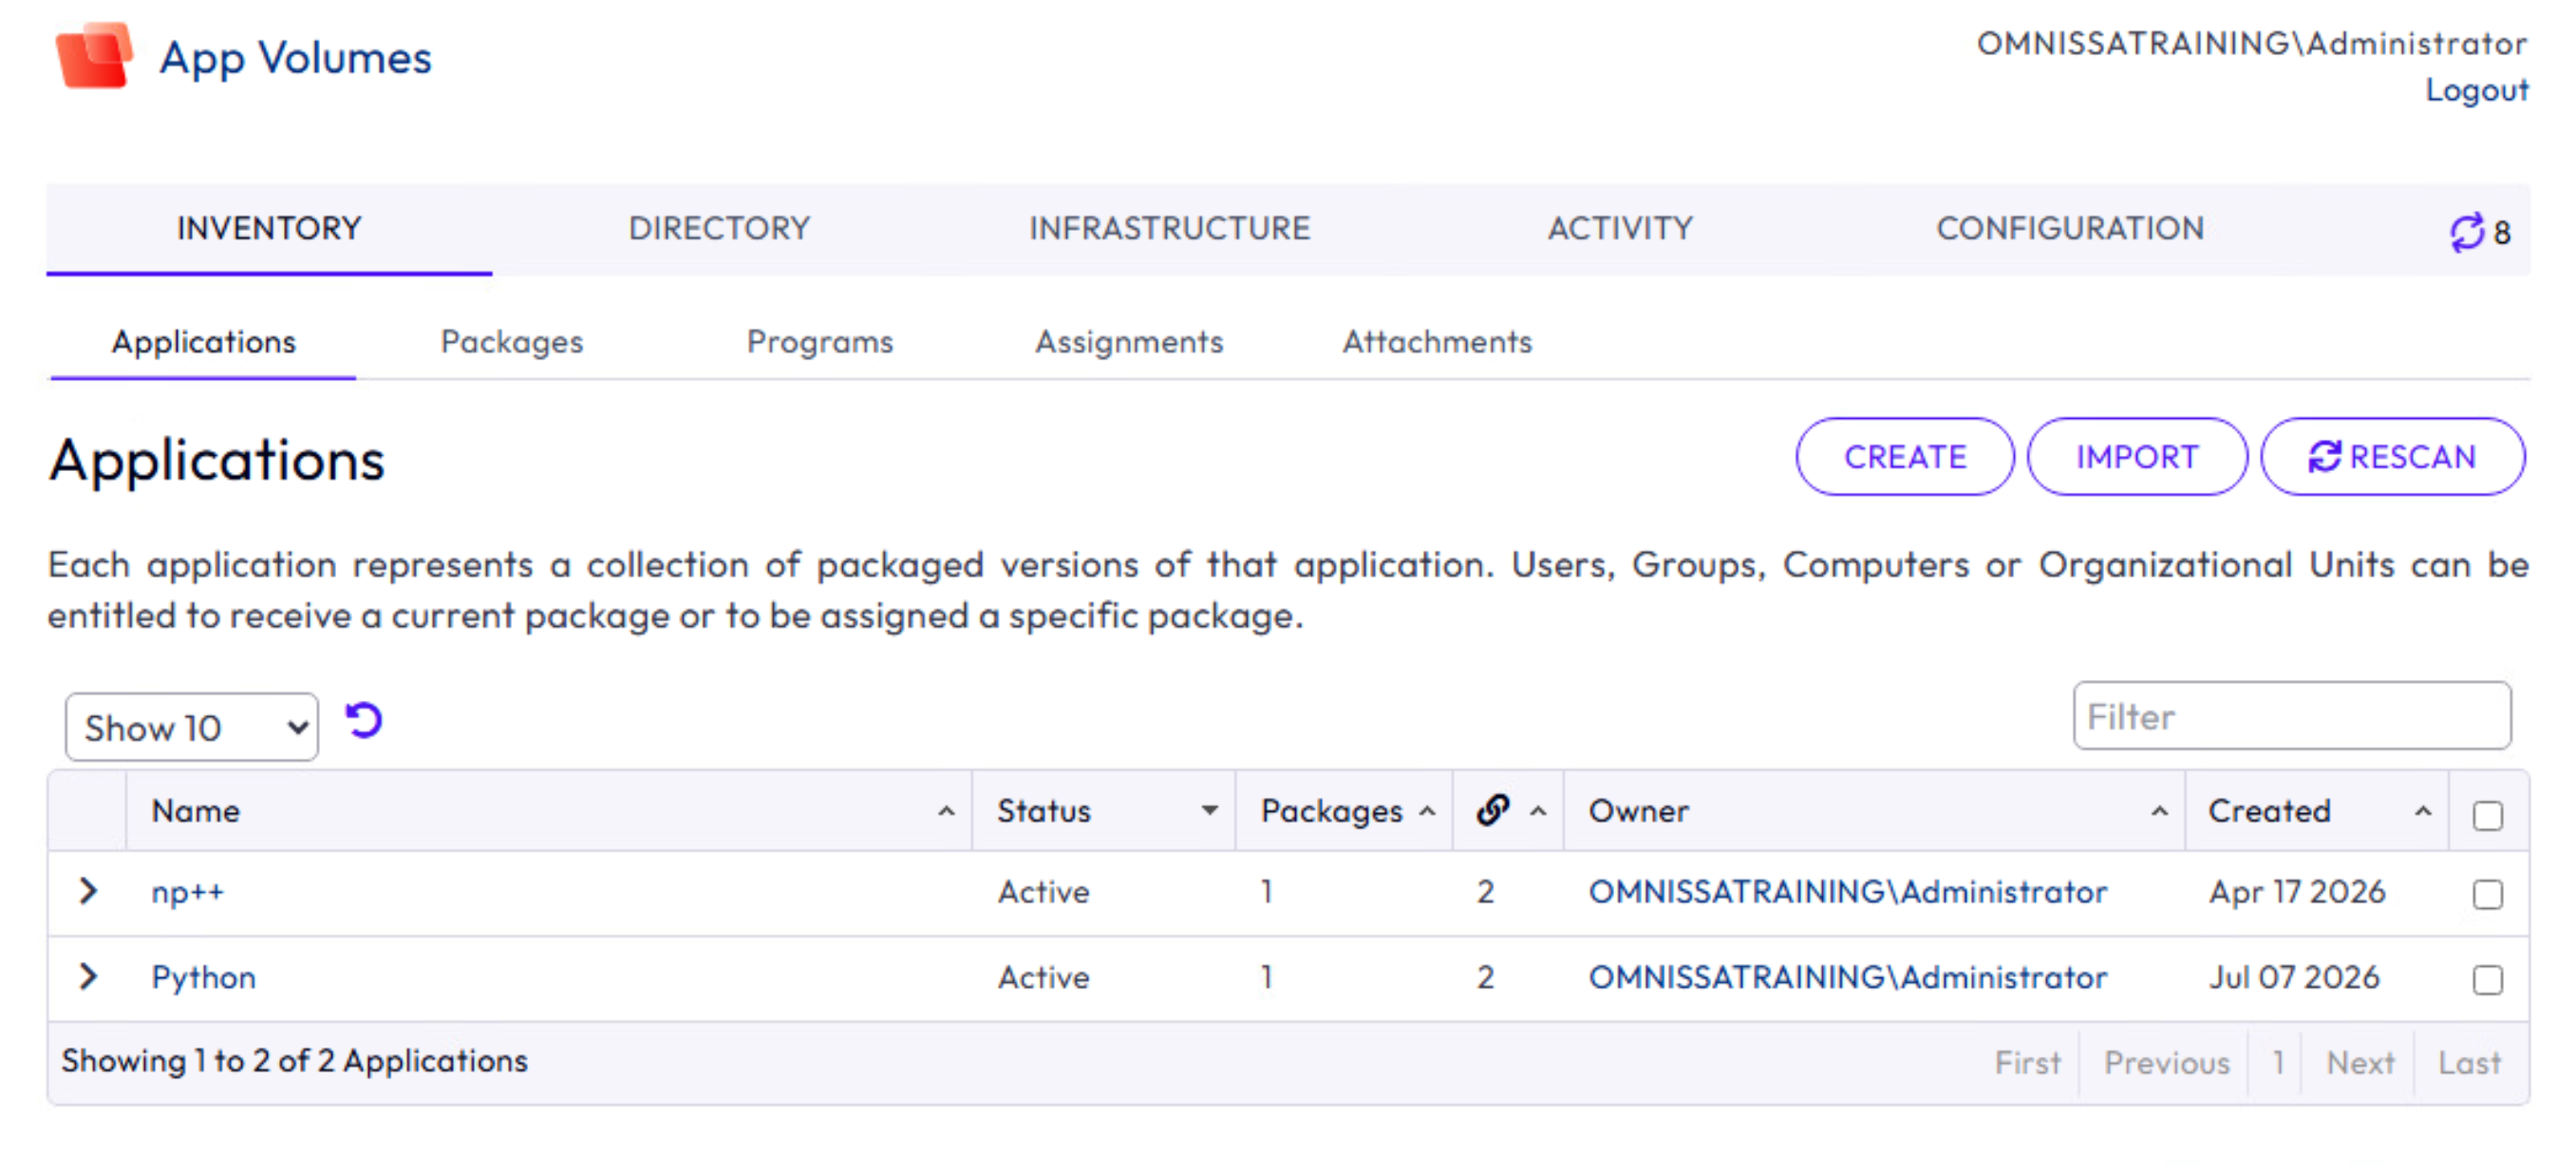
- To trigger the import operation, navigate to INVENTORY > Applications and click Import.
The application is imported into App Volumes Manager and listed in the Inventory. If it is not listed, refresh the list or the page.
Method 2: Import the VHD and JSON package using the App Volumes Manager
The VHD and JSON files can also be placed in the App Volumes Manager server at the following location <Installation_Directory>\CloudVolumes\Manager\ppv\packages and uploaded to the App Volumes storage using the App Volumes admin console.
- Login to the App Volumes Manager console.
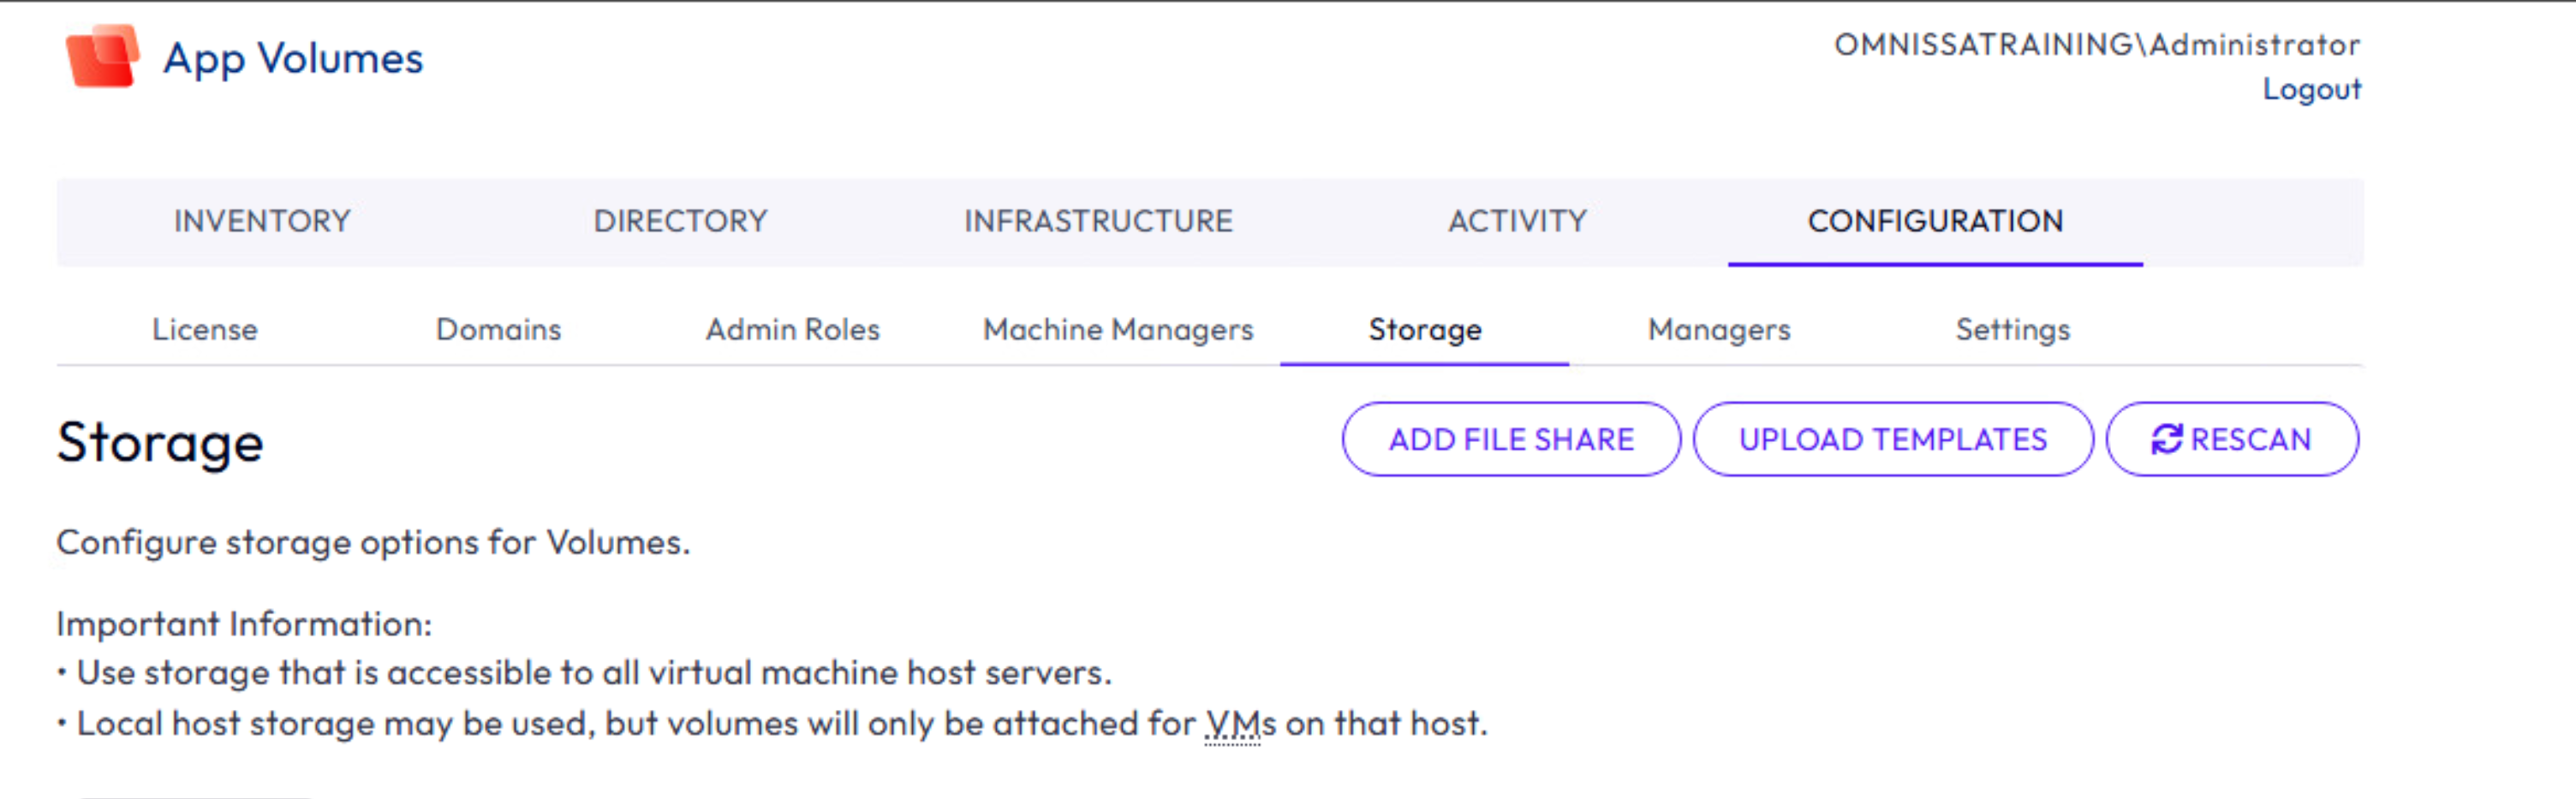
- Navigate to CONFIGURATION > Storage and click Upload Templates.
- Since it is copied to the correct location, we see it listed below.
- This application package is not in the App Volumes environment and is listed as
Nounder the Exists tab.
- This application package is not in the App Volumes environment and is listed as

- Click Upload to initiate uploading this new application package into App Volumes.
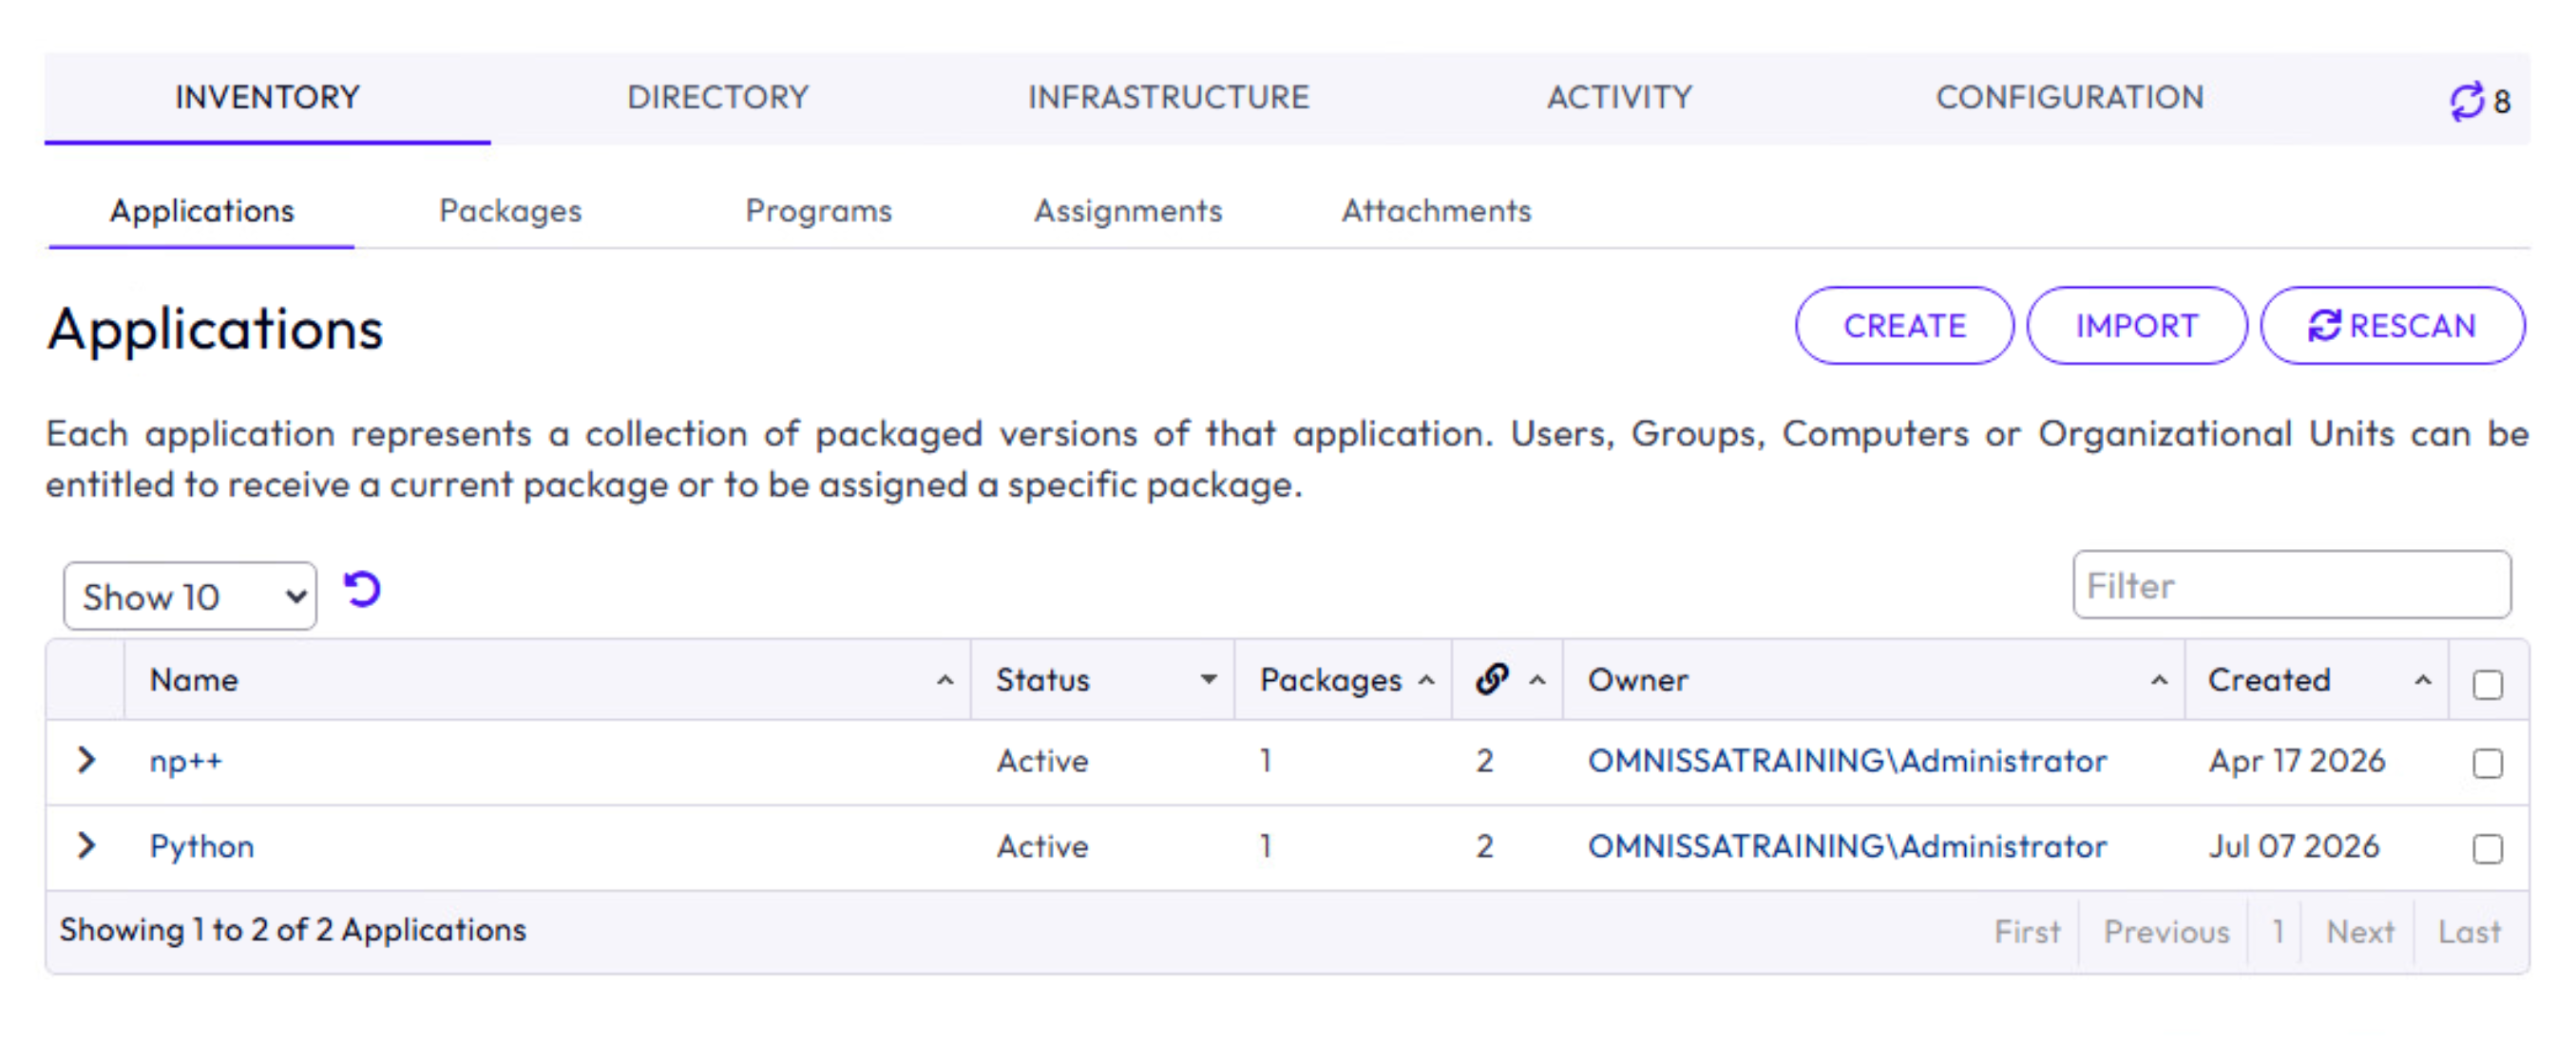
- To validate the upload process, navigate to the INVENTORY > Applications tab.
- If you do not see your application listed, click Import to import the Application Package into the inventory. Then click the Application tab again to refresh the page.
Perform Administrative Tasks in the App Volumes Manager Admin UI
The App Volumes administrator can update the application owner, set the uploaded application with the CURRENT marker, and carry out application assignment tasks.
- Expand the Application (in this example, Python) and click Edit.
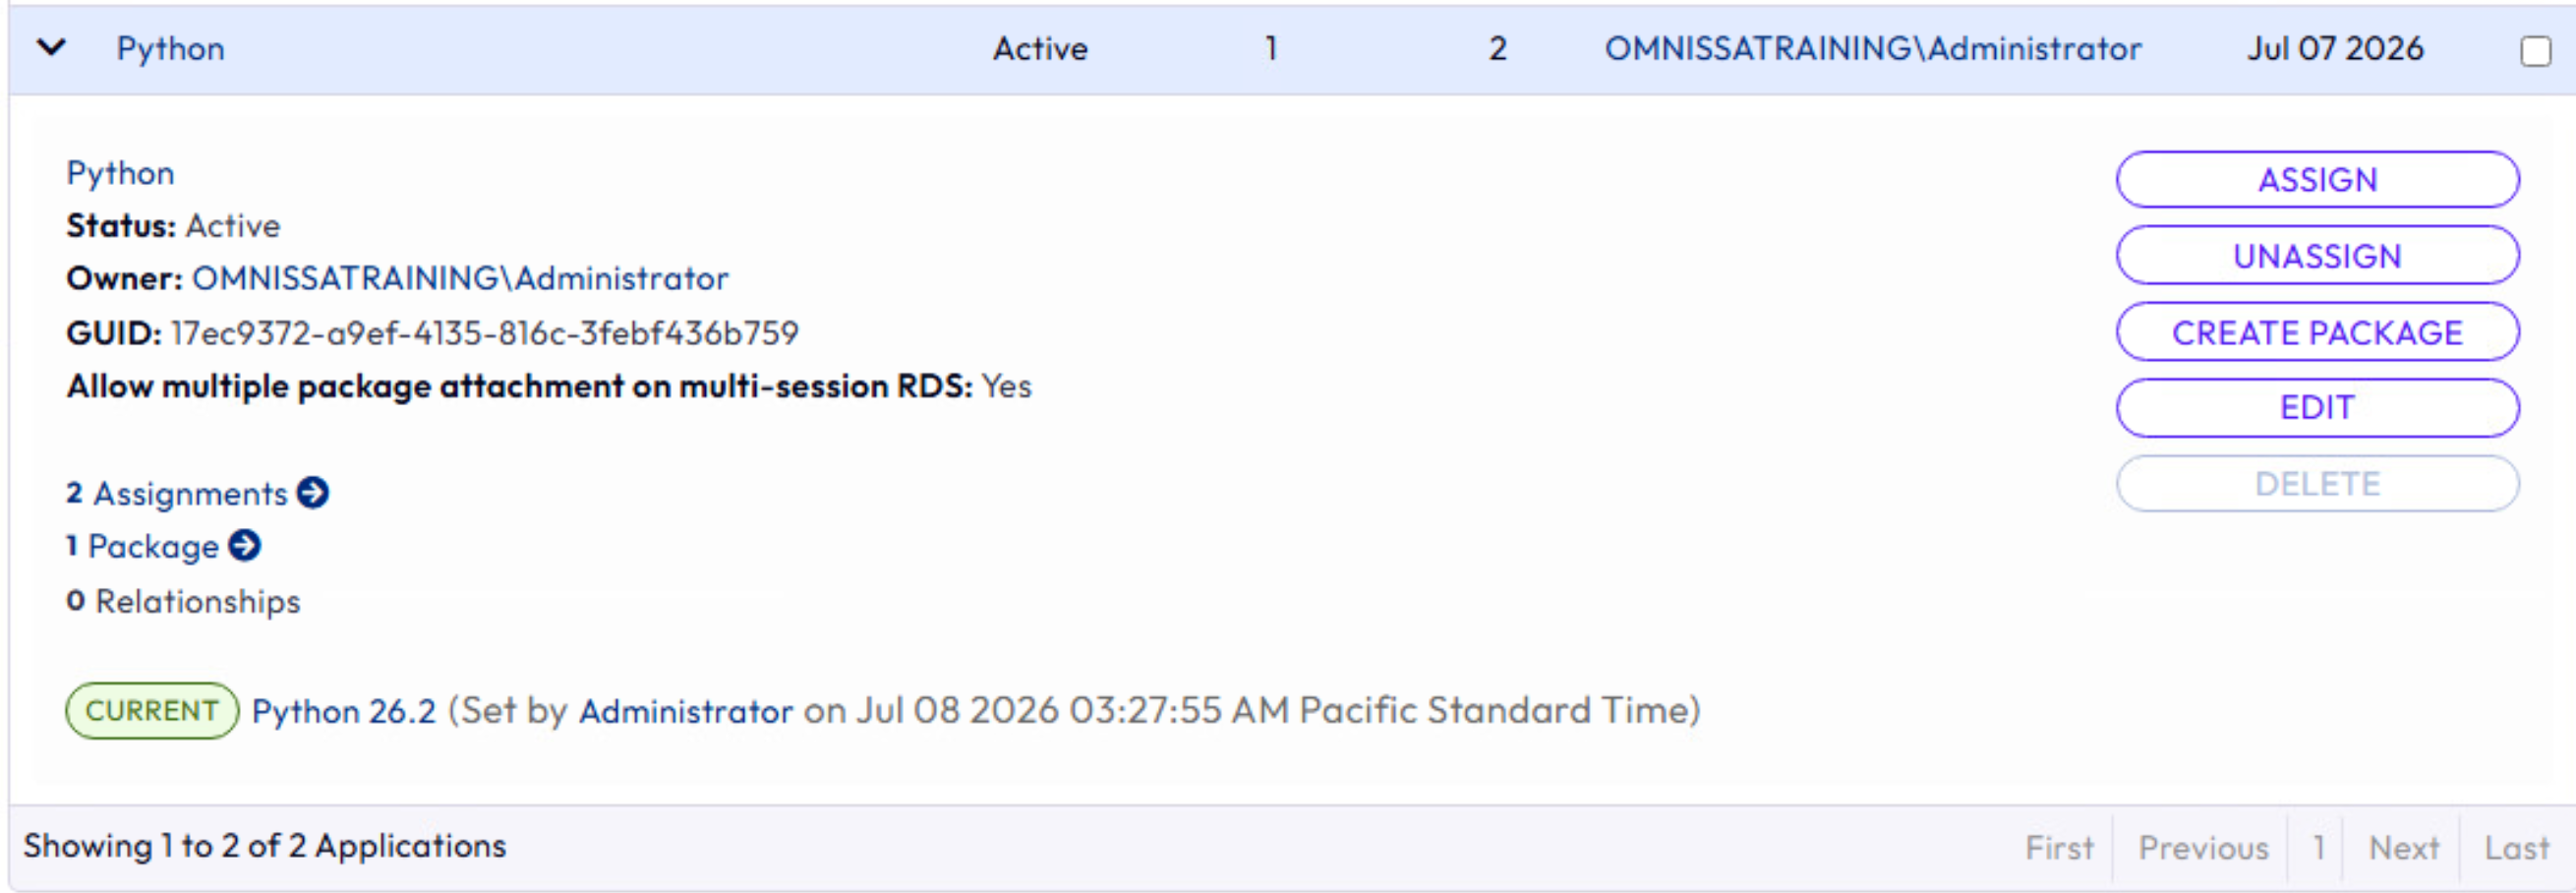
- This will take you to the Edit Application section, where you, as the App Volumes Administrator or Packager, can tag the Application with an application Owner.
- When the application package, created using App Volumes Tools, is uploaded into the App Volumes console, the Owner field is populated with the hostname\administrator’s account that created the package from the source computer, be it physical or a virtual machine. In a production environment, to maintain consistency and tracking, it is advisable to tag the Owner.
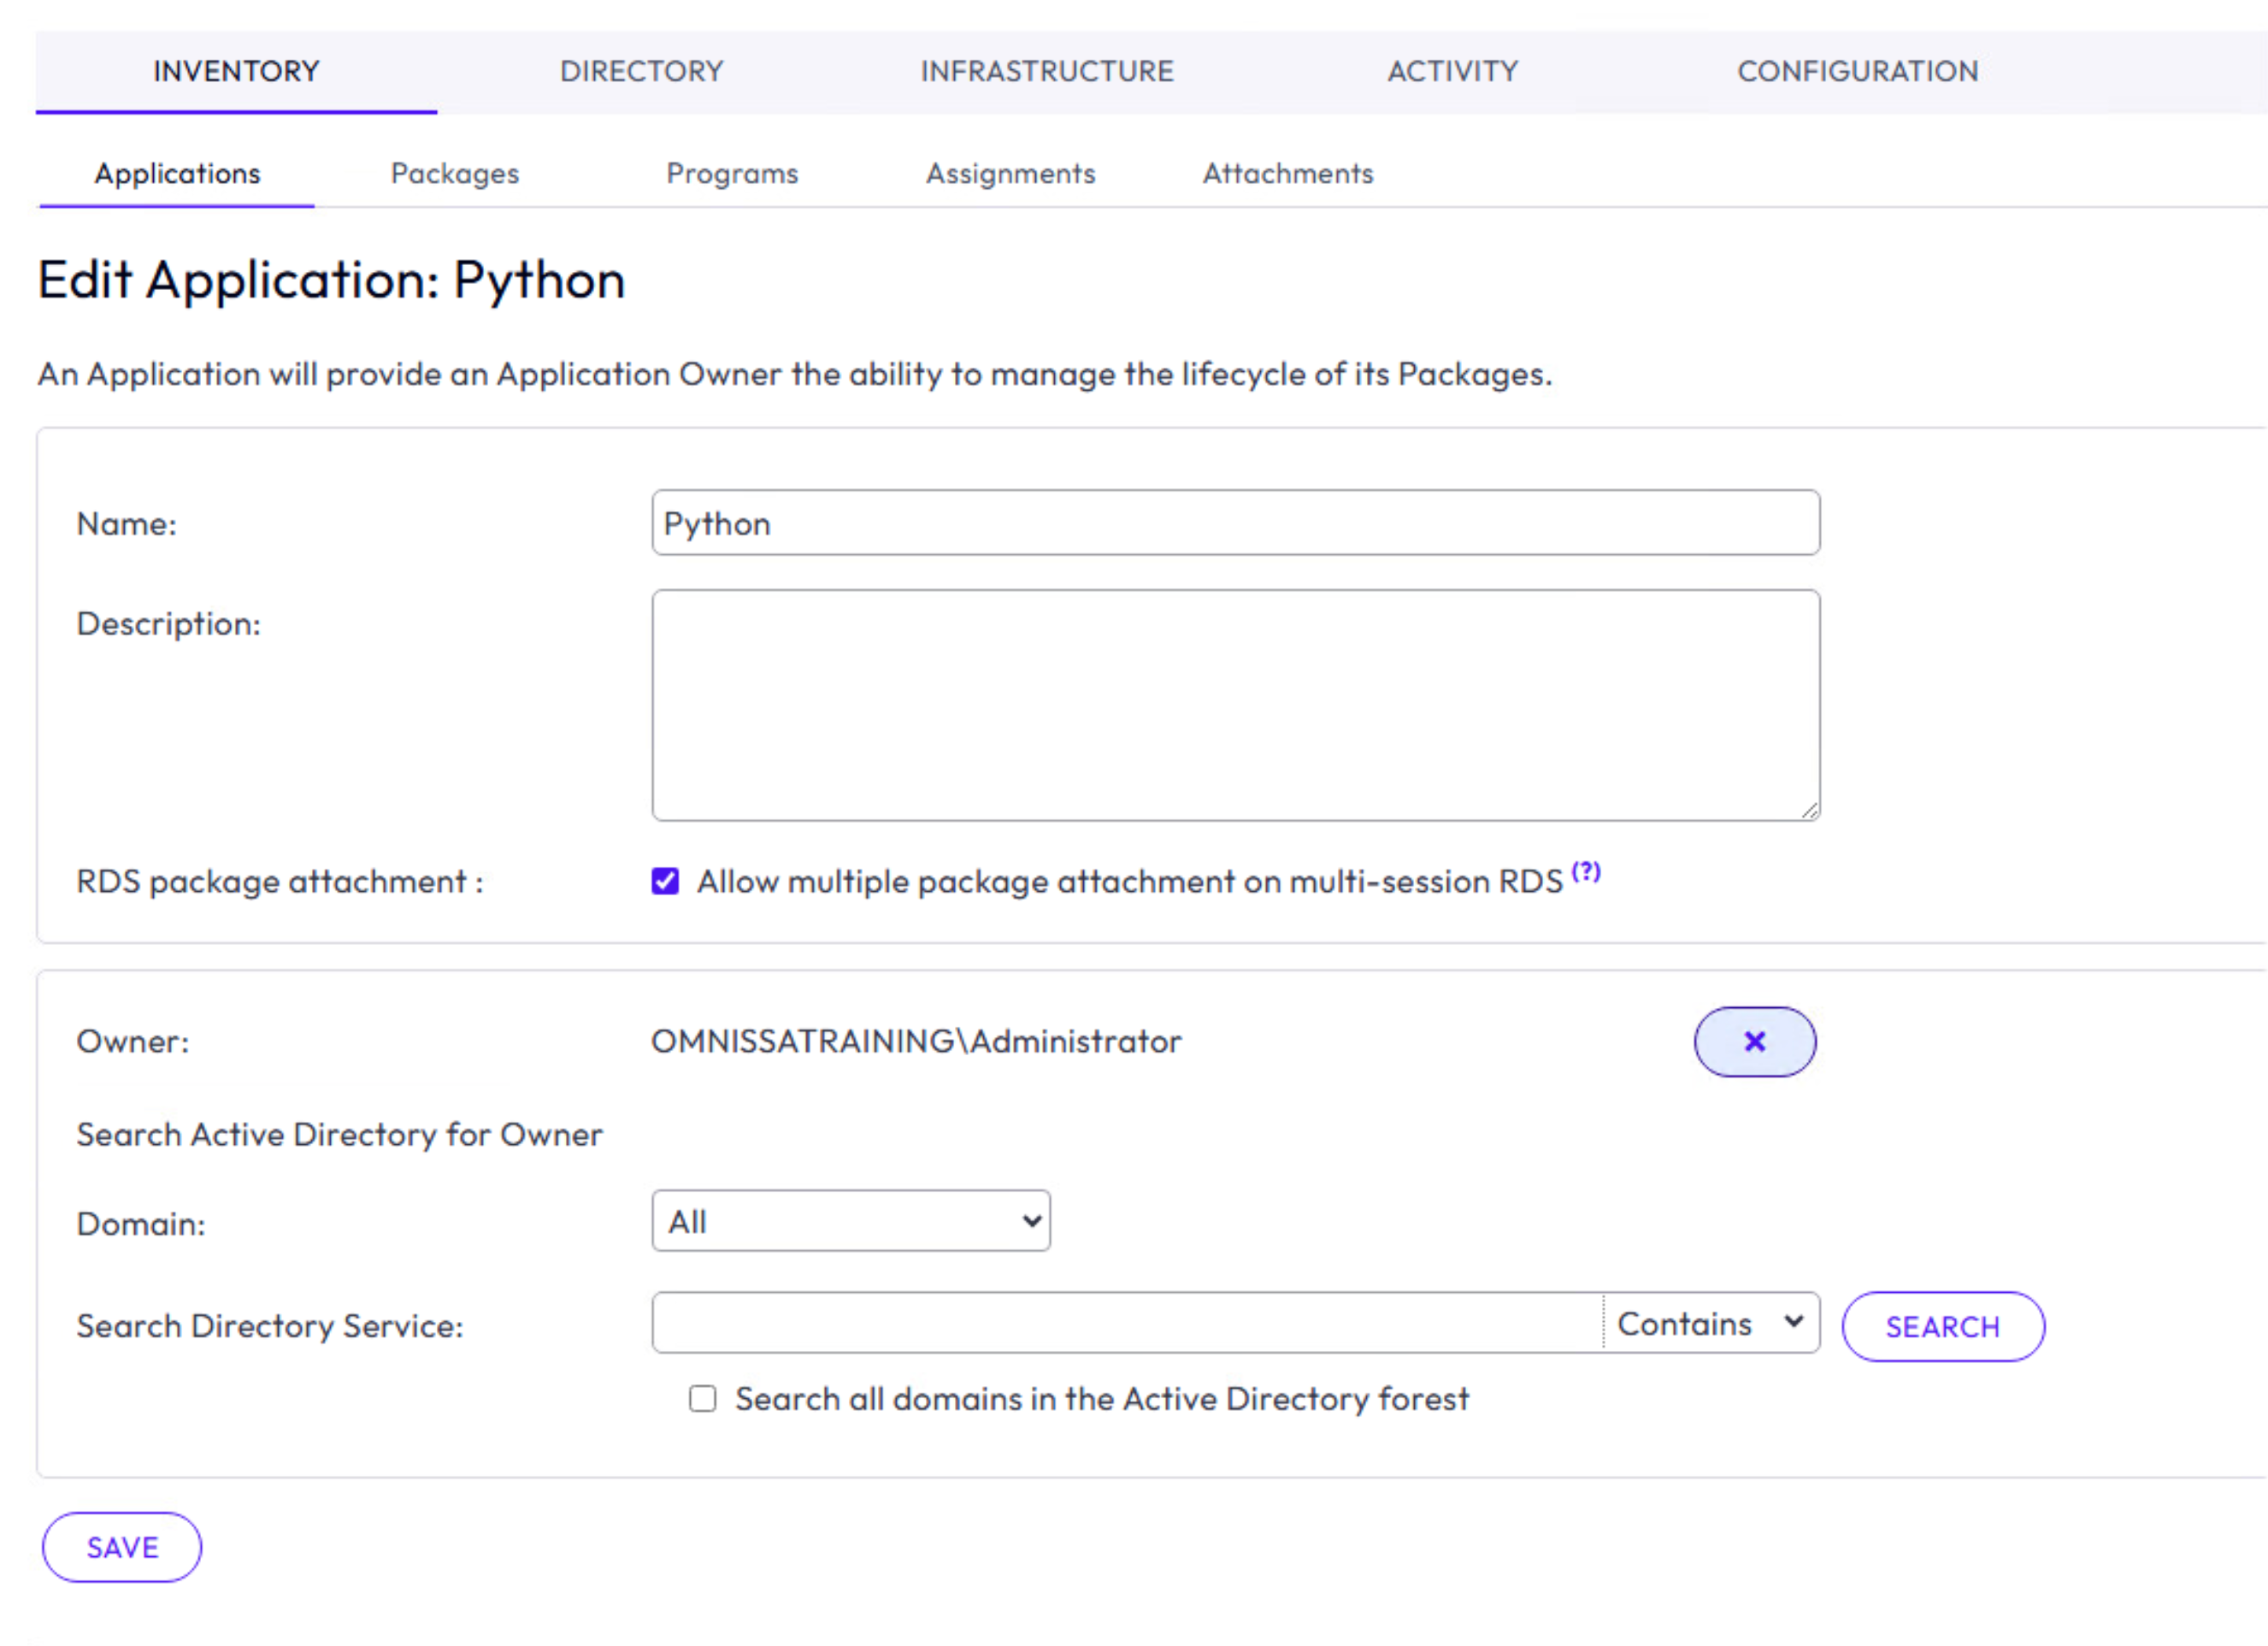
- To set the new Owner of the imported application package, query and select an Active Directory account.
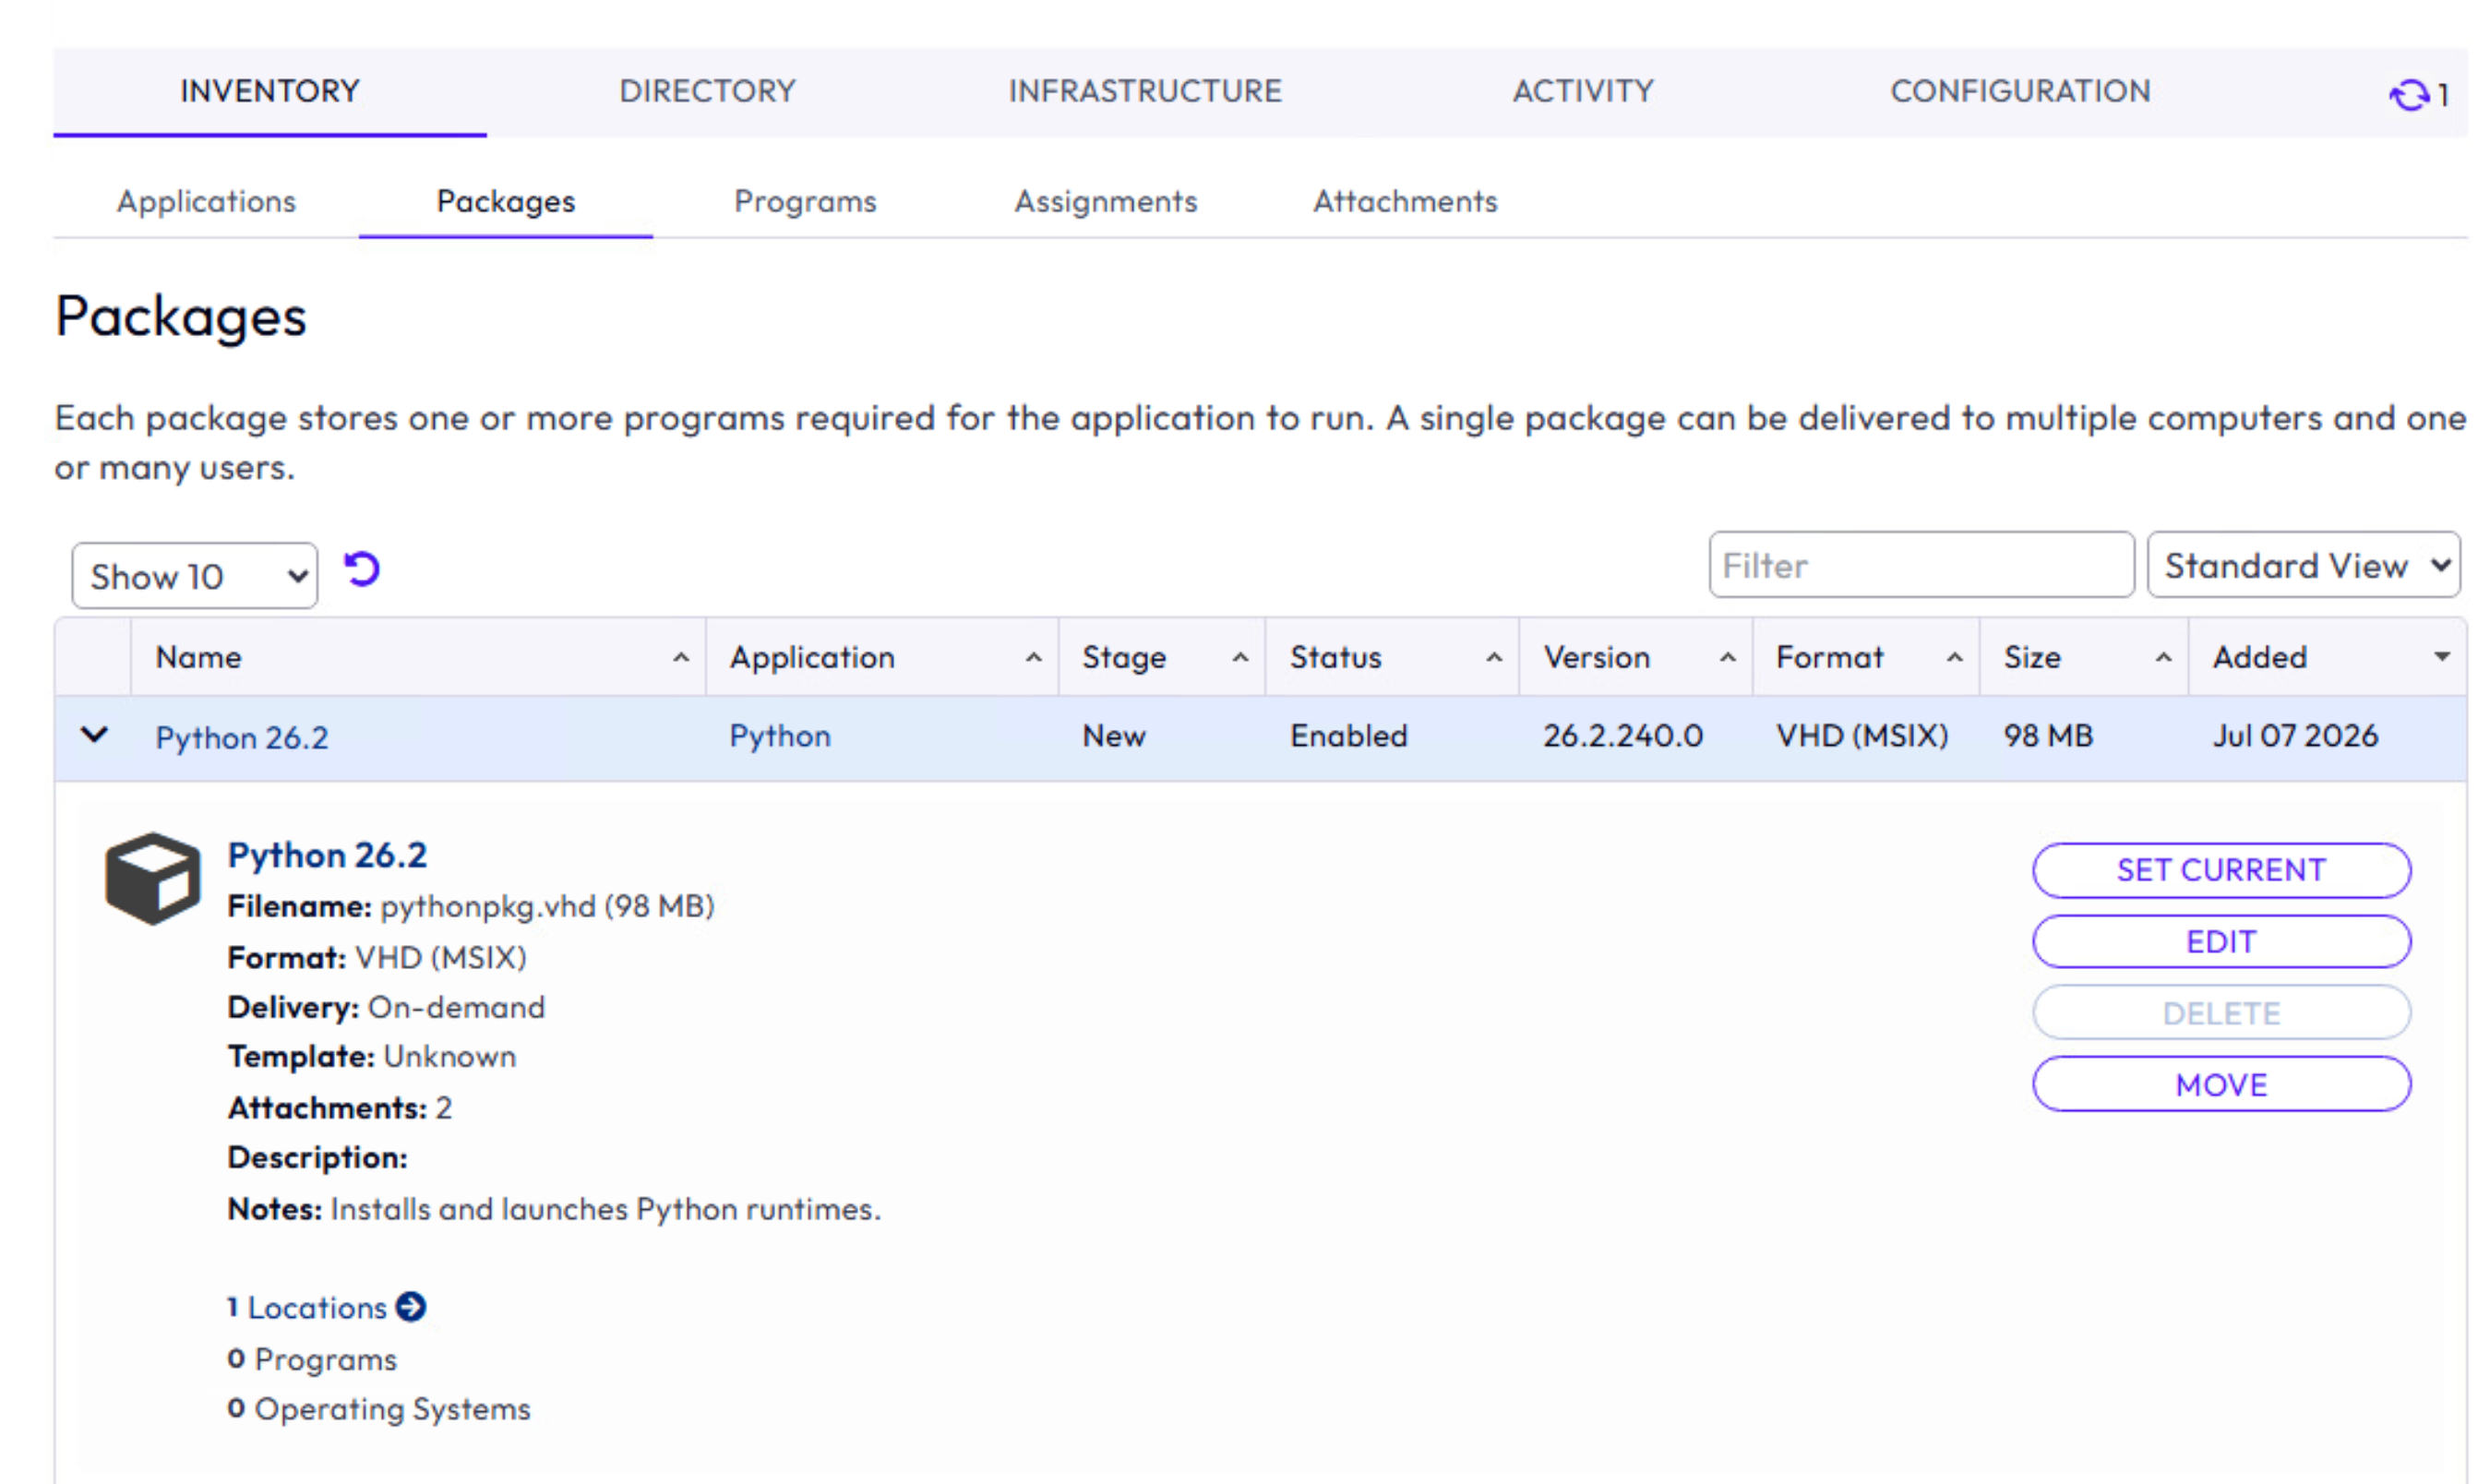
- If an application has several packages and the latest package version must be assigned and delivered to an entity, use the Marker assignment type and mark the package as CURRENT when assigning the application to the entity. As a result, the entity always receives the latest version of the application.
- Navigate to the INVENTORY > Packages, expand the package, and click Set CURRENT.

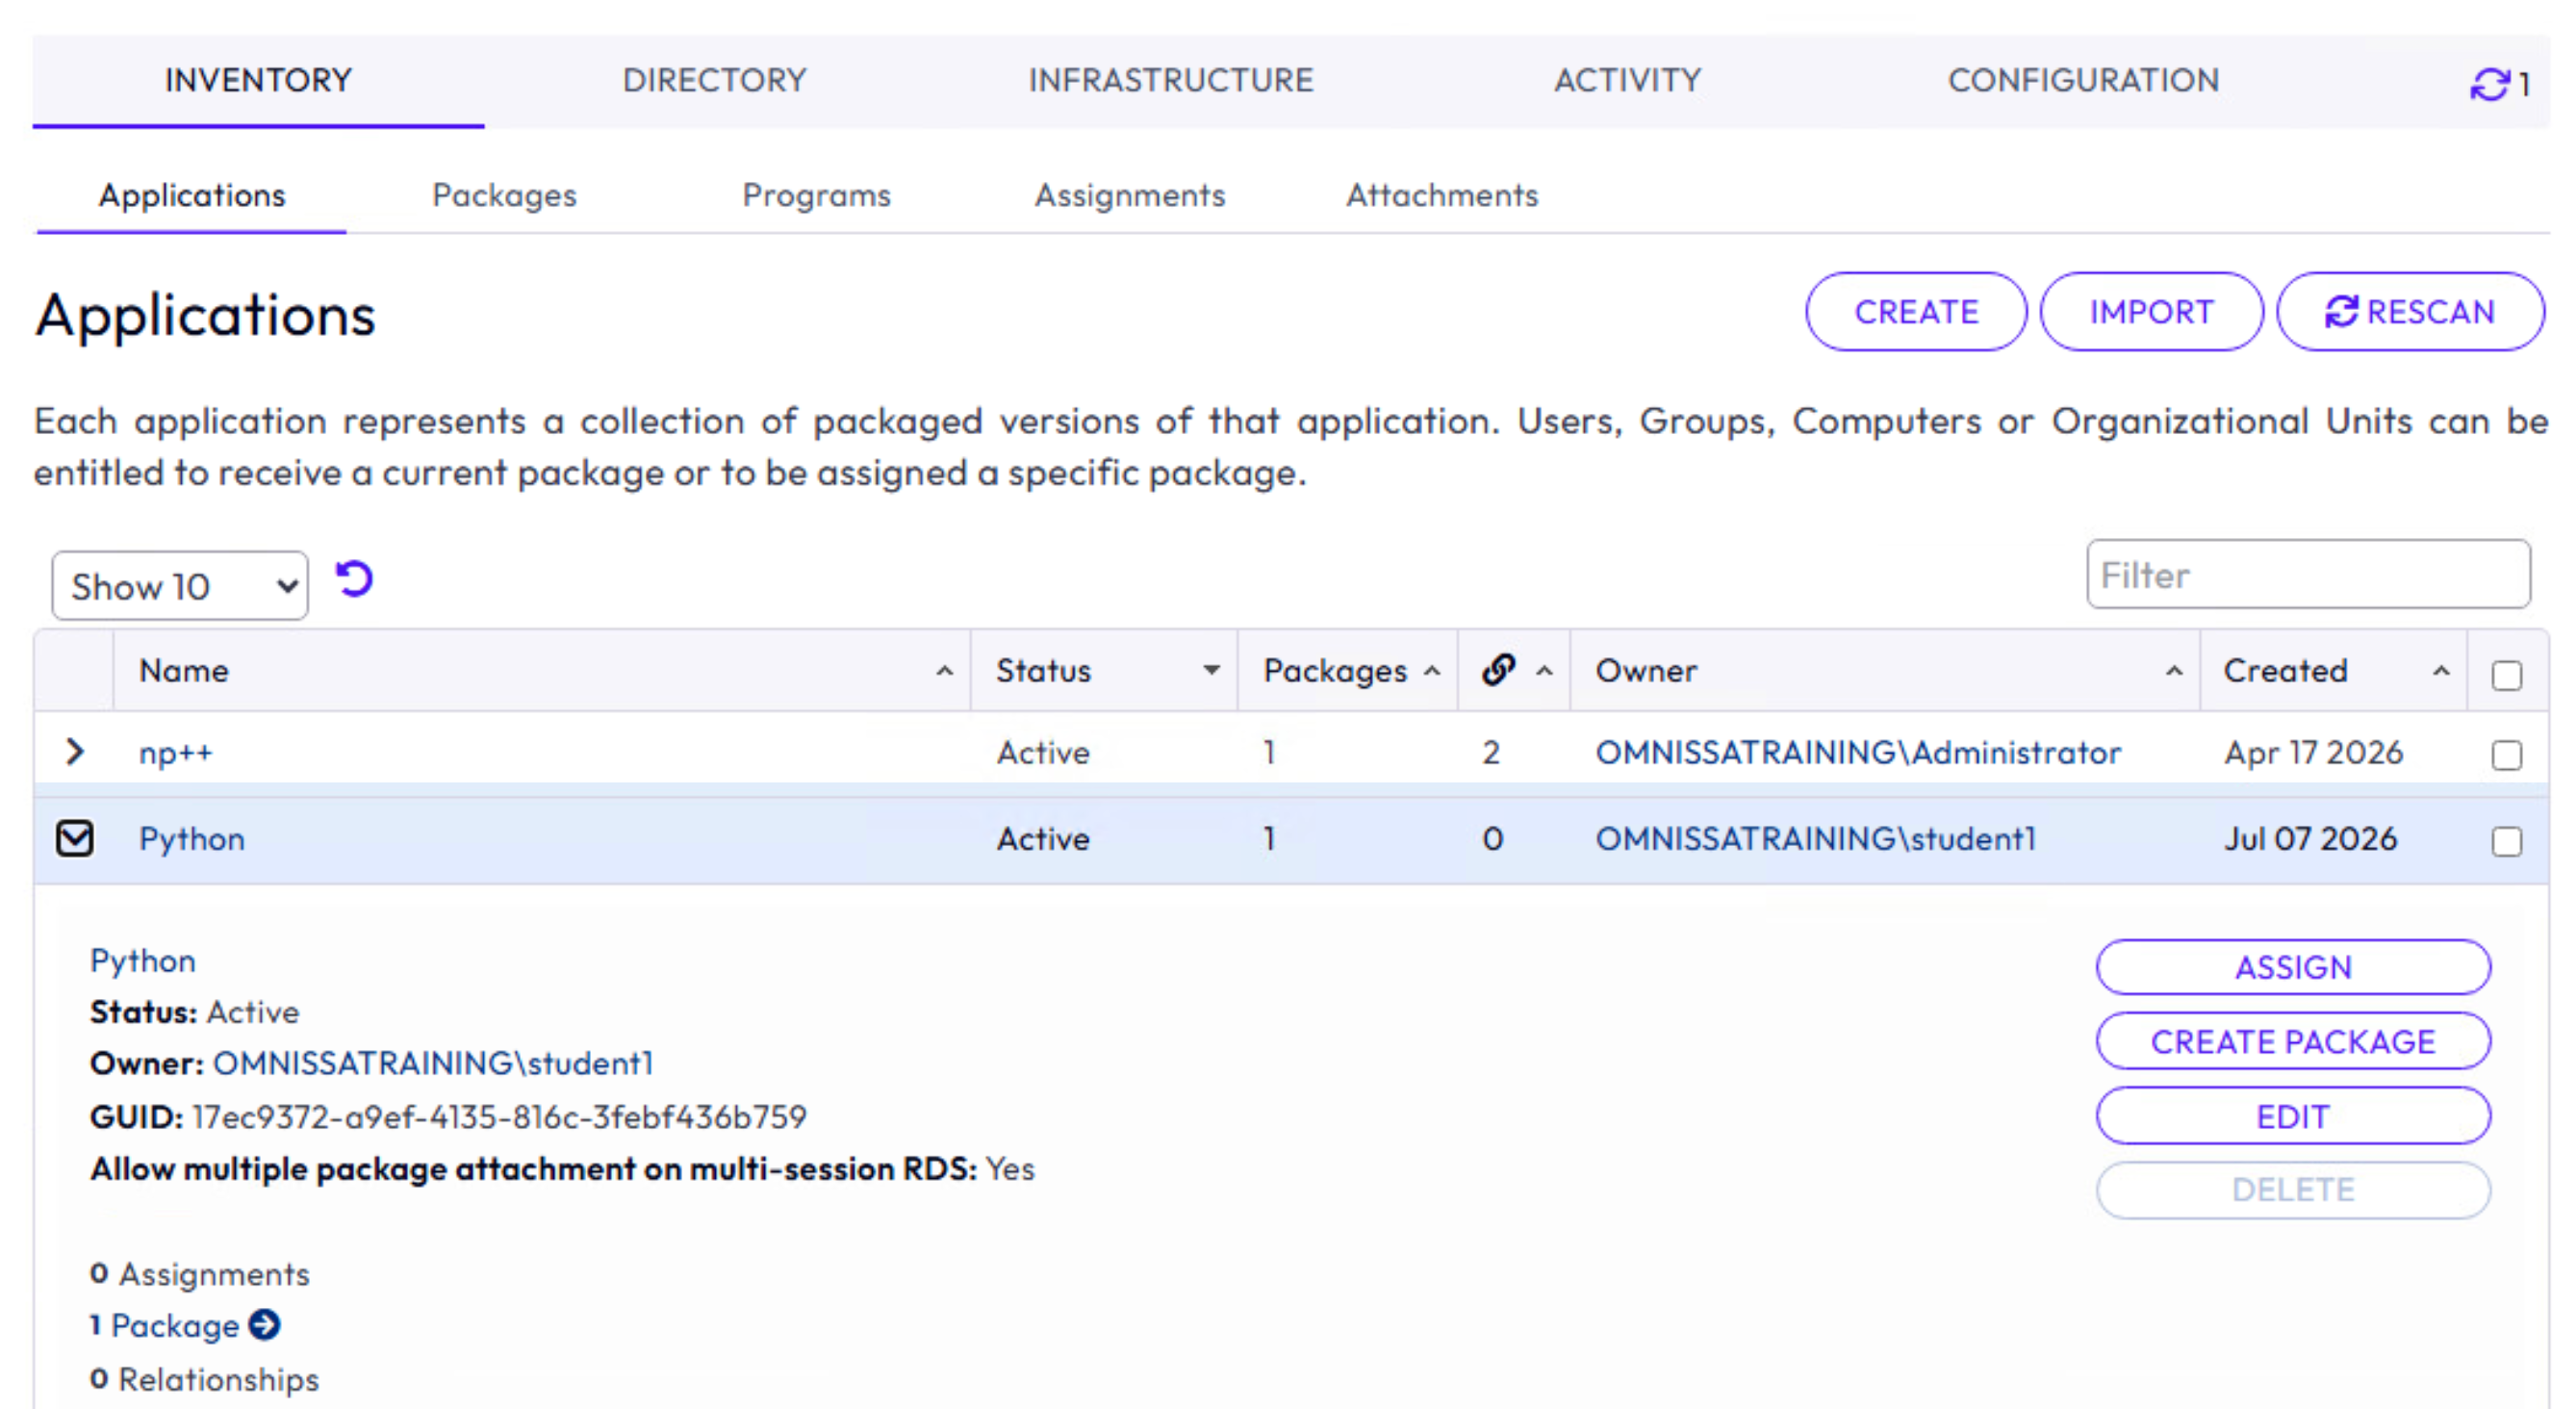
- Finally, to deliver an App Volumes application package to an end user, you must assign an application to an entity that belongs to your organization's Active Directory. An entity can be a user, computer, Group, or Organizational Unit OU.
- Navigate to INVENTORY > Applications, expand the application, and click Assign.
- This brings up the Assign Application screen where you, the App Volumes Administrator, can assign this application.
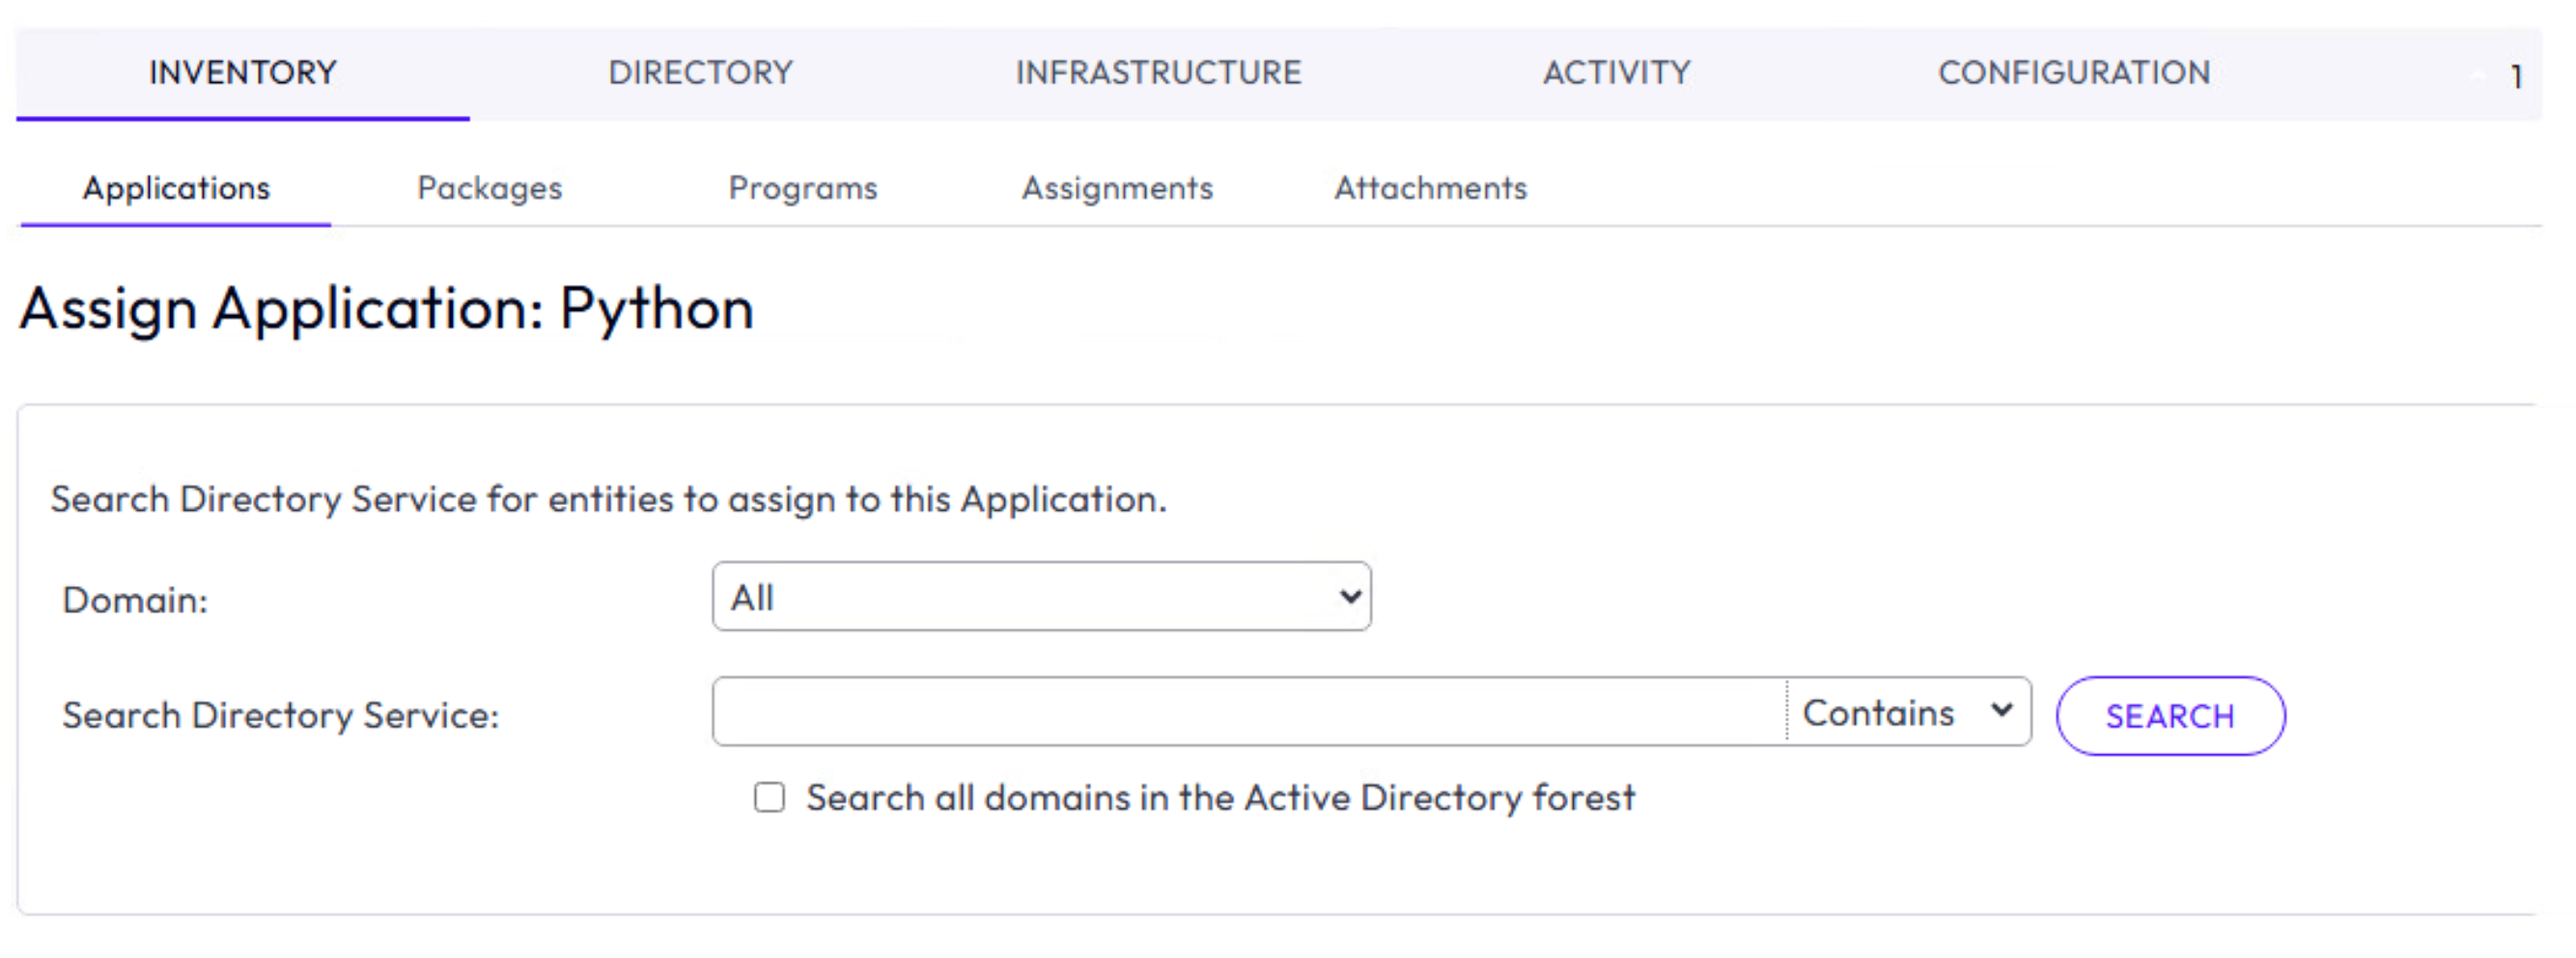
- Query the Active Directory and identify the entity that shows a status of
Available. - Next, assign the package that is set to CURRENT or select the Package to manually select the version of the package (provided you have multiple versions of packages uploaded).
- And finally, click Assign.
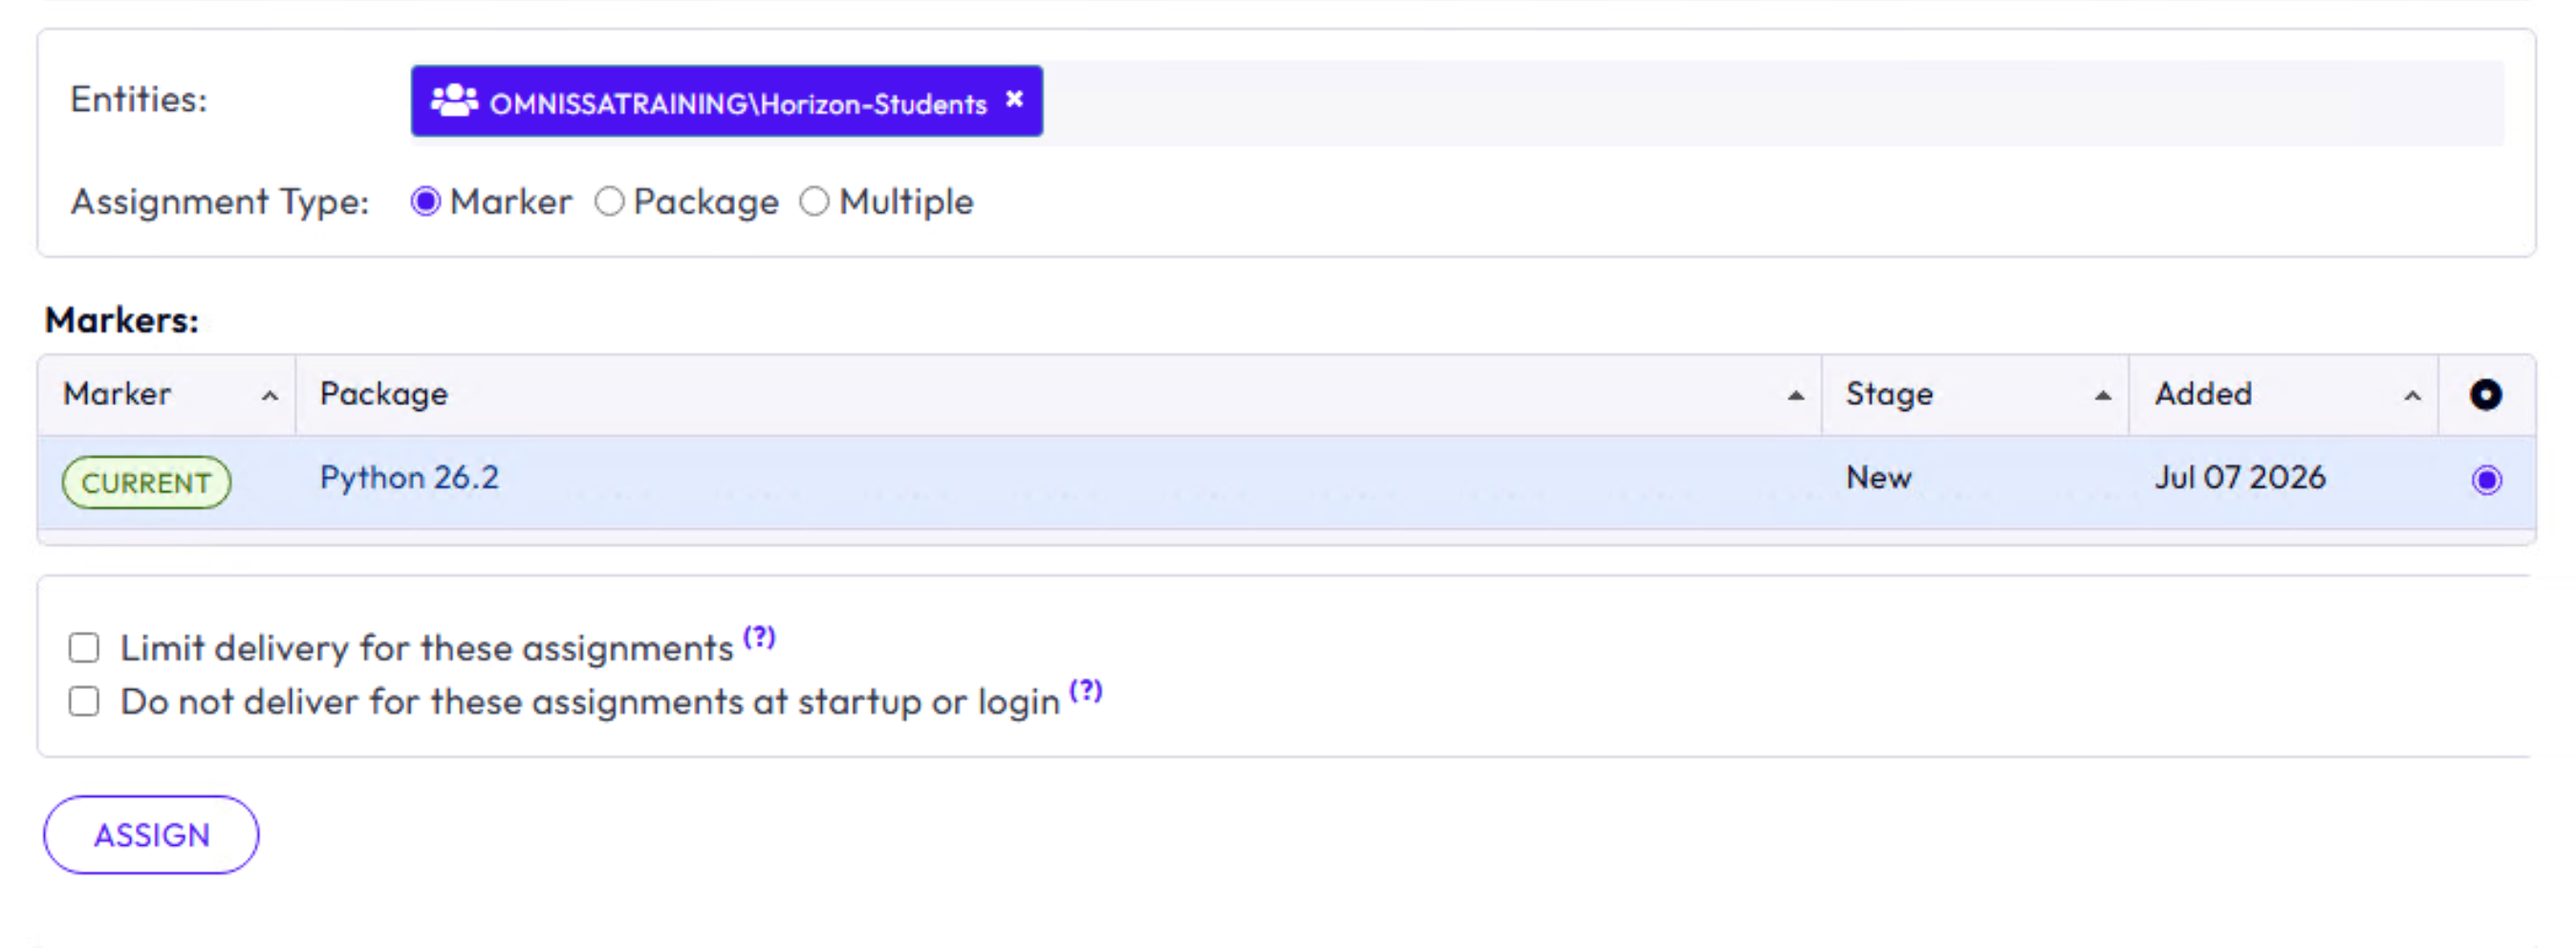
This will take you back to the INVENTORY > Applications tab, where you can expand the application to validate the application assignment.
Validate
To validate that the assignment and test the launch of the application is successful, have the entitled user log in to the target virtual desktop.
- Have the user log in using the Horizon Client or HTML browser and launch their virtual desktop session.
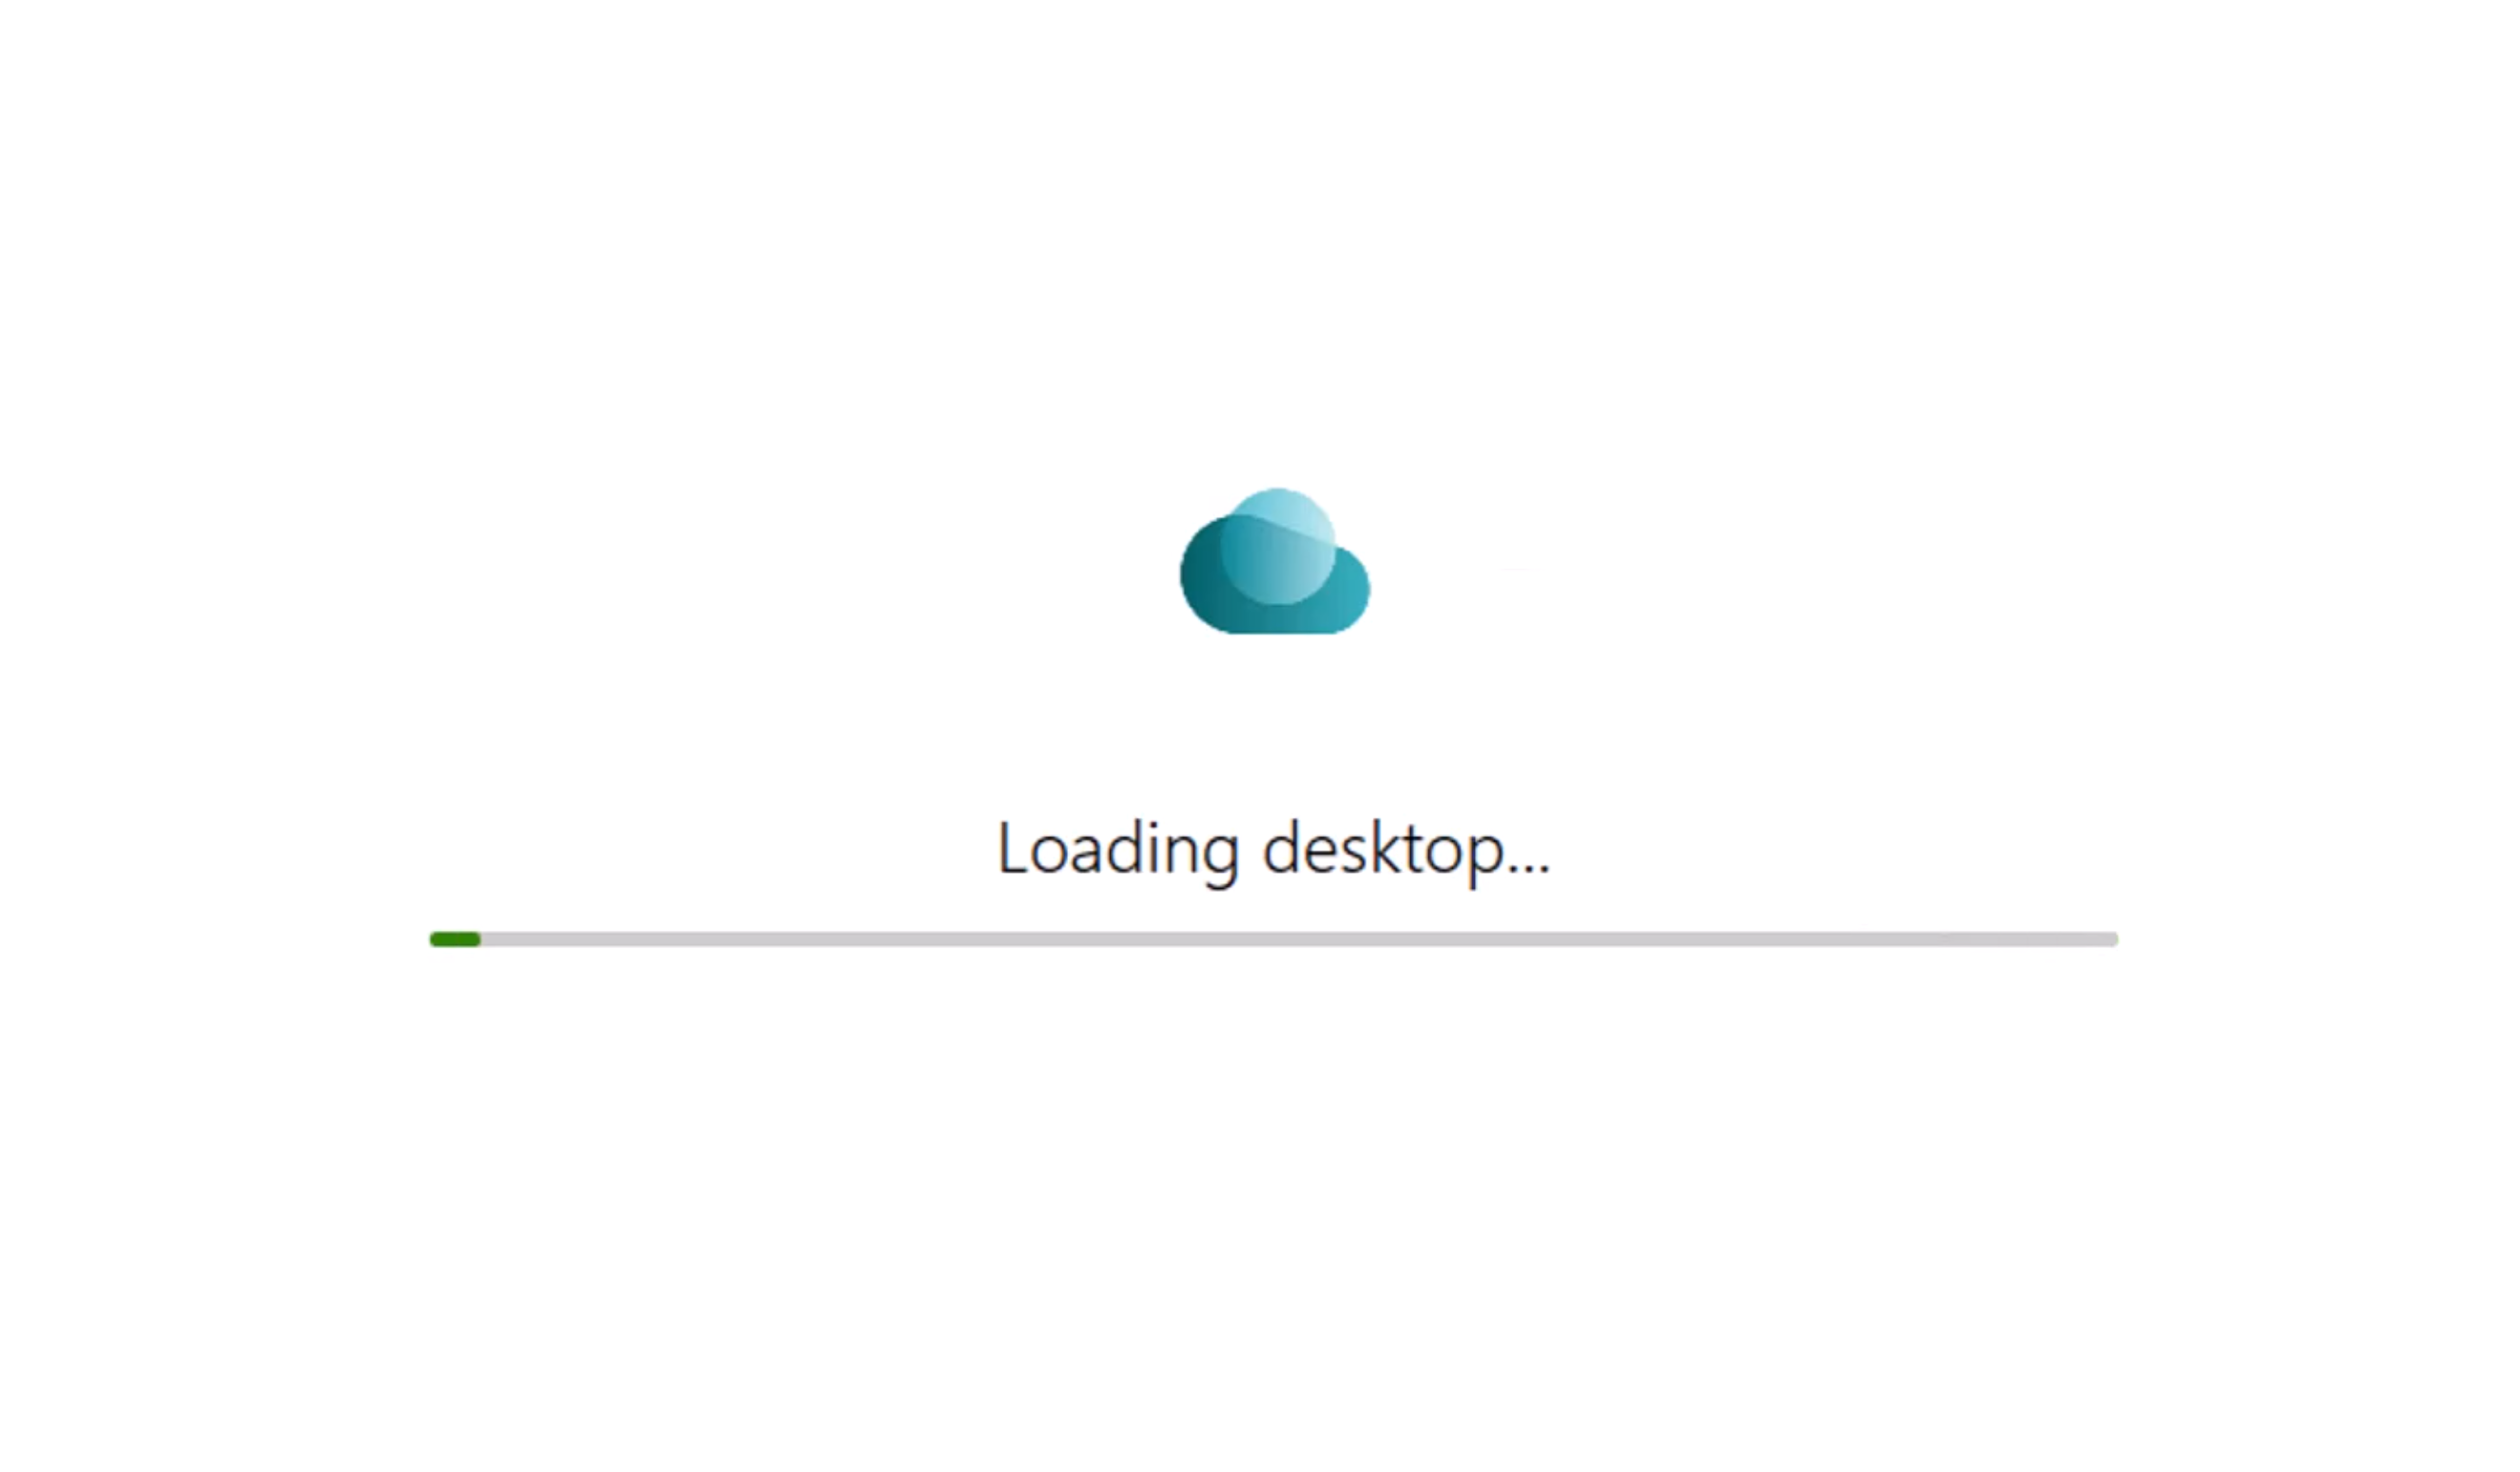
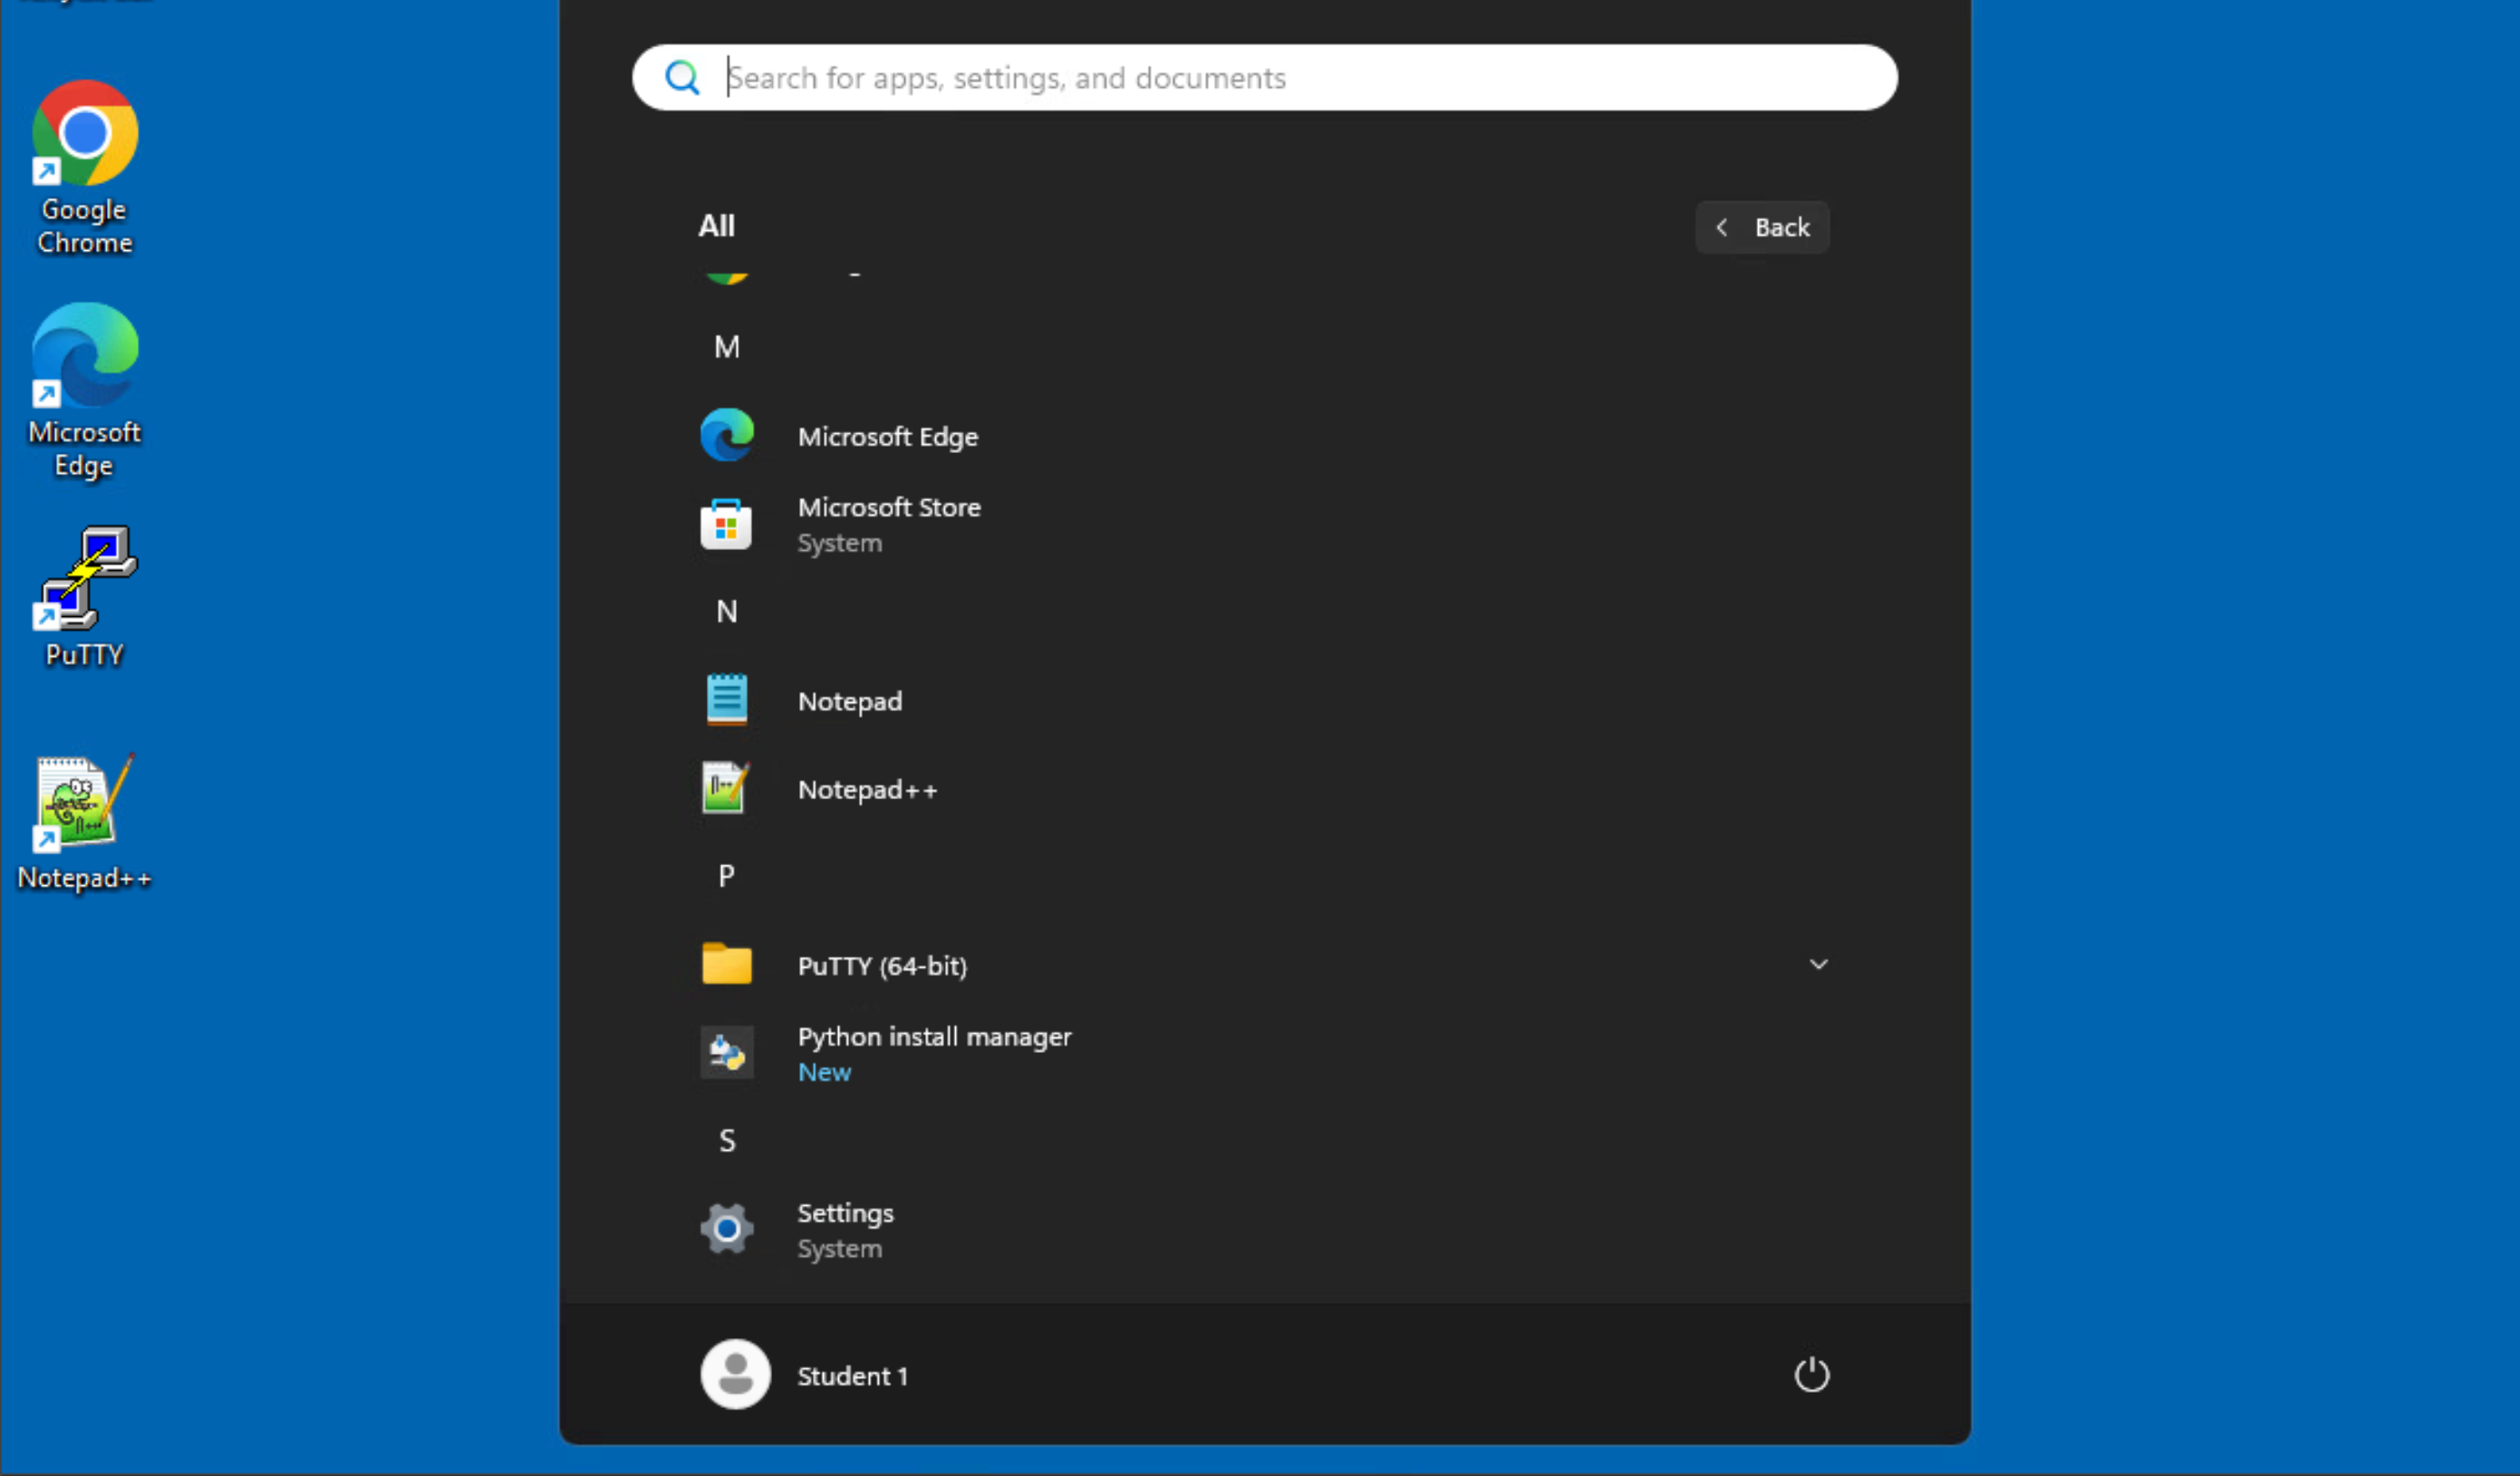
- When the desktop session launches, have the user click Start to view the list of applications.
- The screenshot below shows the assignment of Python 26.2 (Python Installation Manager) made available to the user to consume within this virtual desktop session.
- The screenshot below shows the assignment of Python 26.2 (Python Installation Manager) made available to the user to consume within this virtual desktop session.
- Launching the Python Installation Manager application results in the launch of the application within the virtual desktop session and this confirms that it is an MSIX-based application stored and launched from the
C:\Program Files\WindowsApps\<sub-folder>.
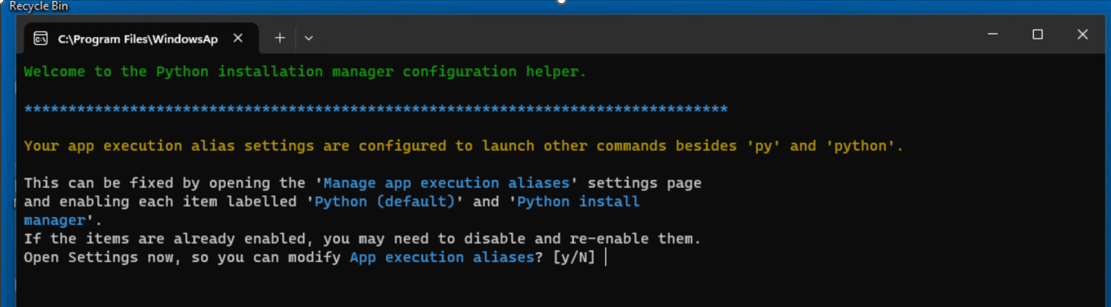
This confirms the successful delivery of the MSIX application package to a virtual desktop session.
Additional information:
Follow MSIX packaging and installation guidelines as well as the Best practices using the MSIX Packaging Tool to create your MSIX installer, which generates the initial VHD and then converts it to an App Volumes VHD and JSON.
Summary and Additional Resources
The administration of an App Volumes environment is inherently complex and constantly evolving. This Application Packaging series aims to be a steady companion, offering reliable guidance and support to help you effectively manage these daily operational tasks. By utilizing this resource, you will be better prepared to handle the challenges of your role, ensuring operational excellence and technical proficiency with Omnissa App Volumes.
We trust you will find this Application Packaging series invaluable in your day-to-day activities and encourage you to refer to it regularly. Your feedback is welcome and will be instrumental in continuously improving this resource.
Additional Resources
Explore the following additional resources:
- Reference Architecture – App Volumes
- App Volumes Product Page
- App Volumes Product Documentation
- App Volumes Knowledge Base Articles
- Horizon 8 Product Page
- Dynamic Environment Manager Product Page
Changelog
The following updates were made to this guide:
| Date | Description of Changes |
| July-2026 |
|
| Dec-2024 |
|
| Oct-2024 |
|
| July-2024 |
|
| Jun-2024 |
|
Authors and Contributors
The following authors and contributors have helped make this paper possible:
Authors
- Sujay Gopalan, Product Specialist, Omnissa.
- Deepti Prasad, Product Specialist, Omnissa.
Reviewers
- Graeme Gordon, Sr. Staff Architect, Omnissa.
- Rick Terlep, Director- Product Specialist, Omnissa.
Feedback
Your feedback is valuable. To comment on this paper, either use the feedback button or contact us at tech_content_feedback@omnissa.com.