Delivery of a ThinApp Application
Delivery of an Omnissa ThinApp Application Package
If you are looking for a guide showing you how to deliver Omnissa ThinApp packages to virtual desktops using Omnissa App Volumes, this document will take you through the two methods of delivering a ThinApp and capturing the application to an App Volumes package. This will significantly reduce the time needed to get ThinApp applications into an App Volumes package ready to be delivered to virtual desktops and RDS Hosts. We also explore the co-existence of two versions of the same application, one delivered as a legacy ThinApp and the second installed locally during the App Volumes capture process.
The Three-Step Workflow

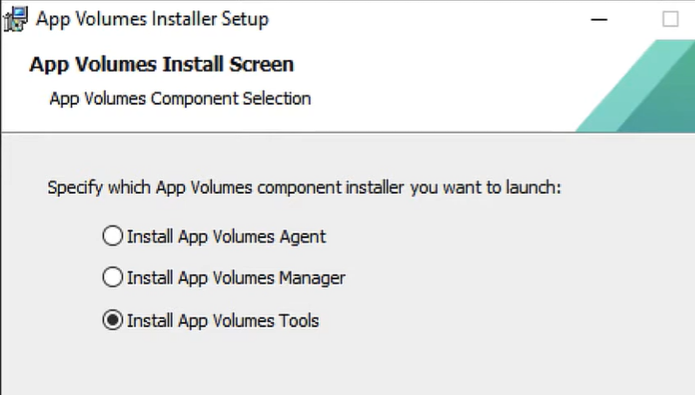
This three-step workflow demonstrates a ThinApp application's capture using App Volumes Tools in the following three sections.
The “Prepare” section will describe the environment and prerequisites needed to be successful. We follow this up with
The “Create” section provides step-by-step instructions on the App Volumes capture process using App Volumes Tools, capturing the installation of a legacy version of an application that ThinApp virtualized. Finally, we explore the installation and coexistence of two versions of the same application, a legacy version installed from a ThinApp and a newer version natively installed.
The “Validate” section uses the App Volumes appcapture.exe tool to validate the captured applications and confirm their launch. Upon success, the output files will be uploaded to App Volumes and delivered to virtual desktops. The Demonstrate section provides a demo walkthrough of the instructions in this guide.
Prepare
In preparation for demonstrating the App Volumes capture of a ThinApp application of a legacy version of an application and a more recent version coexisting within the App Volumes package, delivered to a virtual desktop, We have referenced the ThinApp documentation under requirements, installation, and limitations. We will demonstrate the deployment of the ThinApp within the App Volumes capture process using the two ThinApp delivery modes.
This document will not cover the ThinApp capture process of the legacy application. We start with the output taken from the ThinApp capture process and walk you through the steps of using App Volumes to capture a deployment of a ThinApp application in its EXE and MSI output formats while showcasing the two ThinApp delivery modes.
In addition to the steps to prepare the App Volumes Packaging Virtual Machine, the following components were present in the environment used to build and validate the two methods of ThinApp delivery modes and the App Volumes capture process.
- Horizon 8: virtual desktops built from a Windows 10 Guest OS image using the following method.
- App Volumes 4.x environment
- App Volumes Packaging virtual machine built using the guidelines outlined in Preparing the App Volumes Packaging Virtual Machine, excluding installing the Horizon agent, App Volumes agent, and DEM agent.
- App Volumes Tools will capture two applications: a deployment of a ThinApp legacy Notepad++ application and a locally installed version of Notepad++.

- App Volumes Tools will capture two applications: a deployment of a ThinApp legacy Notepad++ application and a locally installed version of Notepad++.
- The ThinApp product binaries. (The application or ThinApp should be able to run in a Terminal server environment to be delivered to an RDS Desktop or Application Pool.)
- Software used for the capture: A legacy version of Notepad++ ver.6.x captured using ThinApp and its output source files, along with the ThinApp-compiled Notepad++ EXE and MSI and the most recent version of a Notepad++ installer.
On the App Volumes Package capture VM, we have created the following folders and their content used for this demonstration;
- “Software Repo” folder > ThinApp 2312 application binaries and the newest version of Notepad++
- The ThinApp 2312 application folder contains the “Thinreg.exe” needed for method 2.
- “ThinApp Repo” folder > ThinApp output folder structure for the captured legacy Notepad++
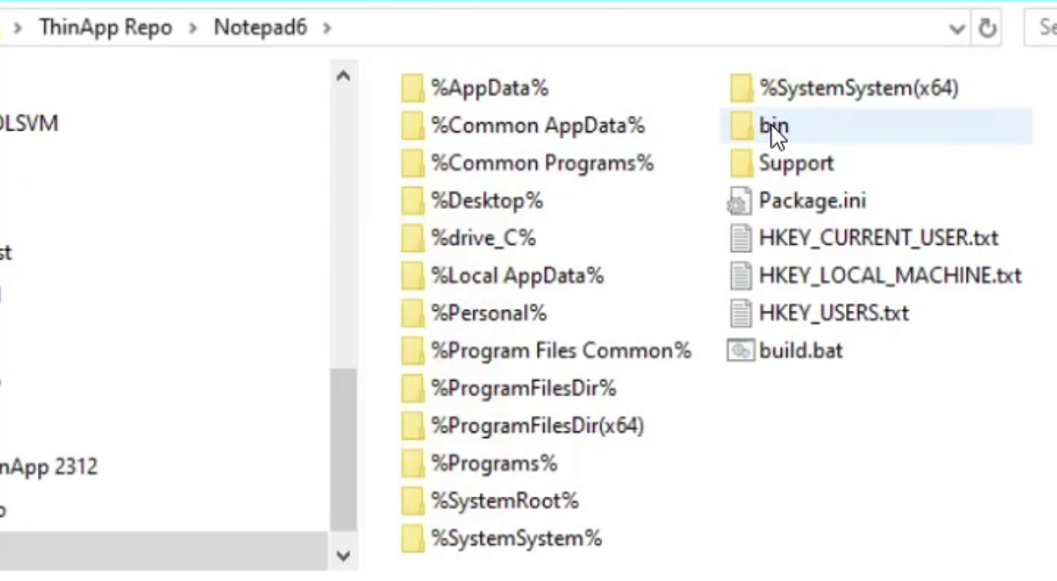
- The “bin” folder contains the ThinApp compiled Notepad++ executable and MSI files.
We have also saved the legacy Notepad++ ThinApp executable on a remote share.
Create
The Create segment of this document will demonstrate two methods of deploying a ThinApp application, capturing it within an App Volumes packaging process and also showcasing how App Volumes can capture two versions of Notepad++ (one a ThinApp legacy version and a direct install of the latest version of the same application). We must ensure that preparing the app volumes packaging virtual machine build contains the prerequisites mentioned and initiate the following steps;

Note: Depending on how the current ThinApp is accessed by the virtual desktops, one can explore Method 1 or Method 2 described in this document to capture the ThinApp as an App Volumes package.
Step 1: Initiate App Volumes install and capture of a ThinApp application.
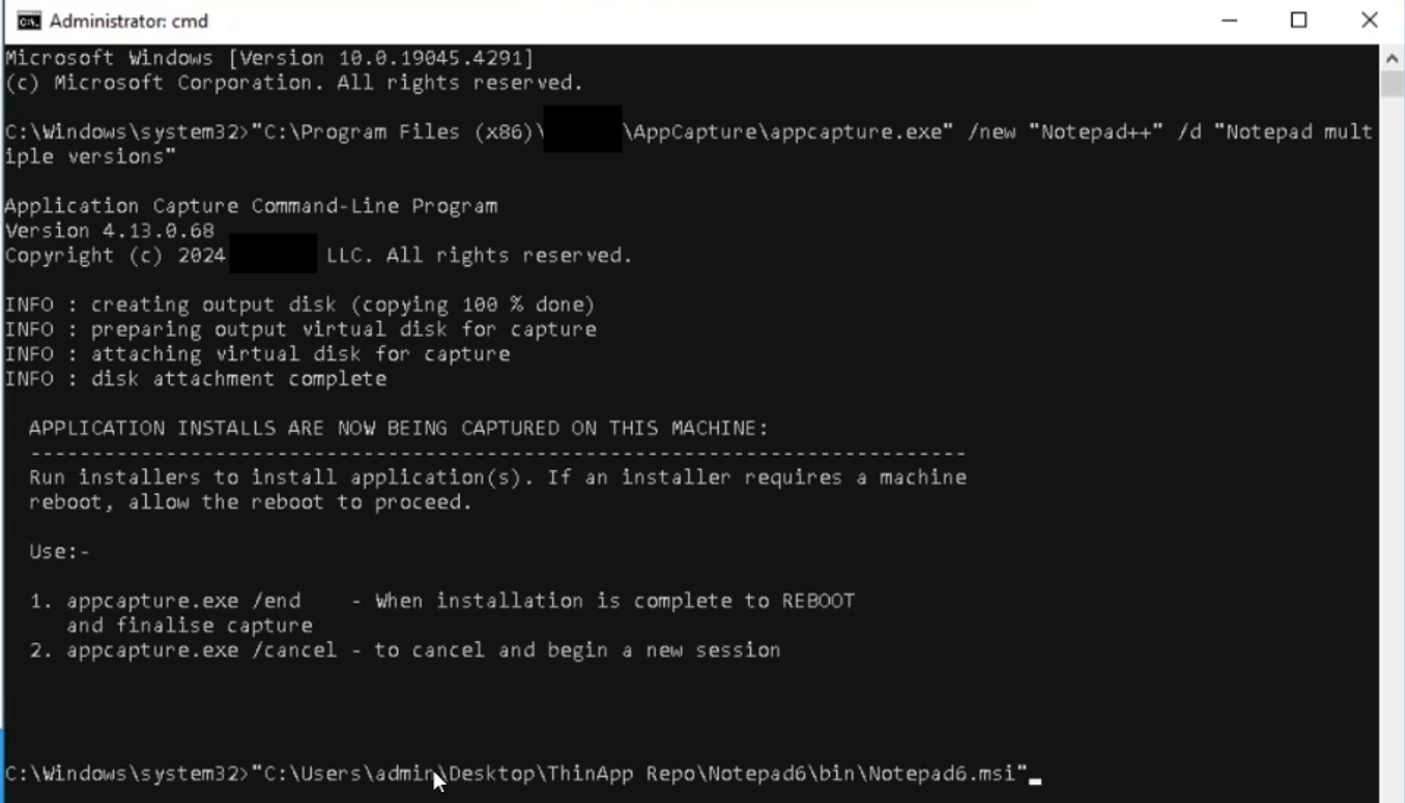
- We log in with an administrative account on the packaging virtual machine and start the App Volumes appcapture.exe. We use the following syntax to capture Notepad++.
Syntax:
C:\> “C:\Program Files\Omnissa\AppVolumes\Agent\appcapture.exe” /new <Application Name> /d “<description>”
The appcapture command is run on the Packaging Virtual Machine:
C:\> “C:\Program Files\Omnissa\AppVolumes\Agent\appcapture.exe” / new “Notepad++” /d “Notepad++ Multiple versions”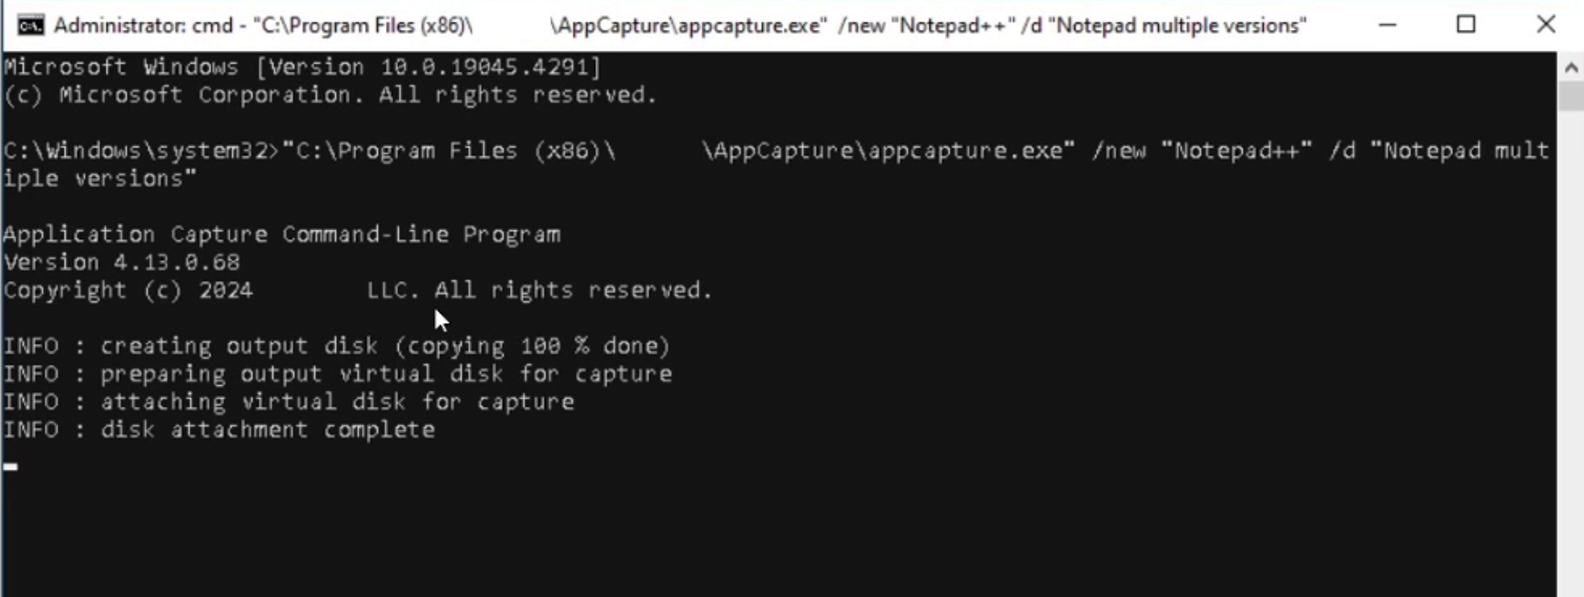
- This results in the “Notepad++.vhd” virtual hard disk file getting created in the “C:\ProgramData\Omnissa\AppVolumes\Packages” output folder.

Method 1: Deploying a ThinApp Application using the MSI or EXE installer from the ThinApp output
In the first method of deploying a ThinApp application, we follow the guidelines provided for deploying a ThinApp captured application using the decentralized mode of deployment.
This method deploys the ThinApp application locally to the virtual desktop. This also means that the ThinApp executable will be deployed locally and occupy the required disk space, both the installation and its subsequent application launch.
- We are poised at the App Volumes appcapture.exe, which has started a new capture and is ready to install an application.

- As we have our prerequisite application source files, ThinApp application output files available in the packaging virtual machine, we can copy the path to the MSI version of the legacy version of Notepad++ packaged using ThinApp and run the installer from the “bin” folder, within the ThinApp stored path “C:\<folder location>\ThinApp Repo\Notepad6\bin\Notepad6.msi”.

- We have chosen to use the MSI version of the ThinApp application.

- We have chosen to use the MSI version of the ThinApp application.
- The installation location will be based on the ThinApp application capture and the following ThinApp application capture process of selecting the Isolation Mode, and the choice made to Store Application Changes in the Sandbox will determine the installation location.

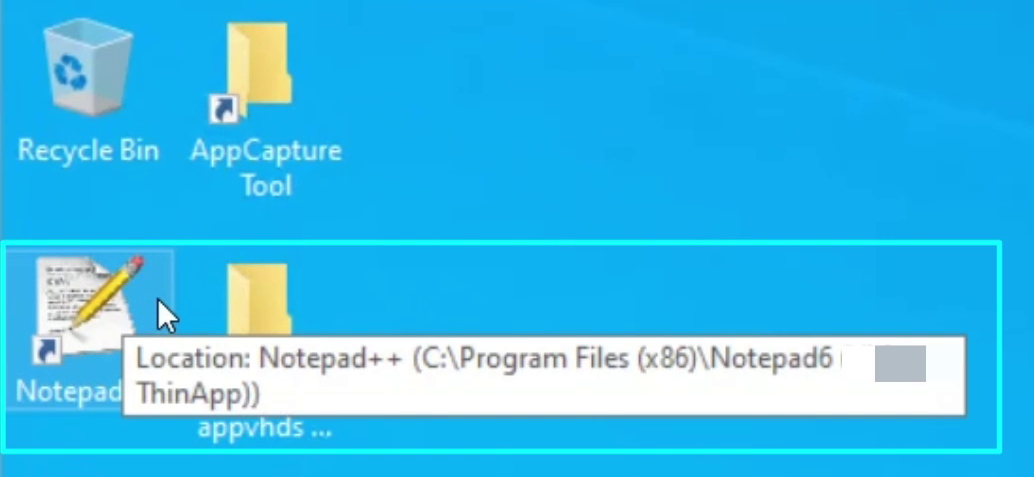
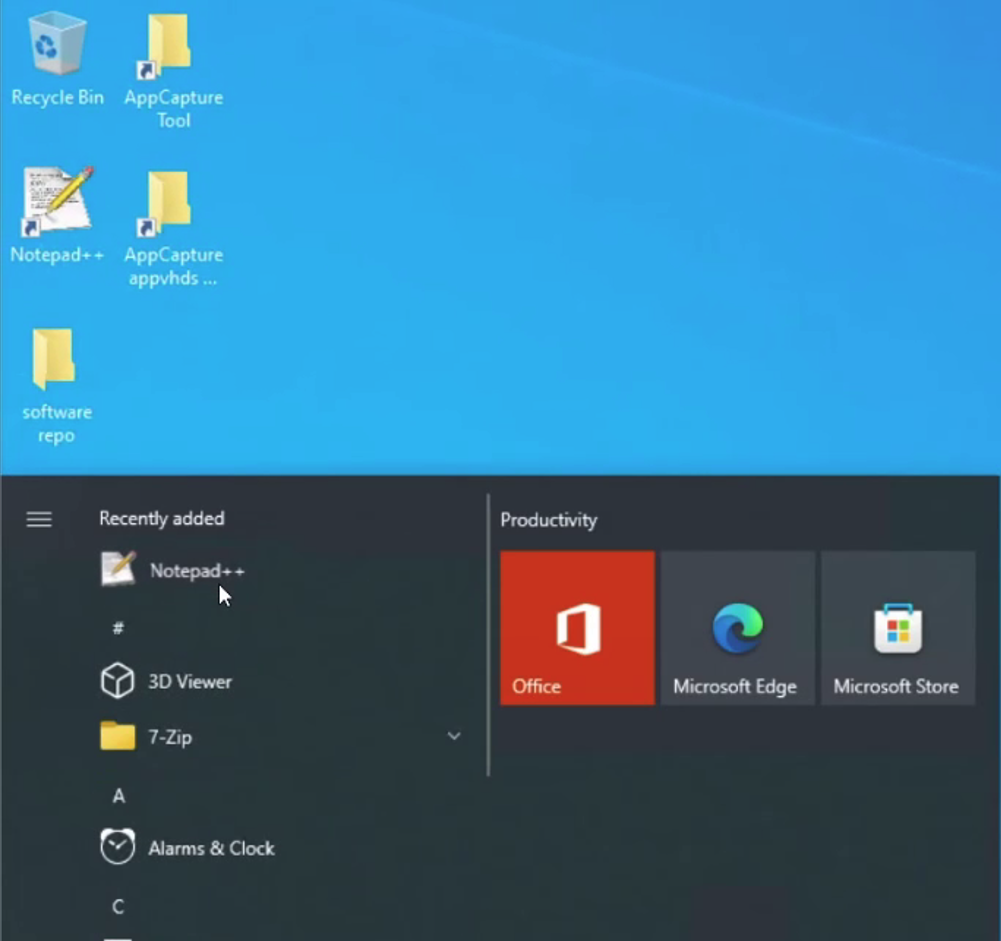
- A successful installation of the legacy version of the Notepad++ ThinApp application results in a Desktop icon.

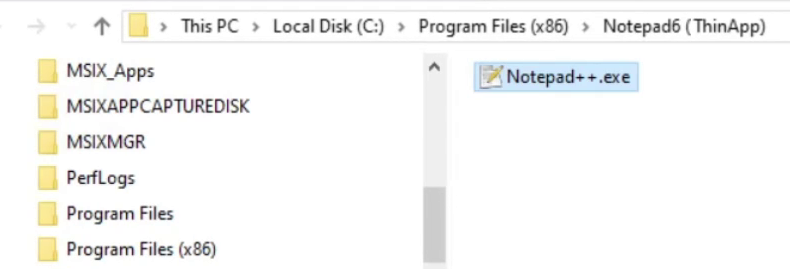
- Based on the ThinApp capture process we can confirm the location of the legacy Notepad++ executable within the Program Files (x86) folder structure.

- In the specific case of deploying Notepad++, using the ThinApp application MSI, the additional files and folder structures that get created are in the;
- Application shortcut is created on the Desktop.
- The application launch and uninstall script placed in “C:\ProgramData\Thinstall\UnRegister”
- The user profile gets a folder structure created under the Local AppData with “Thinstall\Cache”
- The user profile gets a folder structure created under the Roaming AppData with “Thinstall\<ThinApp Application Name>”. All user-modified application changes are stored here.
- In the specific case of deploying Notepad++, using the ThinApp application MSI, the additional files and folder structures that get created are in the;
Note: These locations will change based on the applications captured.
- We launch the legacy version of Notepad++ from the Start Menu.

- Launching Notepad++, navigating to “Settings”, we can confirm the version of this ThinApp legacy Notepad++ to be Notepad++ ver.6.2.3.

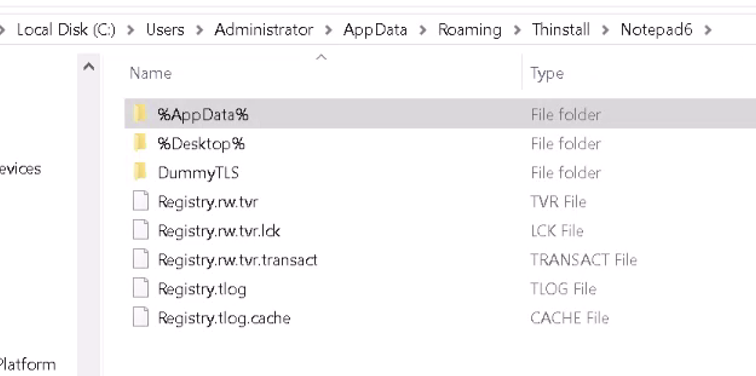
- From this point, if the End User makes any application setting changes, they will be stored in the user’s profile under the “AppData\Roaming\Thinstall\<ThinApp>\%AppData%” folder structure.
- When we changed Notepad++ settings, the following files were created/modified, capturing the new settings, which will be applied on the subsequent launch of the legacy Notepad++.

- We can also see a virtualized Registry to capture any Registry-level changes in this ThinApp.

- When we changed Notepad++ settings, the following files were created/modified, capturing the new settings, which will be applied on the subsequent launch of the legacy Notepad++.
Method 2: Using ThinReg.exe to deploy a ThinApp application
In this method of deploying a ThinApp application, we will follow the guidelines provided for deploying a ThinApp captured application using the centralized mode of deployment.
We use the ThinApp Thinreg.exe utility to deploy the legacy Notepad++ ThinApp from a remote share that centralizes the application and streams the application to the target virtual desktop at the application launch. This application deployment method only creates a local folder structure to house only modified elements of the application and its settings. The ThinApp itself does not reside on the local virtual machine, so the required disk space for the installation and the application executable is reduced.
- Once again, we have initiated the App Volumes appcapture.exe that has started a new capture ready for the installation of an application.
- We locate the ThinApp from the central share and copy its path.

- Using the executable format, we use the following Thinreg.exe syntax to deploy the legacy Notepad++ ThinApp. And use the “/a” syntax to deploy the application to all users as described in the parameters.
Syntax:
C:\> ThinApp\thinreg.exe “<path to the ThinApp executable file>” /a
ThinReg command run in the Packaging Virtual Machine:
C:\> ThinApp\thinreg.exe “\\dc01\share\ThinApps\Notepad++.exe” /a

- In the specific case of installing Notepad++, invoking the Thinreg.exe to install the ThinApp application from a central share, the only files and folder structures that get created are in the;
- Application shortcut is created on the Desktop.
- The application launch and uninstall script placed in “C:\ProgramData\Thinstall\UnRegister”
- The user profile gets a folder structure created under the Local AppData with “Thinstall\Cache”
- The user profile gets a folder structure created under the Roaming AppData with “Thinstall\<ThinApp Application Name>”. All user-modified application changes are stored here.
- There is no instance of the Application executable being made locally available in the Program Files location. The launch of the application will be streamed from the central share into the virtual desktop’s memory.
Note: These locations will change based on the applications captured.

- We now proceed to launch the legacy Notepad++ from the Start Menu.

- Launching Notepad++, navigating to “Settings”, we can confirm the version of this ThinApp legacy Notepad++ to be Notepad++ ver.6.2.3.

- From this point, if the End User makes any application setting changes, they will be stored in the user’s profile under the “AppData\Roaming\Thinstall\<ThinApp>\%AppData%” folder structure.
- When we changed Notepad++ settings, the following files were created/modified, capturing the new settings, which will be applied on the subsequent launch of the legacy Notepad++.

- We can also see a virtualized Registry to capture any Registry-level changes in this ThinApp.

- When we changed Notepad++ settings, the following files were created/modified, capturing the new settings, which will be applied on the subsequent launch of the legacy Notepad++.
Step 2: Capturing a second application alongside a legacy ThinApp deployed application
We now switch tracks and return to the moment after we have validated the installation of the ThinApp version of the legacy Notepad++ 6.x. Now we explore the coexistence of multiple versions of the same application, a legacy version deployed by ThinApp and the second being a newer version installed locally. For this demo, we will install the latest version of Notepad++ while writing this document. We continue through the App Volumes capture process, where after the deployment of the ThinApp and its validation, we proceed to install the Notepad++ version 8.x onto the same App Volumes virtual hard disk currently active and capturing the application installation.
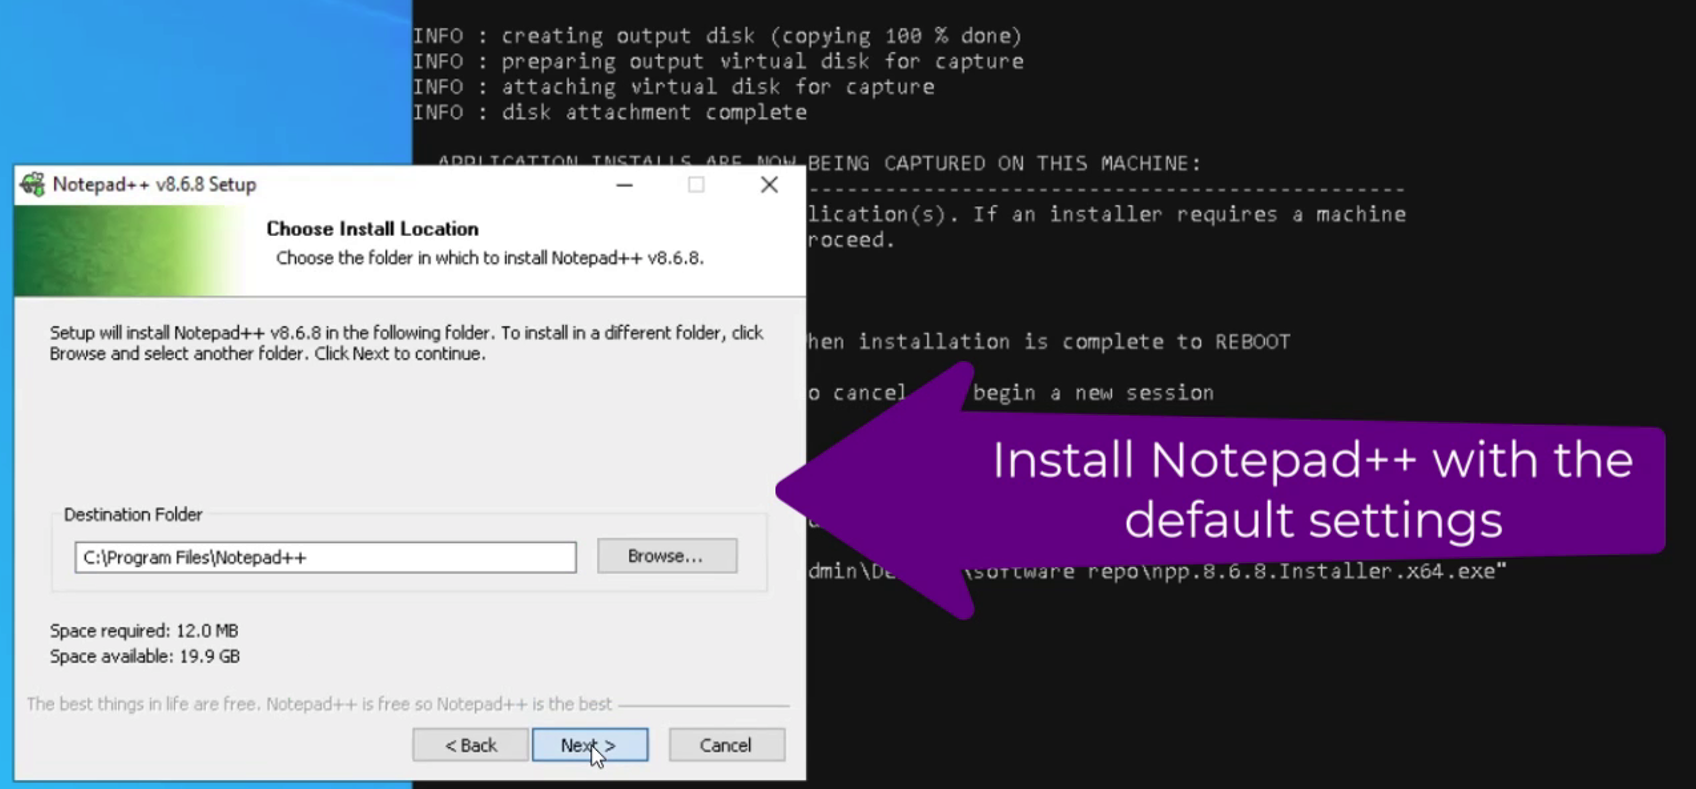
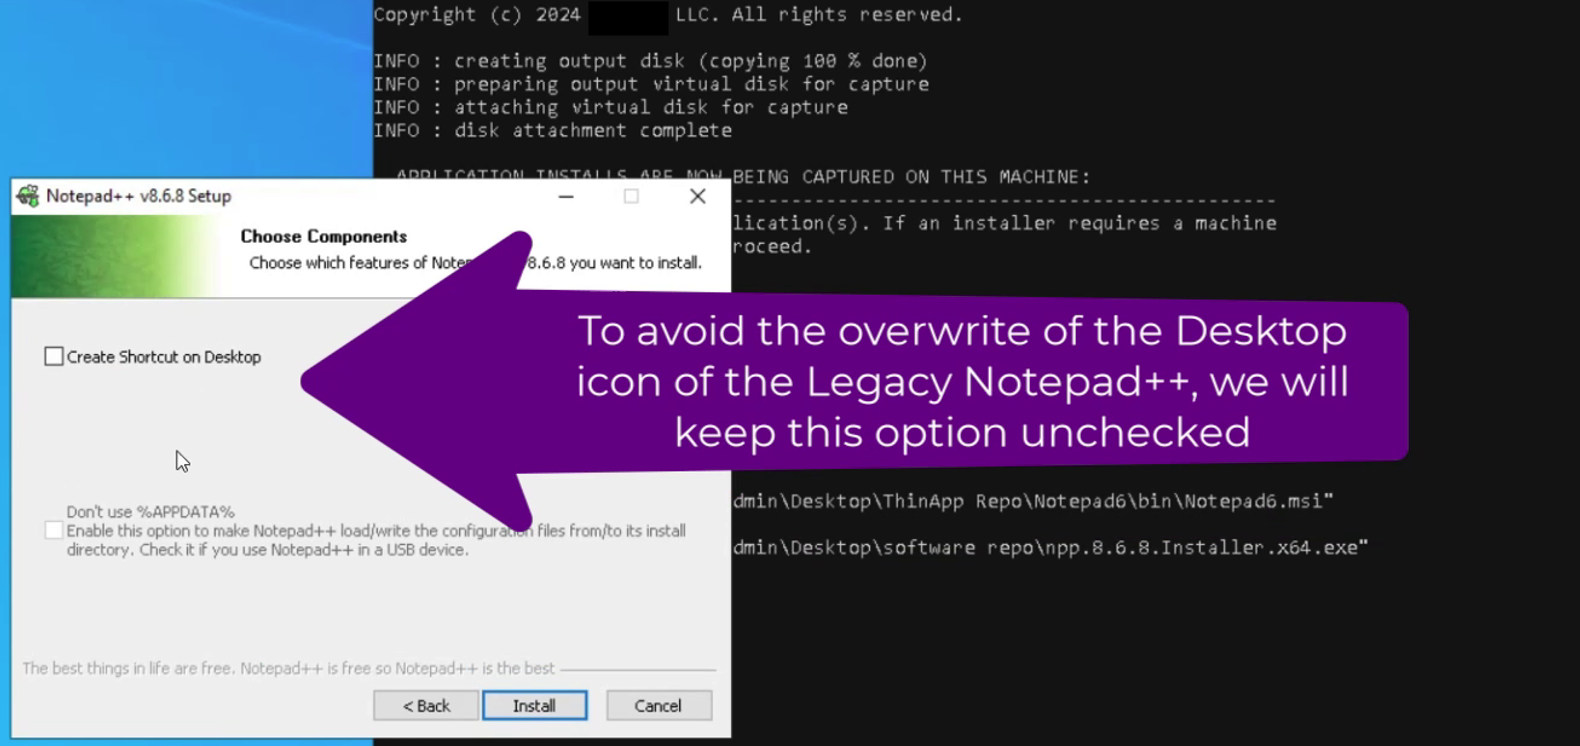
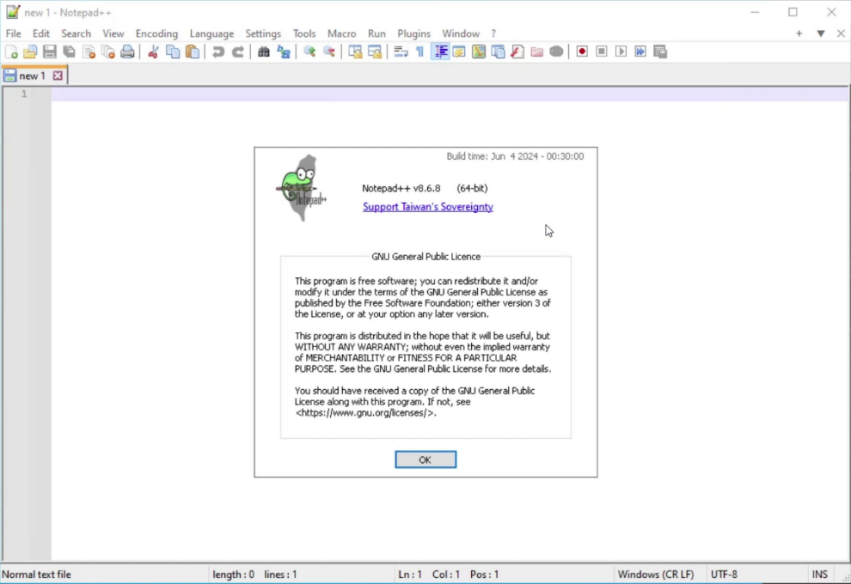
- We have the latest version of Notepad++ ver.8.6.8 that we will install locally on this packaging virtual machine.

- We will install the default settings for this version of Notepad++.

- With the legacy version of Notepad++ already creating a Desktop icon, we will skip the option to create a shortcut on the Desktop, which will overwrite the legacy version.

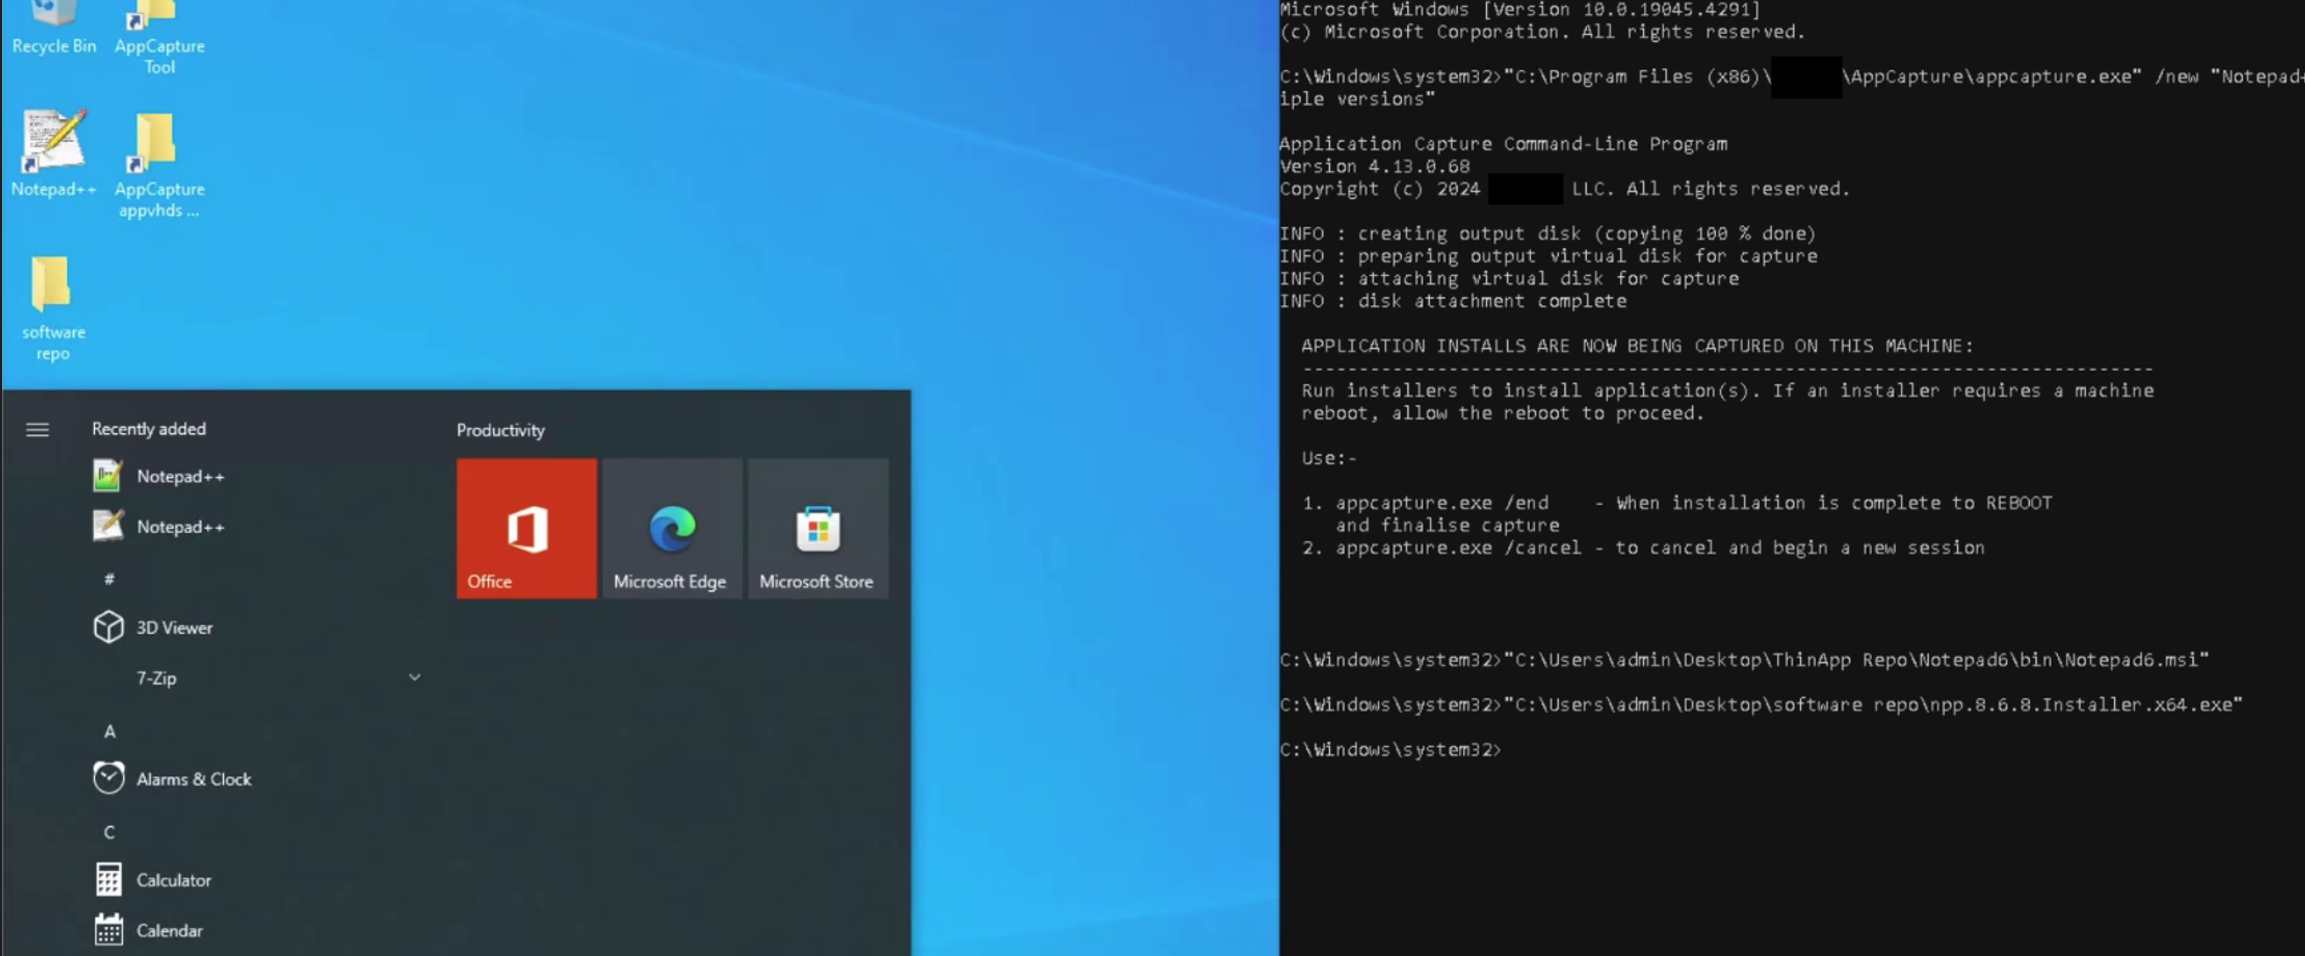
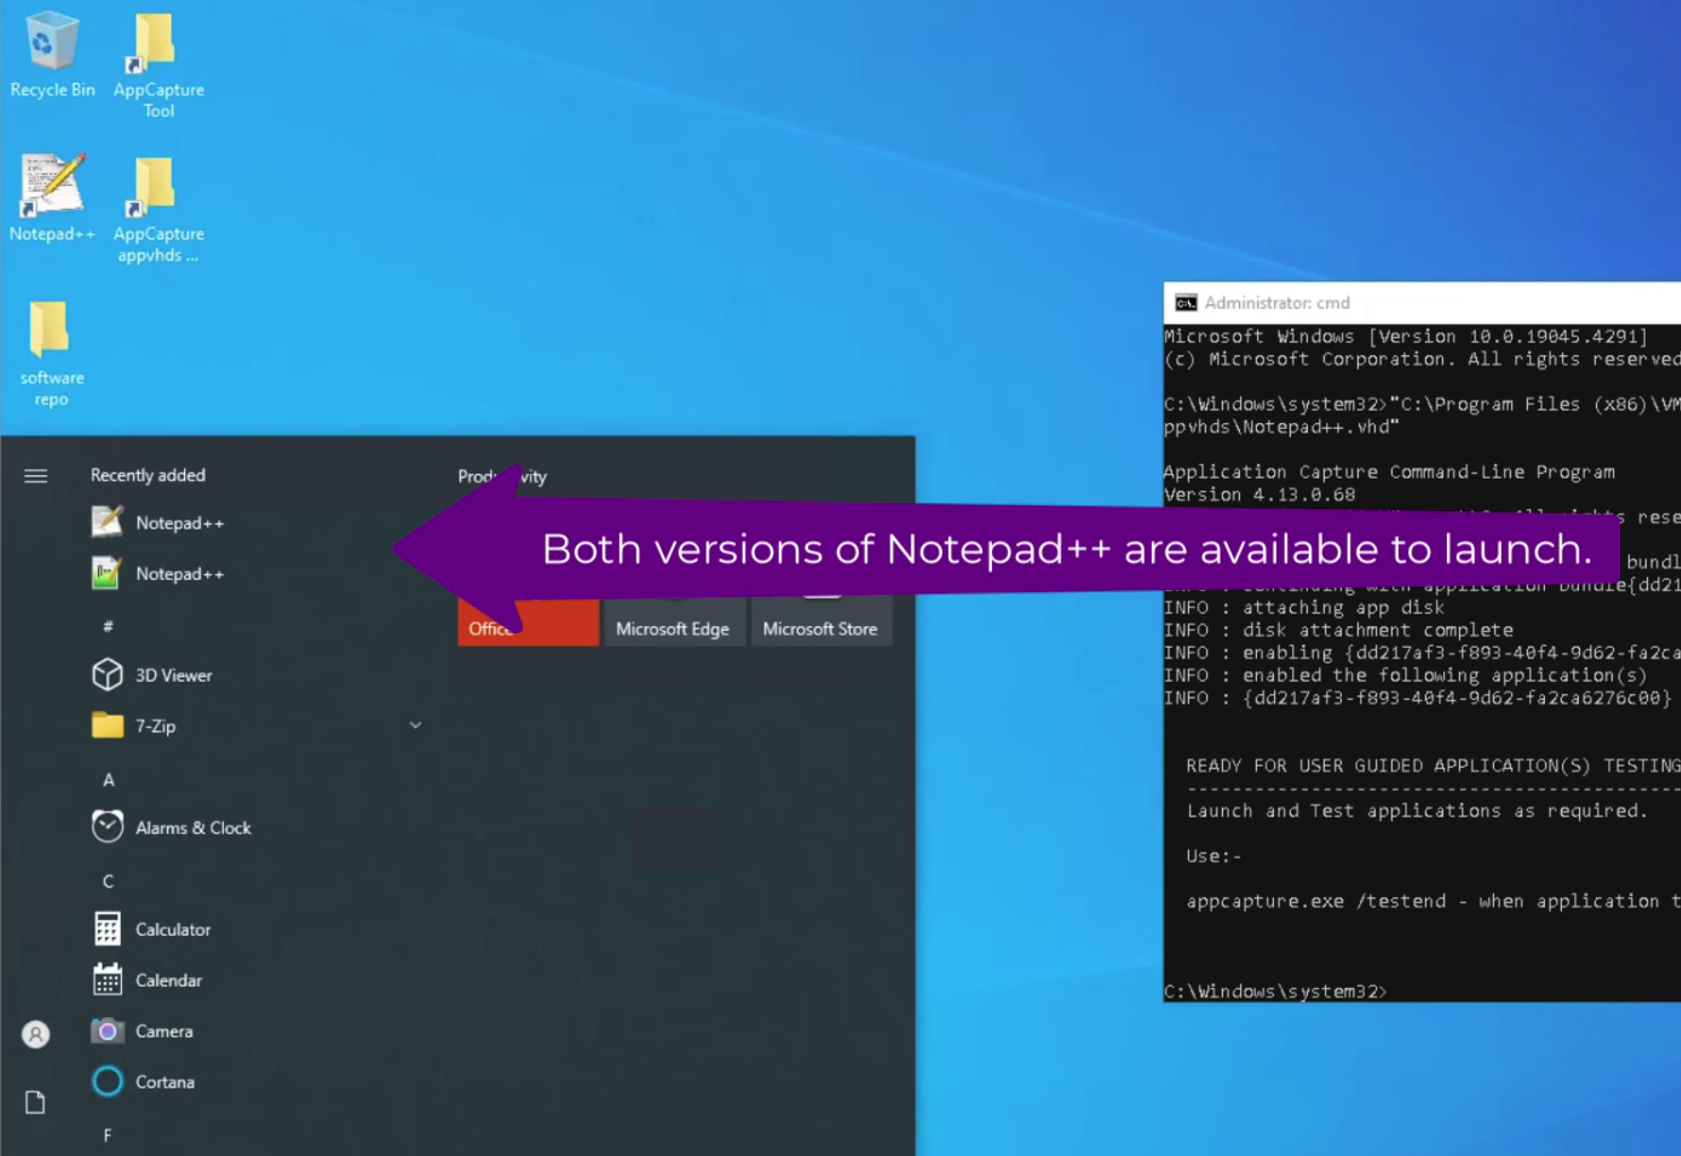
- We can validate that both instances of Notepad++ are available from the Start Menu as they point to different locations.

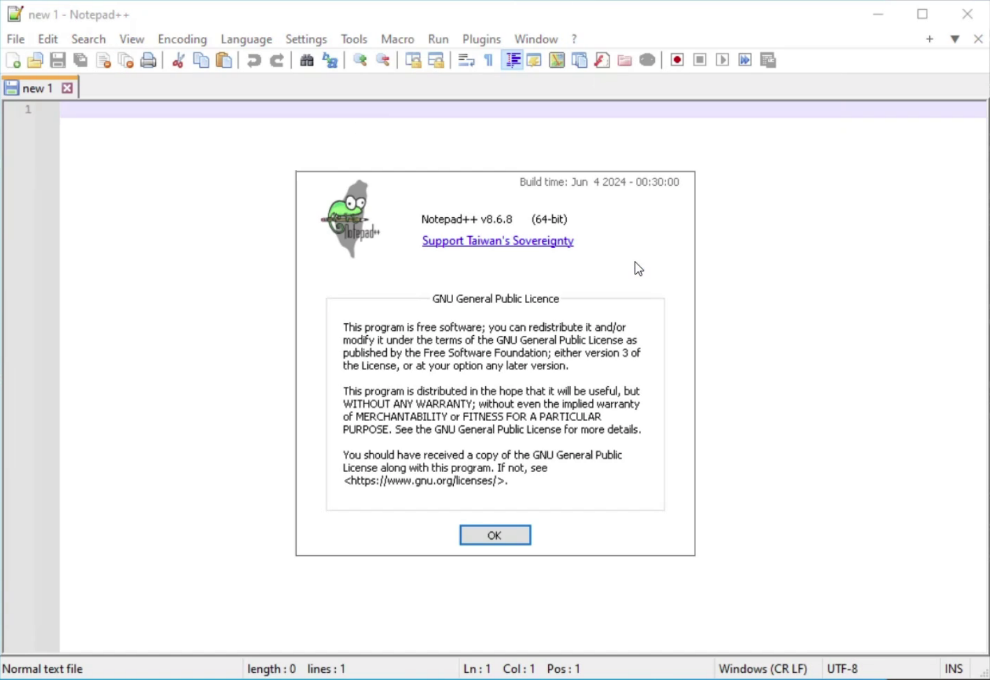
- We can confirm that the newer version of the Notepad++ application has also launched and confirm the product version.

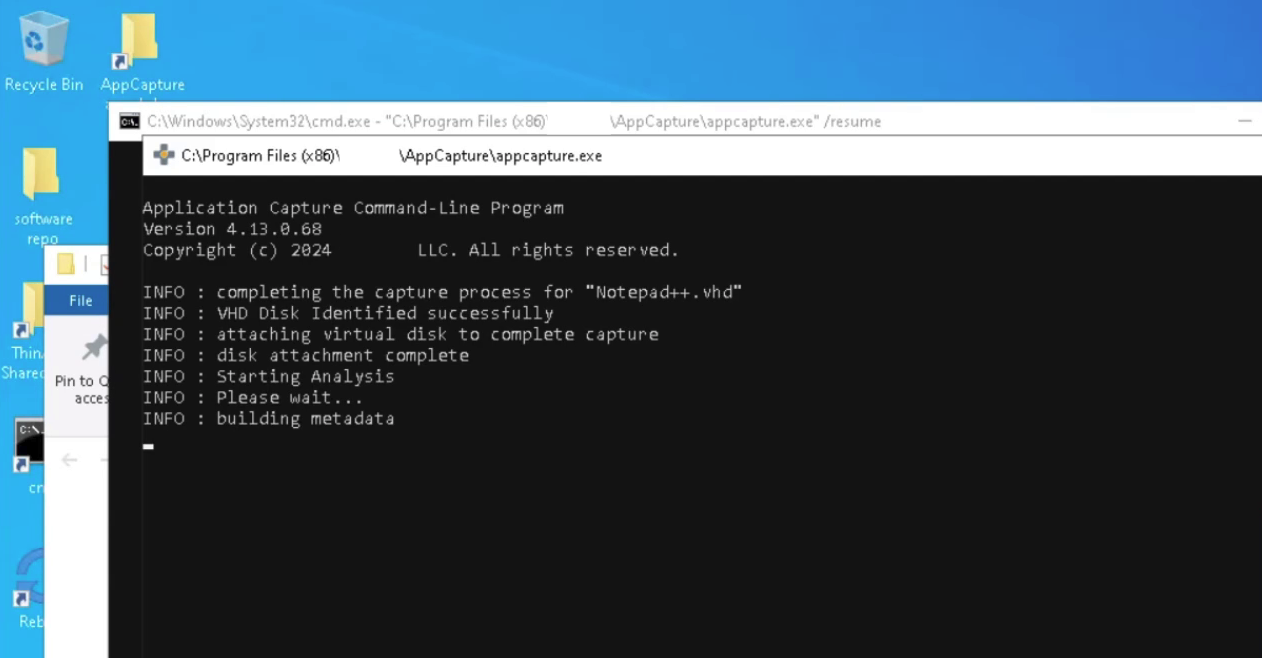
- We now bring to close the App Volumes appcapture process by using the following;
Syntax:
C:\> “C:\Program Files\Omnissa\AppVolumes\Agent\appcapture.exe” /end
The appcapture command runs to end the App Volumes package capture:
C:\> “C:\Program Files\Omnissa\AppVolumes\Agent\appcapture.exe” /end
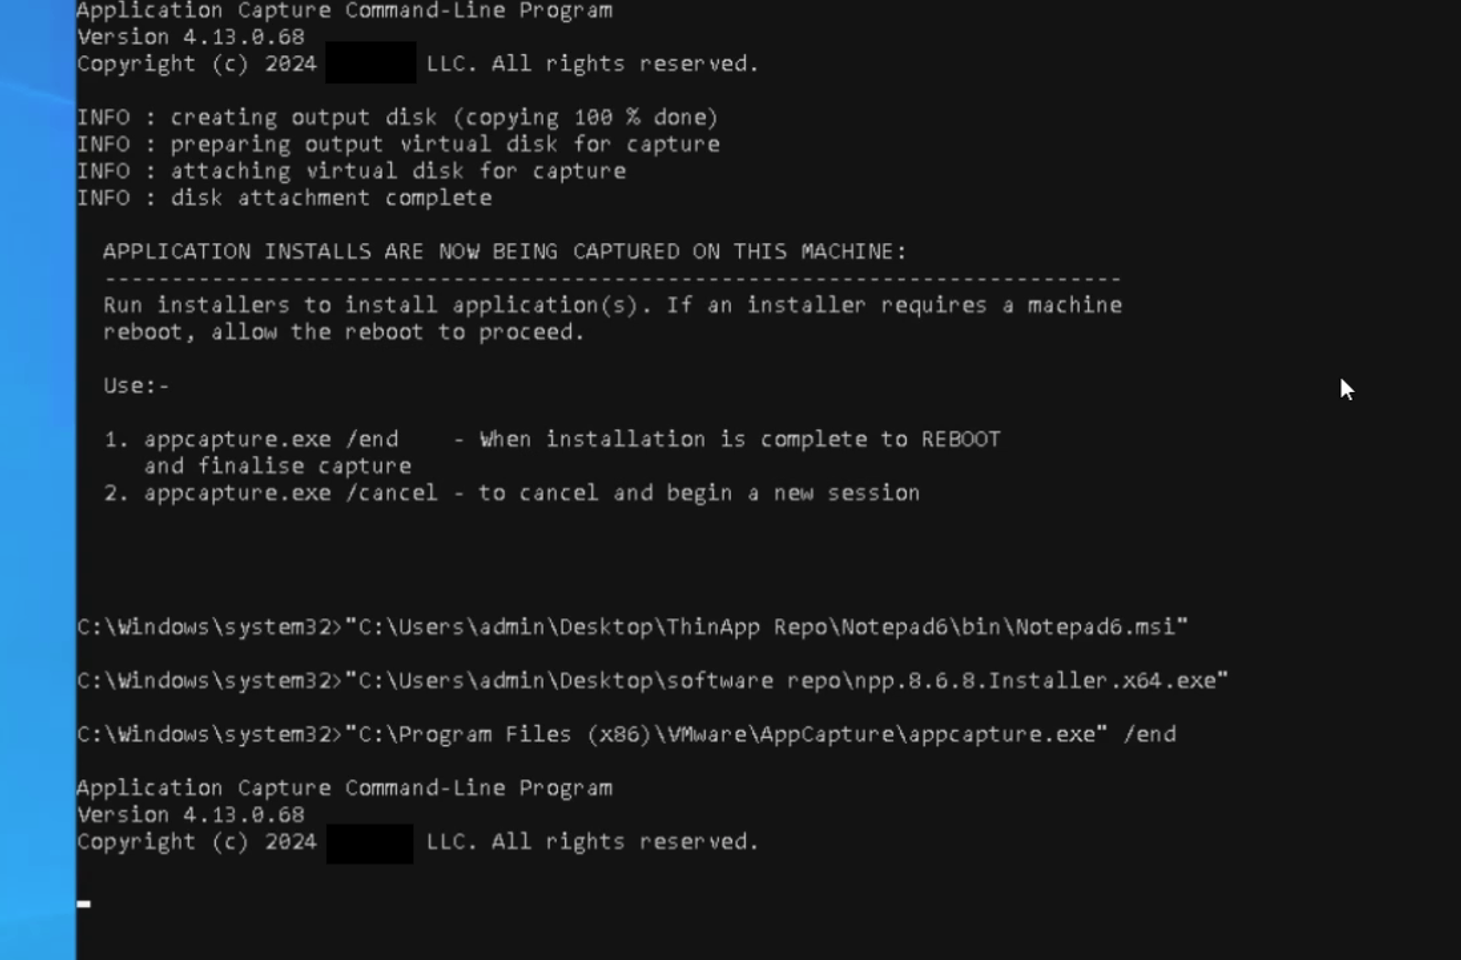
- The trigger to close the appcapture process will result in the packaging virtual machine reboot.

- Once the reboot is complete, the successful App Volumes capture results in the three output files.

- Copy these files to a share and revert the packaging virtual machine to its snapshot. The next step is to validate the success of the capture.
Validate
When carrying out an App Volumes capture using the App Volumes tools, initial validation of the application package validation captured in its VHD format can be performed on the same packaging virtual machine.
- After the capture has been completed and the output files are exported to a file share, the first step is to revert the packaging virtual machine to its snapshot.
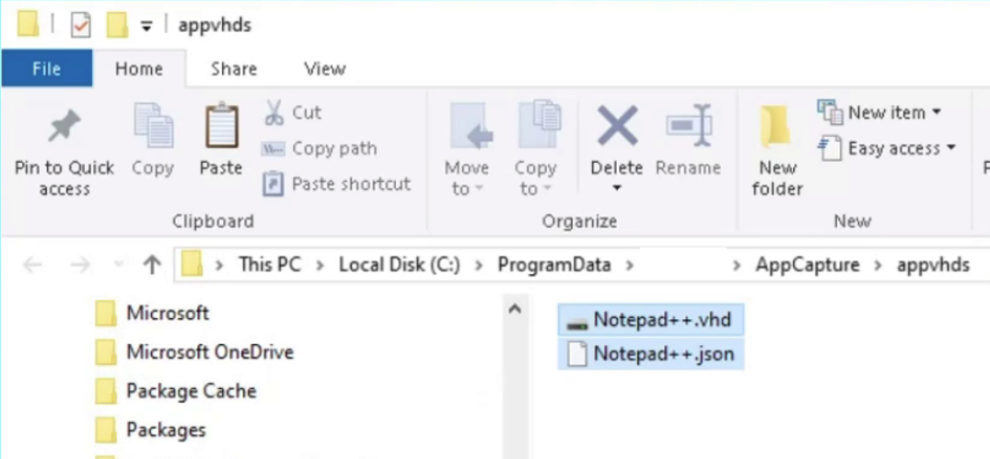
- Now copy the output files (JSON and the VHD) back to the “appvhds” folder located in the path “C:\ProgramData\Omnissa\AppVolumes\Packages”.

- Launch an elevated command prompt, navigate to the “C:\Program Files\Omnissa\AppVolumes\Agent\” folder, and run the appcapture.exe command to mount the VHD using the following
Syntax:
C:\Program Files\Omnissa\AppVolumes\Agent\appcapture.exe /test <path to vhd>
Appcapture command used to mount the captured package:
“C:\Program Files\Omnissa\AppVolumes\Agent\appcapture.exe” /test “C:\ProgramData\Omnissa\AppVolumes\Packages\Notepad++.vhd”
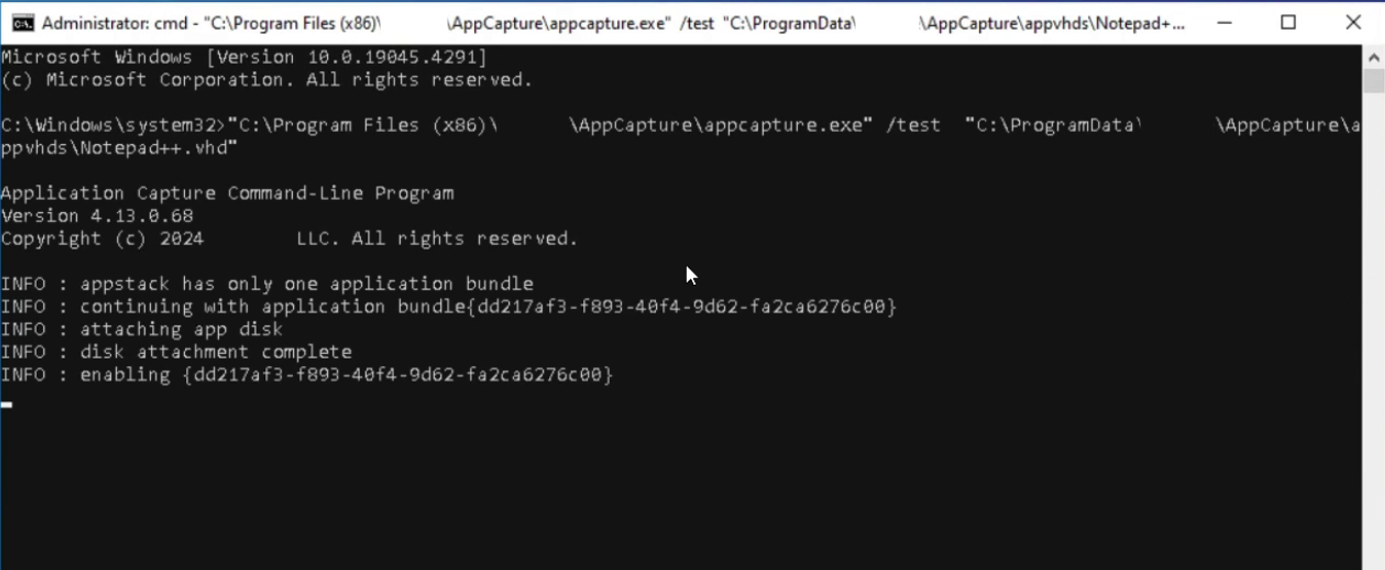
- The successful execution of the command results in both versions of Notepad++ being made available on the packaging virtual machine. An end user targeted with this App Volumes package will be presented with both versions of Notepad++ and, based on the requirements, will launch either one.

- The final step is to launch both versions of Notepad++ to confirm the application capture and delivery of the App Volumes package, as shown in the result below.
- The Notepad++ 8.x is available as the natively installed application.
- Depending on the deployment method used to deploy the legacy version of Notepad++, the Desktop and Start Menu icons will reflect mapping to the locally available ThinApp application if installed using the decentralized method or point to the remote file share if deployed using the centralized method.


- In this demonstration, we have deployed a legacy application captured using ThinApp, along with a newer version of the same application installed locally, capturing both applications using App Volumes Tools. The next step is to copy the (VHD or VMDK) and JSON to an App Volumes environment supporting the format.
- Additionally, you can use the Dynamic Environment Manager to inject Personalized application settings, as shown in Delivering DEM App Personalization to App Volumes Packages.
Demonstrate
For a demo of the steps in this guide, see:
Summary and Additional Resources
The administration of an Omnissa App Volumes environment is inherently complex and constantly evolving. This Application Packaging series aims to be a steady companion, offering reliable guidance and support to help you effectively manage these daily operational tasks. By utilizing this resource, you will be better prepared to handle the challenges of your role, ensuring operational excellence and technical proficiency with App Volumes.
We trust you will find this Application Packaging series invaluable in your day-to-day activities and encourage you to refer to it regularly. Your feedback is welcome and will be instrumental in continuously improving this resource.
Additional Resources
Explore the following additional resources.
- Reference Architecture – App Volumes
- App Volumes Product Page
- App Volumes Product Documentation
- App Volumes Knowledge Base Articles
- Horizon 8 Product Page
- ThinApp User Guide
- ThinApp Deployment Modes
Changelog
The following updates were made to this guide.
| Date | Description of Changes |
| Dec-2024 |
|
| Oct-2024 |
|
| August-2024 |
|
Authors and Contributors
The following authors and contributors have helped make this paper possible:
Authors
- Sujay Gopalan, Sr. Technical Marketing Architect, Omnissa.
Reviewers
- Graeme Gordon, Sr. Staff Architect, Omnissa.
- Rick Terlep, Staff Technical Marketing Architect, Omnissa.
- Mike Erb, Staff Technical Marketing Architect, Omnissa.
Feedback
Your feedback is valuable. To comment on this paper, either use the feedback button or contact us at tech_content_feedback@omnissa.com.


