

Creating Larger Capture Disk For Use With App Volumes Command-Line-Capture Program
Overview
While administering End User Computing environments, it is sometimes necessary to have more than 10GB of space for creating packages for Omnissa App Volumes. This tutorial provides the required steps to create different sized capture disks when using the App Volumes Command-Line Capture program.
Purpose of This Tutorial
This tutorial takes you through the steps to change the capture disk size for the App Volumes Command-Line-Capture Program. Before you change the size of this disk, you must first set up an Install App Volumes Application Capture Command-Line Program. For more information, see the Omnissa App Volumes documentation.
Audience
This tutorial is intended for IT administrators and product evaluators who are familiar with App Volumes. Familiarity with networking and storage in a virtual environment, Active Directory, directory services is assumed. Knowledge of other technologies, such as Omnissa Horizon is also helpful.
Create Your Capture Disk
When capturing App Packages, you may find that some applications require more disk space than can be provided with the default template. The App Volumes Command Line program gives you the ability to create new templates with the required space.
Note: The steps are sequential and build upon one another, so make sure that you complete each step before going to the next step.
Prerequisites
Before you begin, make sure you have installed the App Volumes Command-Line Program.
Creating Capture Disks
- Log in to the capture machine.
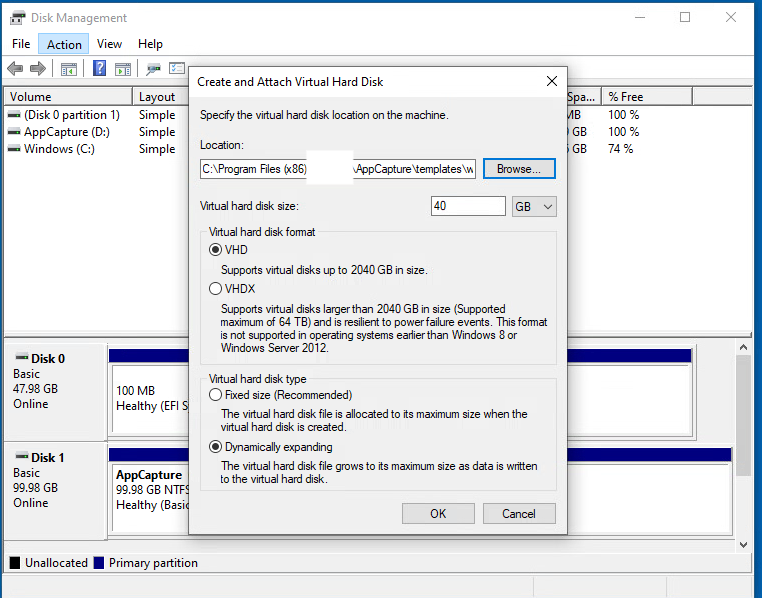
- Create new VHD of desired size in the C:\Program Files\Omnissa\AppVolumes\Agent\templates\ with a name of wemcapture_[newsize].vhd.

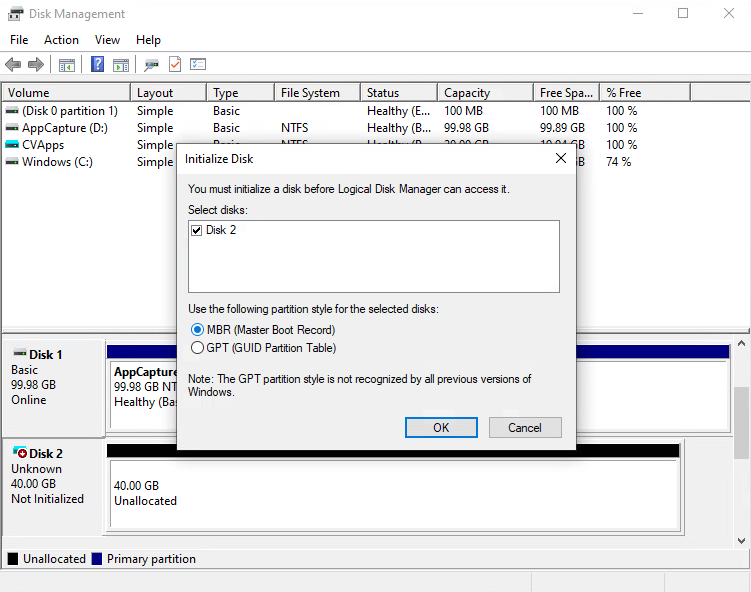
- Initialize the disk with the MBR partition style:
- Create a new NTFS volume on the disk and mount:
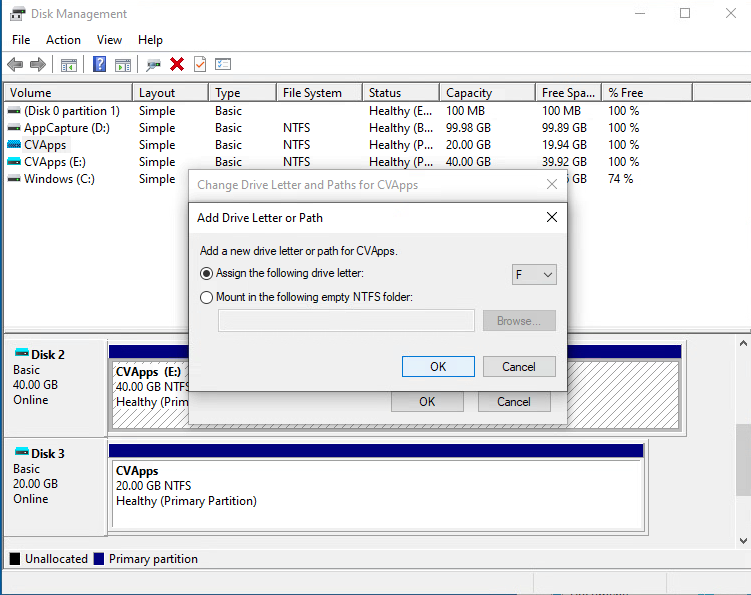
- Assign a drive letter to the existing CVApps template:
- Ensure that system files are not hidden:
- Open the Control Panel, and select Appearance and Personalization.
- Click Show hidden files and folders to open the Folder Options window.
- Select Show hidden files, folders, and drives.
- Ensure that these options are not selected:
- Hide empty drives in the Computer folder
- Hide extensions for known file types
- Hide protected operating system files (recommended)
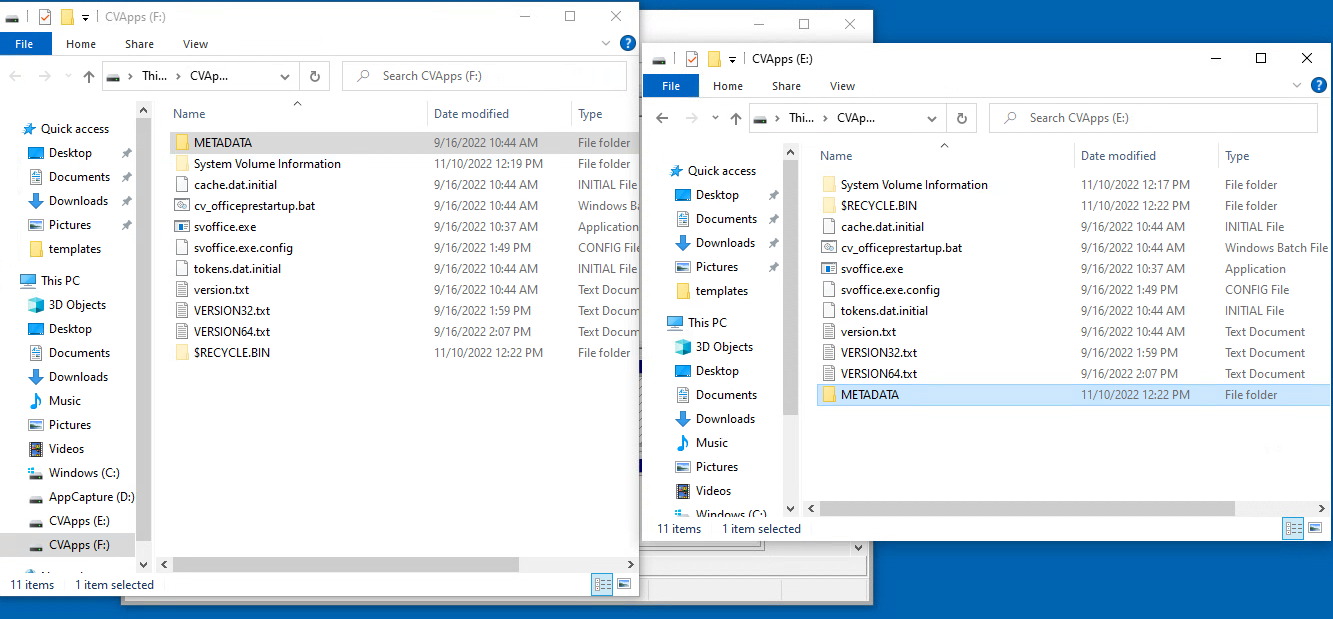
- Copy all files and folders, including system files, from the original CVapps to the new one.
- On the newly created VHD, do the following:
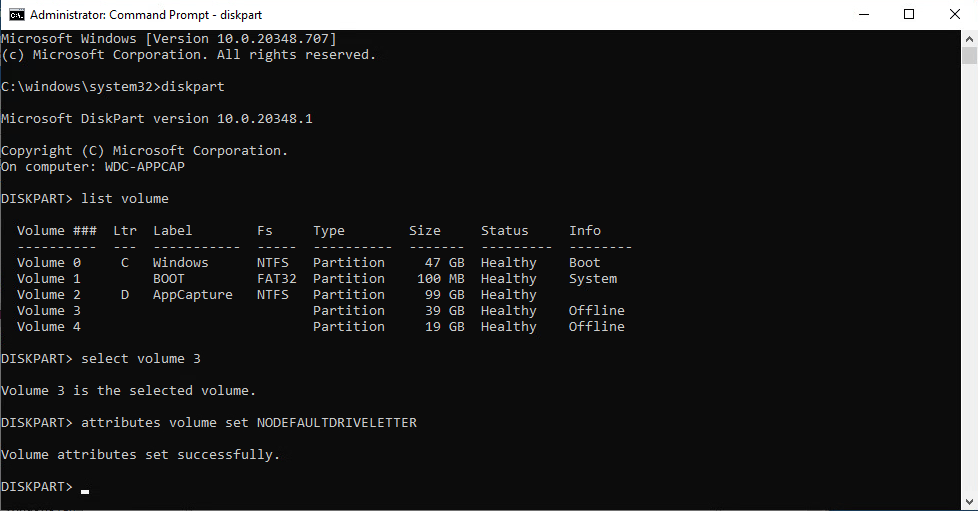
- Using diskmgmt.msc, unassign the drive letter and unmount the VHD.
- Set attribute NODEFAULTDRIVELETTER for the volume.
- Shut down the capture VM and create a new snapshot.
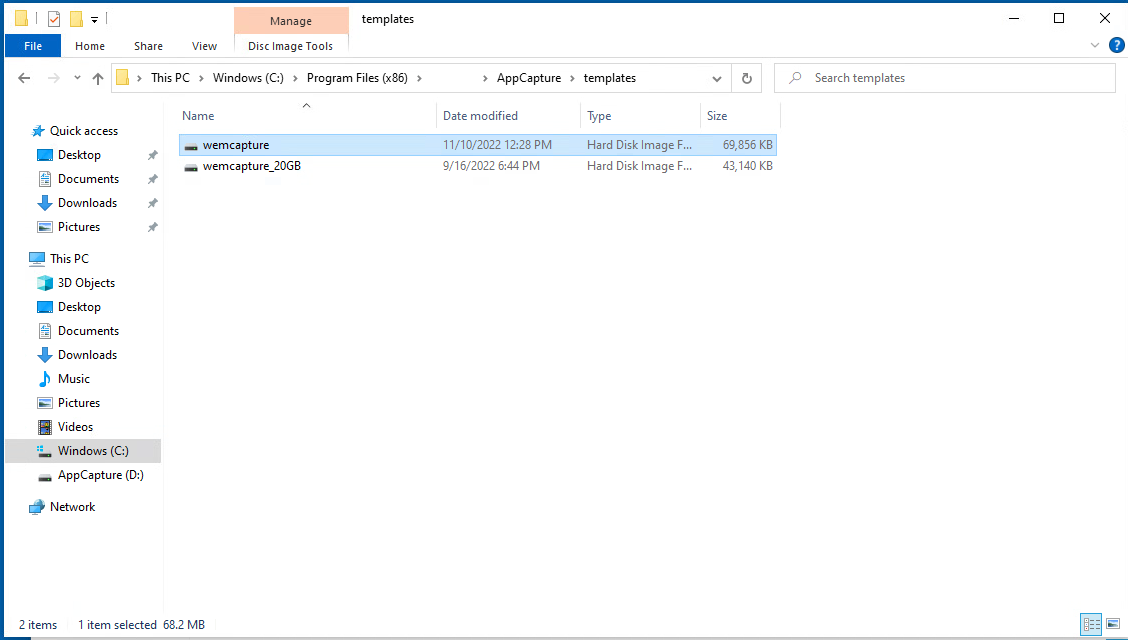
- Rename the original template and name the new one
wemcapture:


You are now ready to use the new, larger template to capture applications!
Summary and Additional Resources
This tutorial described the procedure to create captures disks of different sizes for use with the App Volumes Command-Line Capture Program.
For more operational tutorials on App Volumes, see Omnissa Tech Zone.
Additional Resources
For more information about App Volumes, you can explore the following resources:
- App Volumes Reference Architecture
- App Volumes Product Page
- App Volumes Product Documentation
- App Volumes Configuration
- App Volumes Knowledge Base Articles
- Horizon 8 Product Page
- Omnissa Tech Zone
- Integrating FSLogix Profile Containers with Omnissa Horizon
- Using Automation to Create Optimized Windows Images for Horizon VMs
Changelog
The following updates were made to this guide:
| Date | Description of Changes |
| 2024-12-05 |
|
| 2024-11-01 |
|
| 2023-01-30 |
|
About the Authors and Contributors
Doug Arcidino : Staff Solutions Engineer (Subject Matter Expert), Omnissa.
Mike Erb : Staff Technical Marketing Architect, Omnissa.
Sujay Gopalan : Sr. Technical Marketing Architect, Omnissa.
Feedback
Your feedback is valuable. To comment on this paper, either use the feedback button or contact us at tech_content_feedback@omnissa.com .