Using sensors to enhance macOS management in Workspace ONE UEM

Introduction
Omnissa Workspace ONE UEM collects a limited set of device attributes about your corporate-owned macOS devices. But what if you need device information beyond that which UEM collects by default? Let’s say, for instance, you want to know how many of your macOS devices have an Intel-based CPU architecture as opposed to Apple silicon. Or perhaps you need to trigger a Freestyle Orchestrator workflow based on the battery health of your macOS devices. For either of these scenarios and many more, Sensors in Workspace ONE are the perfect option.
Sensors
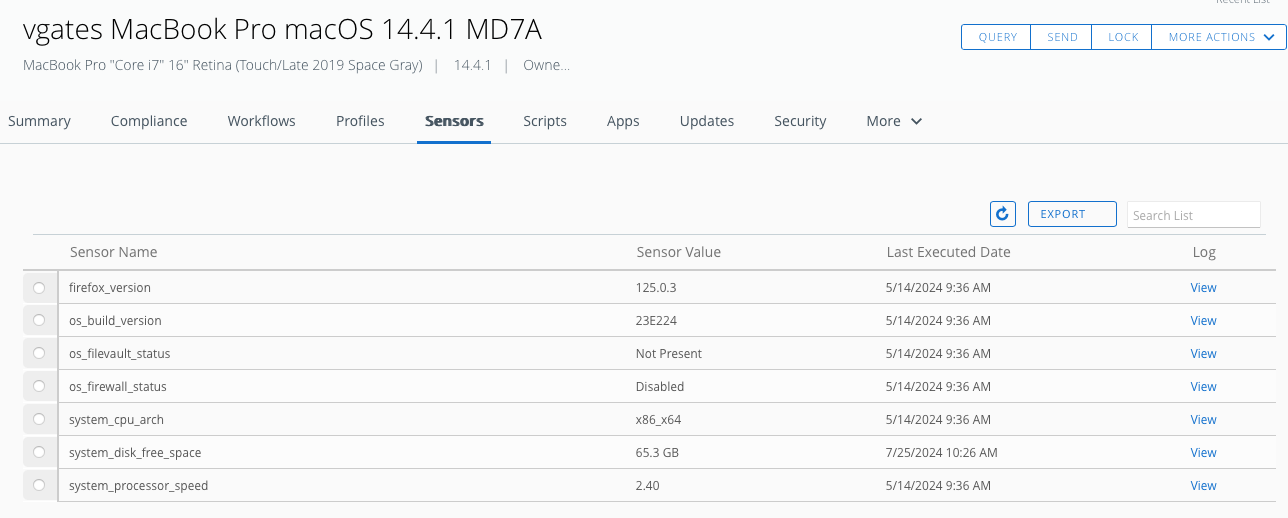
Sensors in Workspace ONE are custom scripts that return a specific value and are configured to run periodically or are triggered by system events, such as login, logout, and startup. The returned value of a Sensor for each device is displayed in the UEM console under the Sensors tab of the Device Details view. Additionally, sensor data can be displayed in Omnissa Intelligence, and used to trigger automation workflows in Freestyle Orchestrator. For privacy reasons, it is important to note that Sensors cannot be assigned to Employee-Owned devices.

For macOS, Sensors can be created using Bash, Python 3, and Zsh. All Sensor scripts must return a value that will be displayed in the UEM console. For instance, the following example script returns the name of the user currently logged into a macOS device.
#!/bin/zsh
loggedInUser=$( scutil <<< "show State:/Users/ConsoleUser" | awk '/Name :/ && ! /loginwindow/ { print $3 }' )
echo $loggedInUser
You can also define variables for your Sensors if dynamic information is required for execution. These variables are defined outside of the script and any data contained within them is protected with encryption both in transit and at-rest. Additionally, all Sensor data is encrypted using an AES-256 bit symmetric key and is transmitted to the UEM console using HTTPS. As you will see from some of the examples in this post, sensors can pull data from several sources, including plist files, executed commands, and others.
Creating a sensor
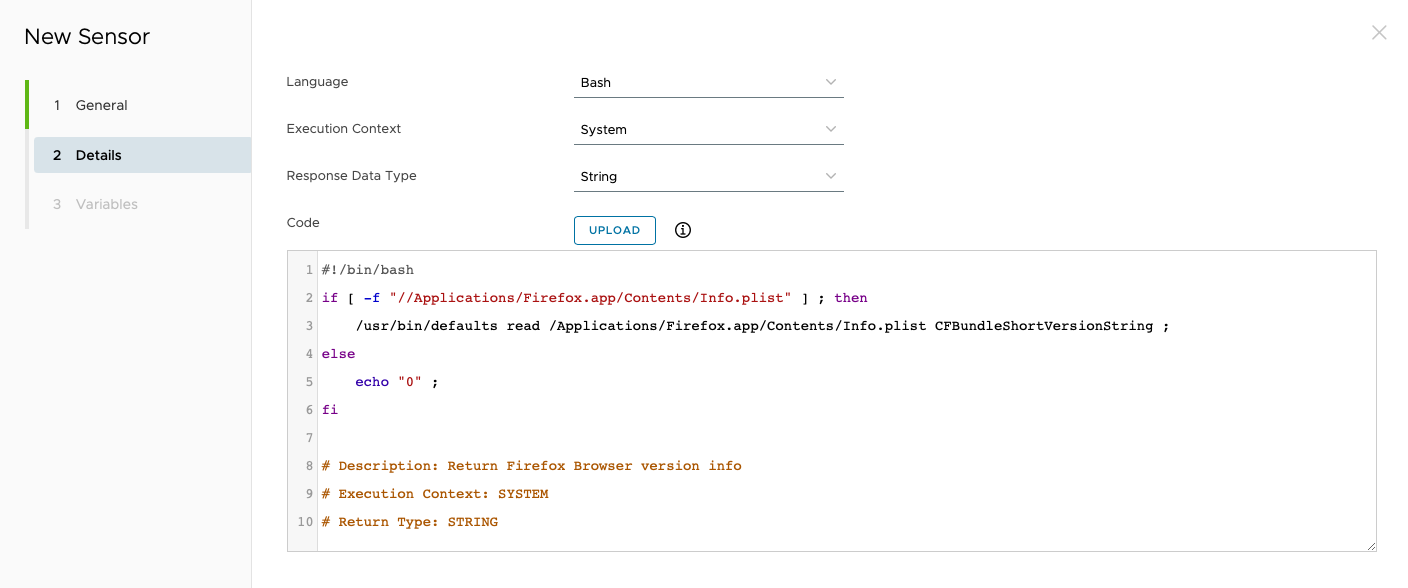
Creating a sensor is an easy process. From the Add dropdown, you select your platform. In this case, it would be macOS. After naming the sensor, you select the Language in which the script is written, the Execution Context, and the Response Data Type. The following table explains each of these options.
| Setting | Description |
| Language | For macOS, the languages available for sensors are Bash, Python 3, and Zsh. |
| Execution Context | The Execution Context identifies whether the script for the sensor will run in the system context or in the current user context. |
| Response Data Type | There are four response data types available: string, integer, Boolean, and date time. |

Once you’ve configured the sensor settings and added the script, you can then add variables to the sensor if required. Then, you assign the sensor to a Smart Group and Workspace ONE will begin collecting data from your macOS devices.
Using sensors for automation
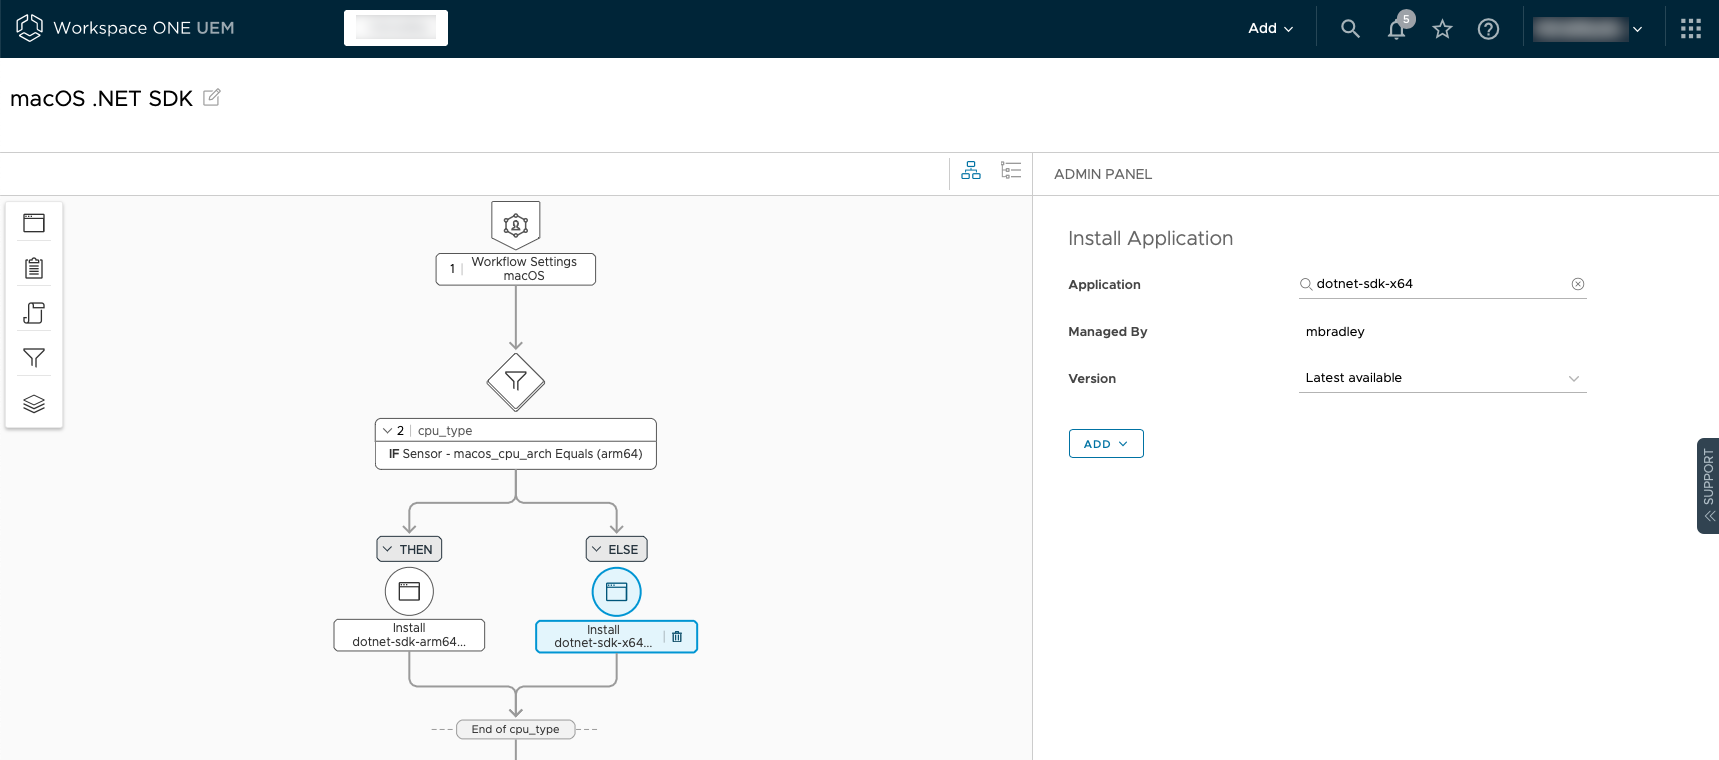
Sensors can be used to trigger automation workflows in Freestyle Orchestrator, and even as condition to define sequences within those workflows. For example, you might have an application with two installer packages: one for Intel-based macOS devices and one for Apple silicon devices. You’ll need to ensure that the correct installer package is used on the applicable device.
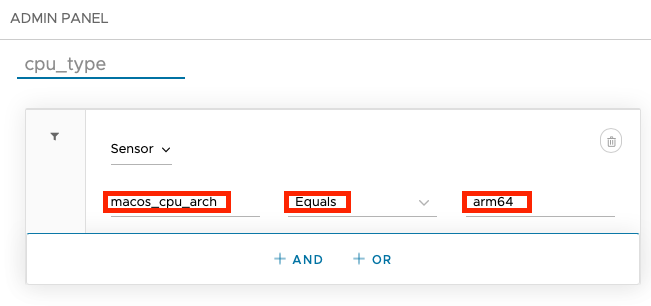
To do this, you first need to create a sensor called cpu_type that checks the CPU architecture on the macOS device using a script such as this:
#!/bin/zsh
PROC=$(/usr/sbin/sysctl -n machdep.cpu.brand_string)
if grep -q "Apple" <<< "$PROC"; then
 echo "arm64"
else
 if grep -q "Intel" <<< "$PROC"; then
     echo "x86_x64"
    else
     echo "unknown_cpu"
    fi
fi
This sensor returns one of three values: arm64 for Apple Silicon, x86_64 for Intel, or unknown_cpu for devices on which it cannot identify the CPU architecture.
Using Freestyle Orchestrator, you can create a workflow that evaluates the results of the sensor and, based on the CPU type reported, will deploy the appropriate installer package to the macOS devices.


Example macOS sensors
Here are a few examples of useful sensors for macOS devices. You can find these and other useful sensors in our repository on GitHub.
Determining the End Date for Apple Care Support
This sensor returns the end data for Apple Care Support from your macOS devices.
#!/bin/bash
currentUser=$(stat -f%Su /dev/console)
ACEplist="/Users/$currentUser/Library/Application Support/com.apple.NewDeviceOutreach/Warranty.plist"
if [ -f "$ACEplist" ];  then
  endDate=$(/usr/libexec/PlistBuddy -c "Print :coverageEndDate" "$ACEplist")
  date=$(date -j -f %s $endDate +%F)
  echo "$date"
else
  echo "Not Found"
fi
Checking the status of the Apple firewall on macOS devices
This sensor checks the status of the Apple firewall on your macOS devices. The sensor returns a status of either Enabled or Disabled.
#!/bin/bash
status=$(/usr/bin/defaults read /Library/Preferences/com.apple.alf globalstate)

if [ "$status" = "1"]; then
    echo "Enabled";
else
    echo "Disabled";
fi
Free space on the system disk
This sensor returns the free space available on the system disk of your macOS devices.
#!/bin/bash
free_space=$(/usr/sbin/diskutil info /| grep 'Available Space:\|Free Space' | awk '{print $4, $5}')
echo $free_space
Summary
Using Sensors as part of your macOS management strategy can complement the existing data collected by Workspace ONE UEM. Additionally, sensor data is useful for triggering automation workflows, which can ease the burden related to the execution of some mundane tasks, user onboarding, software and profile deployment and others. And, although it wasn’t discussed in detail, sensor data can also be used in Omnissa Intelligence, allowing you to generate reports and dashboards based on those sensors.
The examples shown in this post are simple, but the data that you can collect with a sensor is only limited by what is available on the device and your scripting skills.
For more information on managing macOS with Workspace ONE, check out these resources on Tech Zone.
- Getting Started with Freestyle Orchestrator on macOS Devices
- Configuring macOS Platform SSO Using Okta and Workspace ONE UEM
- Using Workspace ONE to Manage Operating System Updates on macOS Devices
