

Configuring Certificate Based Authentication in Entra ID
Overview
Omnissa provides this operational tutorial to help you with your Omnissa Workspace ONE® environment. In this tutorial, you configure certificate-based authentication in Microsoft Entra for Microsoft Office 365 applications. Procedures include configuring a certificate request template in Omnissa Workspace ONE® UEM, configuring Omnissa Workspace ONE® Boxer for certificate-based authentication in Exchange Online, and testing the configurations.
Audience
This operational tutorial is intended for IT professionals and Workspace ONE UEM administrators of existing production environments.
Knowledge of additional technologies such as network, VPN configuration, Omnissa Workspace ONE® Intelligence and Omnissa Workspace ONE® UEM is also helpful.
Configure Certificate-Based Authentication in Entra for Office 365
Certificate-based authentication for Microsoft Office 365 provides employees seamless access to email and other resources. Relying on client certificates simplifies authentication by eliminating the need for employee username and password combinations. Pairing certificate-based authentication for Office 365 with Omnissa Workspace ONE streamlines access for Windows, Android, and iOS devices.
This exercise helps you to configure certificate-based authentication in Entra for Microsoft Office 365. The procedures are sequential and build upon one another, so make sure that you complete each procedure in this section before going to the next procedure.
Benefits of Certificate-Based Authentication
The benefits of certificate-based authentication are as follows.
- Eliminate Brute-Force Threats – Certificate authentication replaces basic and NT LAN Manager (NTLM) authentication, eliminating the threat of password hack attacks.
- Ensure Device Compliance – Only compliant devices receive valid certificates. Therefore, requiring a valid certificate ensures the requesting device enrolled with Workspace ONE and meets the defined corporate policies.
- Manage the Certificate Lifecycle – Automate and control the request, revoke and renewal phases of the client certificate lifecycle.
- Integrate with Public Key Infrastructure (PKI) & Managed PKI Infrastructure – Workspace ONE uses a dedicated certificate authority (CA) and certificate to avoid conflicts with an organization’s other certificate deployments.
- Enforce Managed Credential Access to BYOD Devices – Workspace ONE UEM can provision managed certificates to Workspace ONE Boxer in a BYOD scenario. This allows end users the flexibility to access corporate email in a secure container without the need to enroll their device into the organization.
- Deploy Workspace ONE Boxer in conjunction with Entra Conditional Access – Entra Certificate-Based Authentication allows administrators to deploy Workspace ONE Boxer as an email client for Exchange Online in scenarios where approved client applications are required.
Prerequisites
Before you can perform the procedures in this tutorial, ensure the following components are installed and configured. For more information, see the Omnissa Workspace ONE UEM Documentation.
- Workspace ONE UEM tenant integrated with enterprise CA
- Access to root and intermediate (if applicable) certificates for the issuing CA
- Internet-facing URLs (reachable by Entra) for the Certificate Revocation Lists (CRLs) of the issuing CA
- Global admin access to Office 365 tenant
- Exchange ActiveSync client that supports certificate-based authentication
Introduction
Certificate-based authentication (CBA) provides a passwordless, phishing-resistant authentication method using X.509 certificates. This guide will walk you through setting up CBA in Microsoft Entra ID, based on the official Microsoft documentation.
Certificate Lifecycle Management and Device Management
Before diving into the CBA setup, it's crucial to understand certificate lifecycle management (CLM) and its integration with device management solutions like Workspace ONE UEM.CLM involves managing digital certificates throughout their entire lifecycle, from issuance to expiration and renewal.
Key aspects include:
- Certificate issuance
- Distribution and installation
- Monitoring and reporting
- Renewal and revocation
- Auditing and compliance
Workspace ONE UEM, as a mobile device management (MDM) solution, can automate many aspects of CLM on managed devices:
- Automatic certificate enrollment and distribution
- Centralized monitoring of certificate status
- Automated renewal processes
- Integration with enterprise PKI systems
Benefits of using an MDM for certificate management include:
- Reduced manual effort and human error
- Improved security through timely certificate updates
- Consistent policy enforcement across devices
- Simplified compliance reporting
Prerequisites
- A configured public key infrastructure (PKI)
- User access to client authentication certificates issued by a trusted PKI
- Global Administrator or Authentication Policy Administrator role
Setting Up Certificate-Based Authentication in Microsoft Entra ID
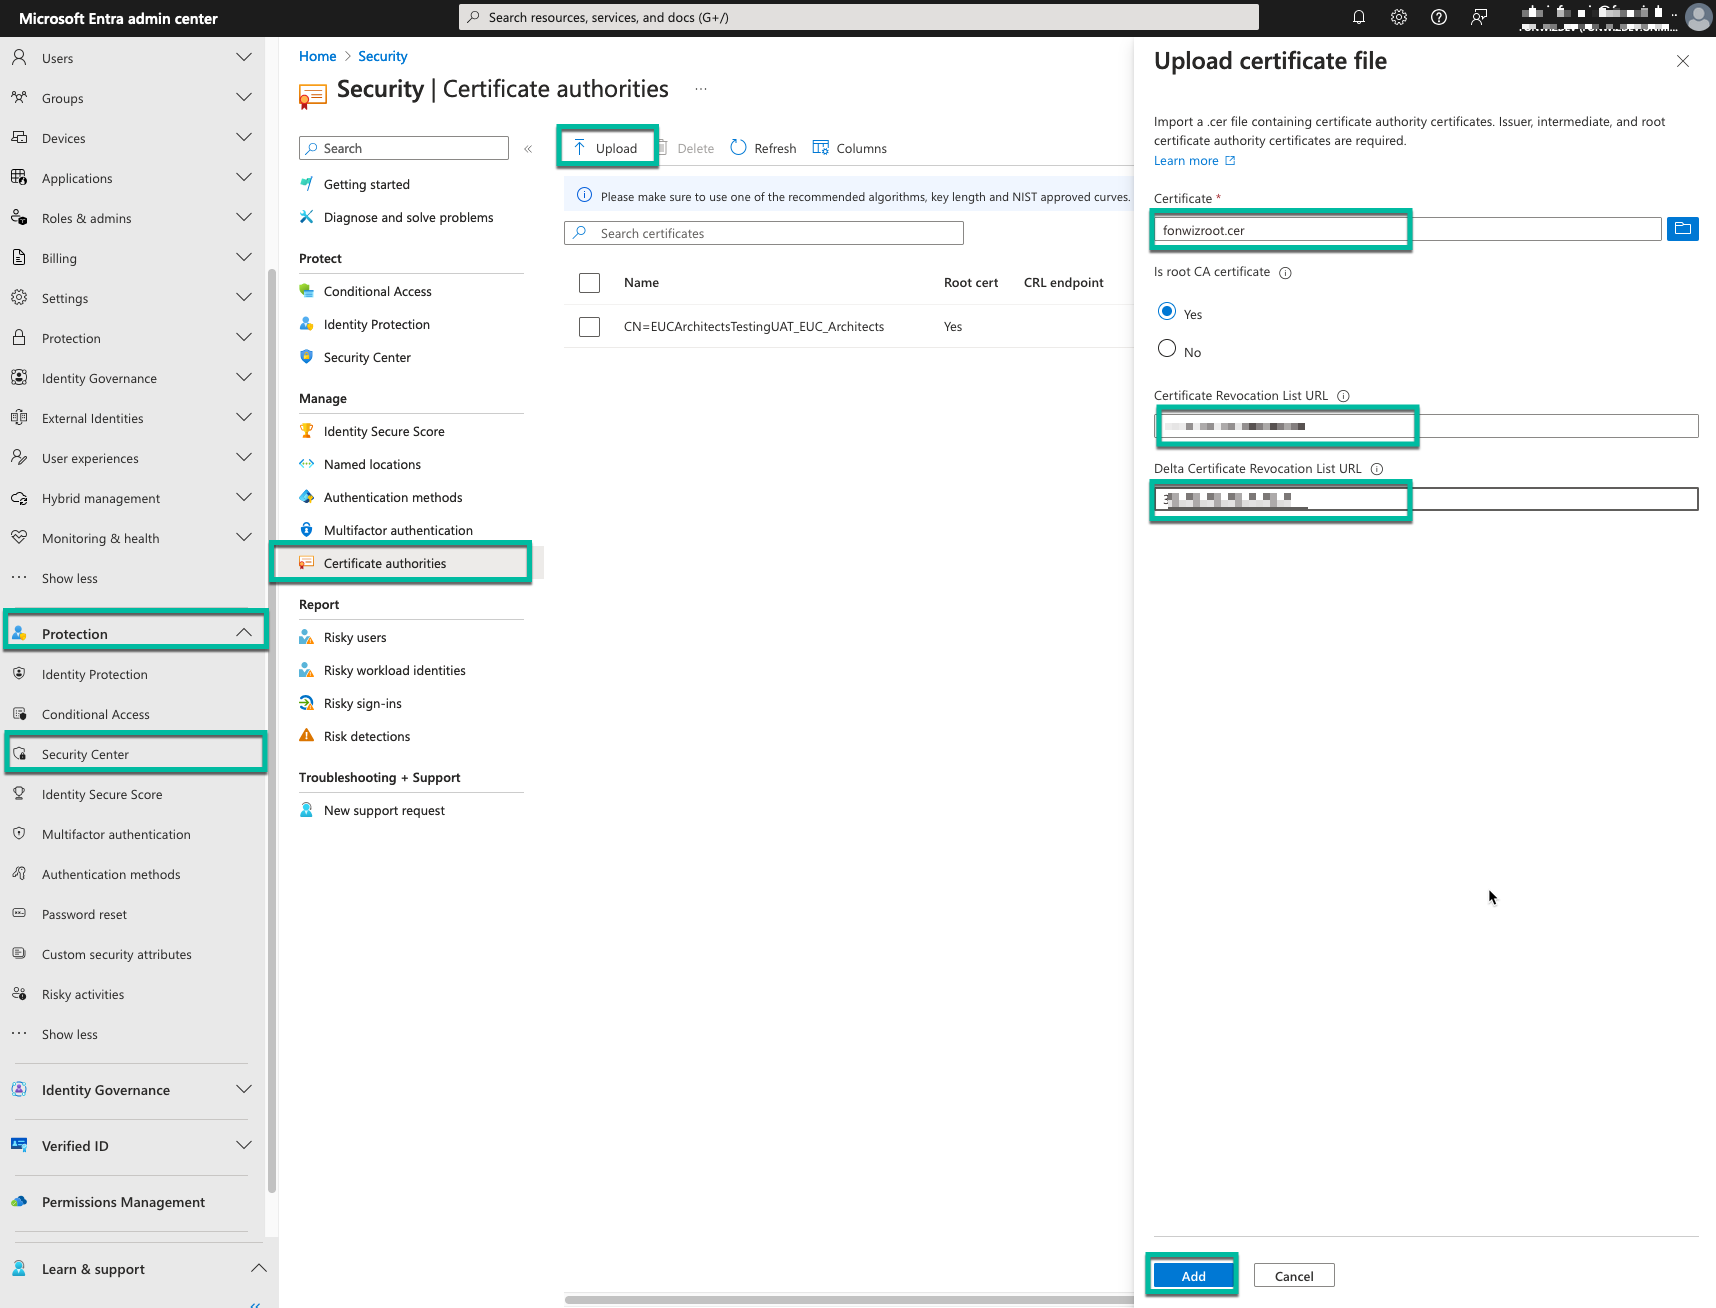
Step 1: Configure Certification Authorities
- Sign in to the Microsoft Entra admin center as a Global Administrator.
- Navigate to Protection > Security Center > Certificate authorities.
- Select Upload to add a new CA:
- Choose the CA file
- Specify if it's a root certificate
- Enter the Certificate Revocation List (CRL) URL (Entra only supports CRL, no OCSP so using the built in AirWatch CA which only supports OCSP is not recommended)
- Provide the Delta CRL URL (if applicable)
- Click Add
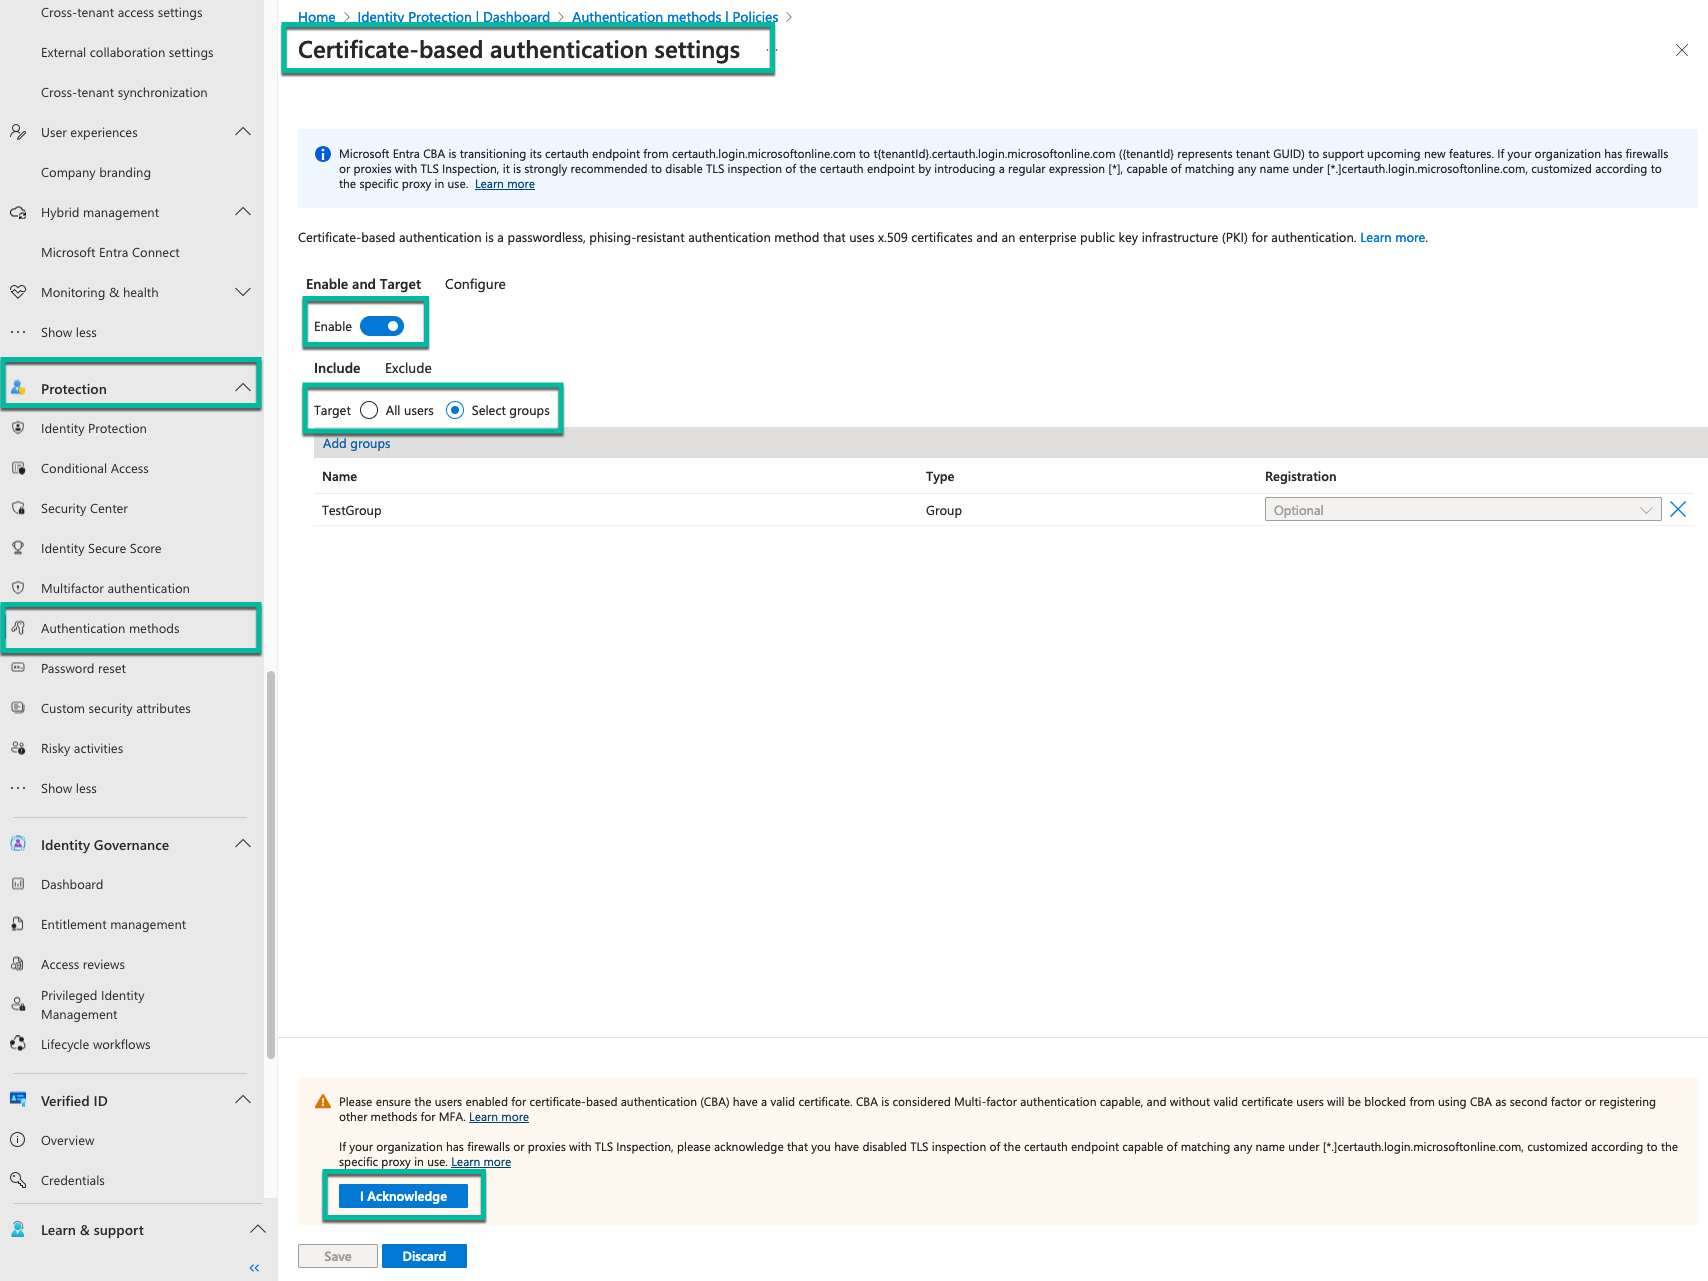
Step 2: Enable CBA on the Tenant
- Sign in to the Microsoft Entra admin center as an Authentication Policy Administrator.
- Go to Protection > Authentication methods > Certificate-based Authentication.
- Under Enable and Target, select Enable.
- Choose to target All users or specific groups (recommended).
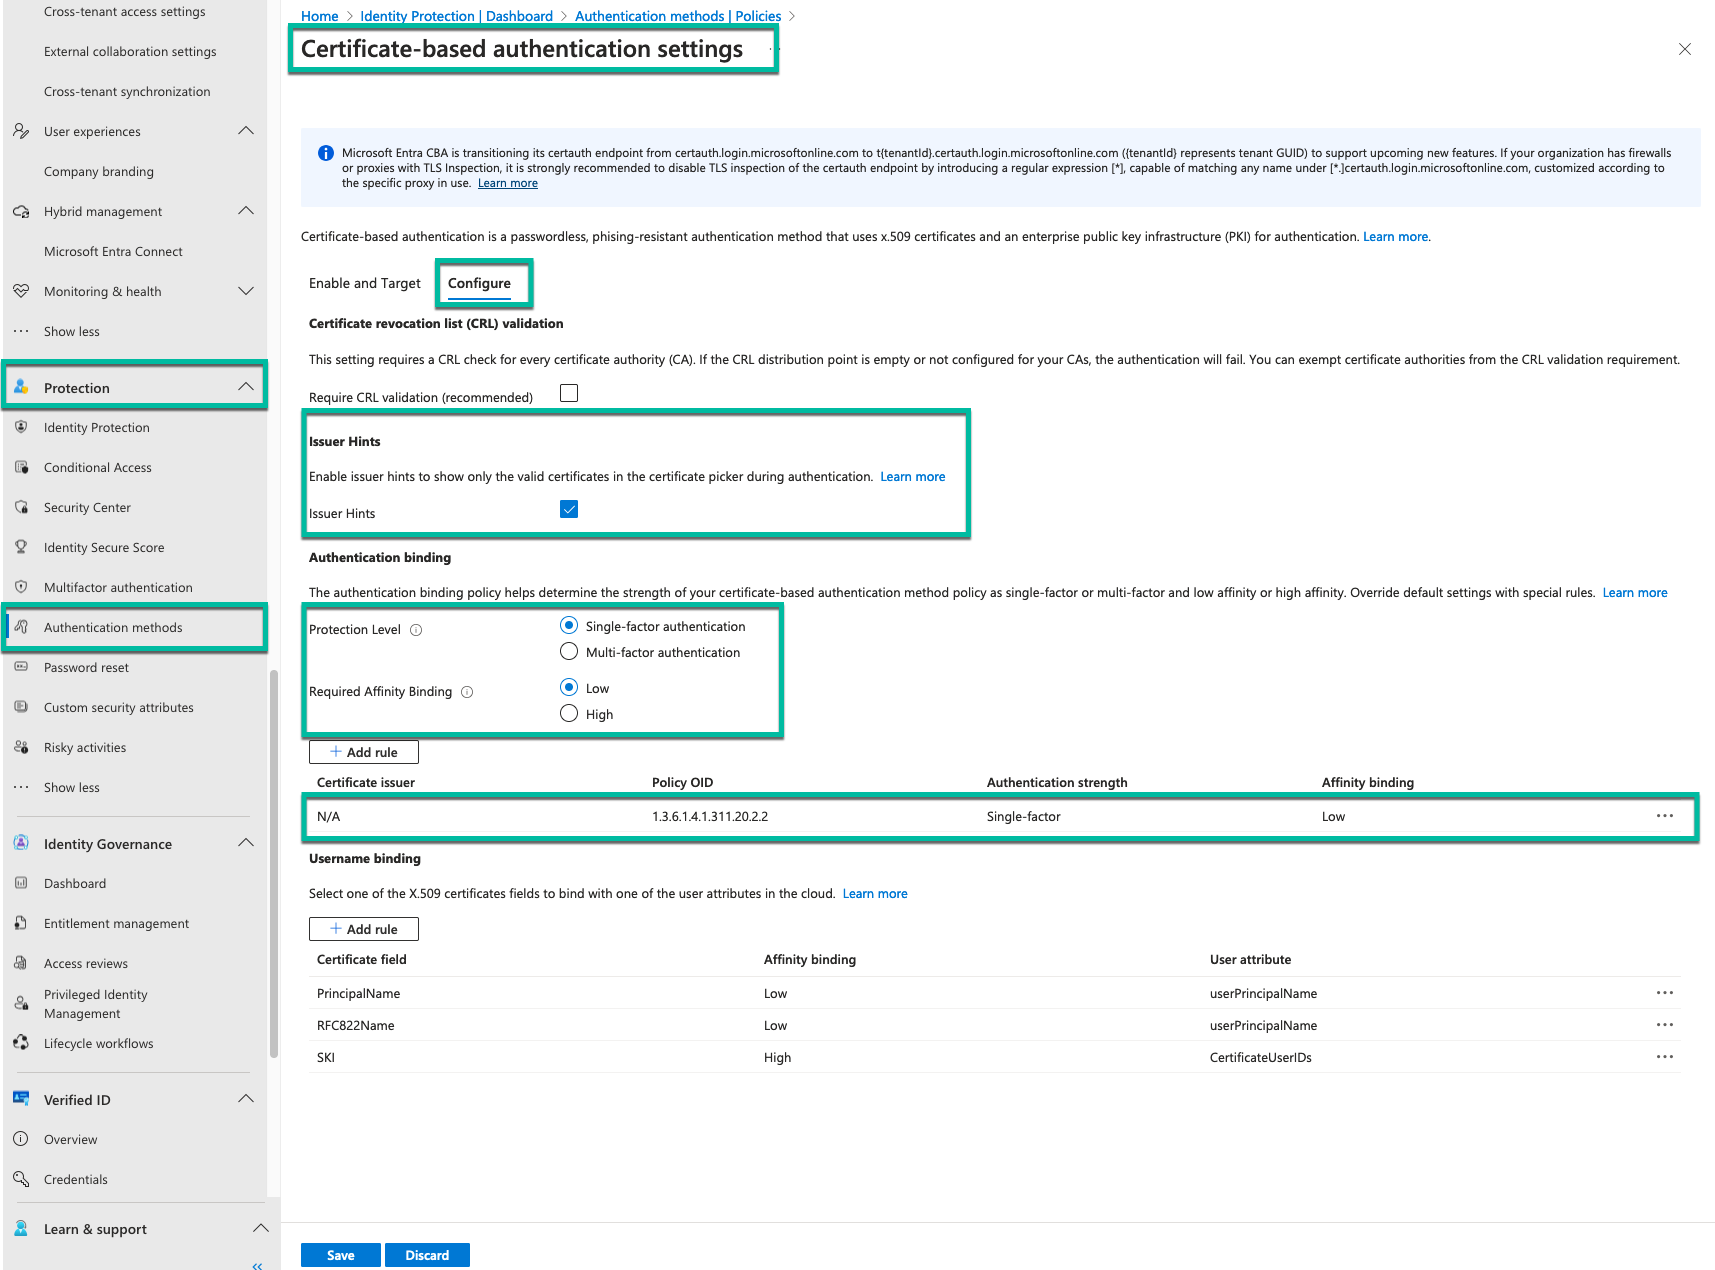
 Step 3: Configure Authentication Binding Policy
- In the Microsoft Entra admin center, go to Protection > Authentication methods > Policies.
- Select Certificate-based Authentication under Manage.
- Click Configure to set up authentication binding.
- Set the default protection level (Single-factor or Multifactor).
- Add custom rules if needed, based on certificate issuer or Policy OID.
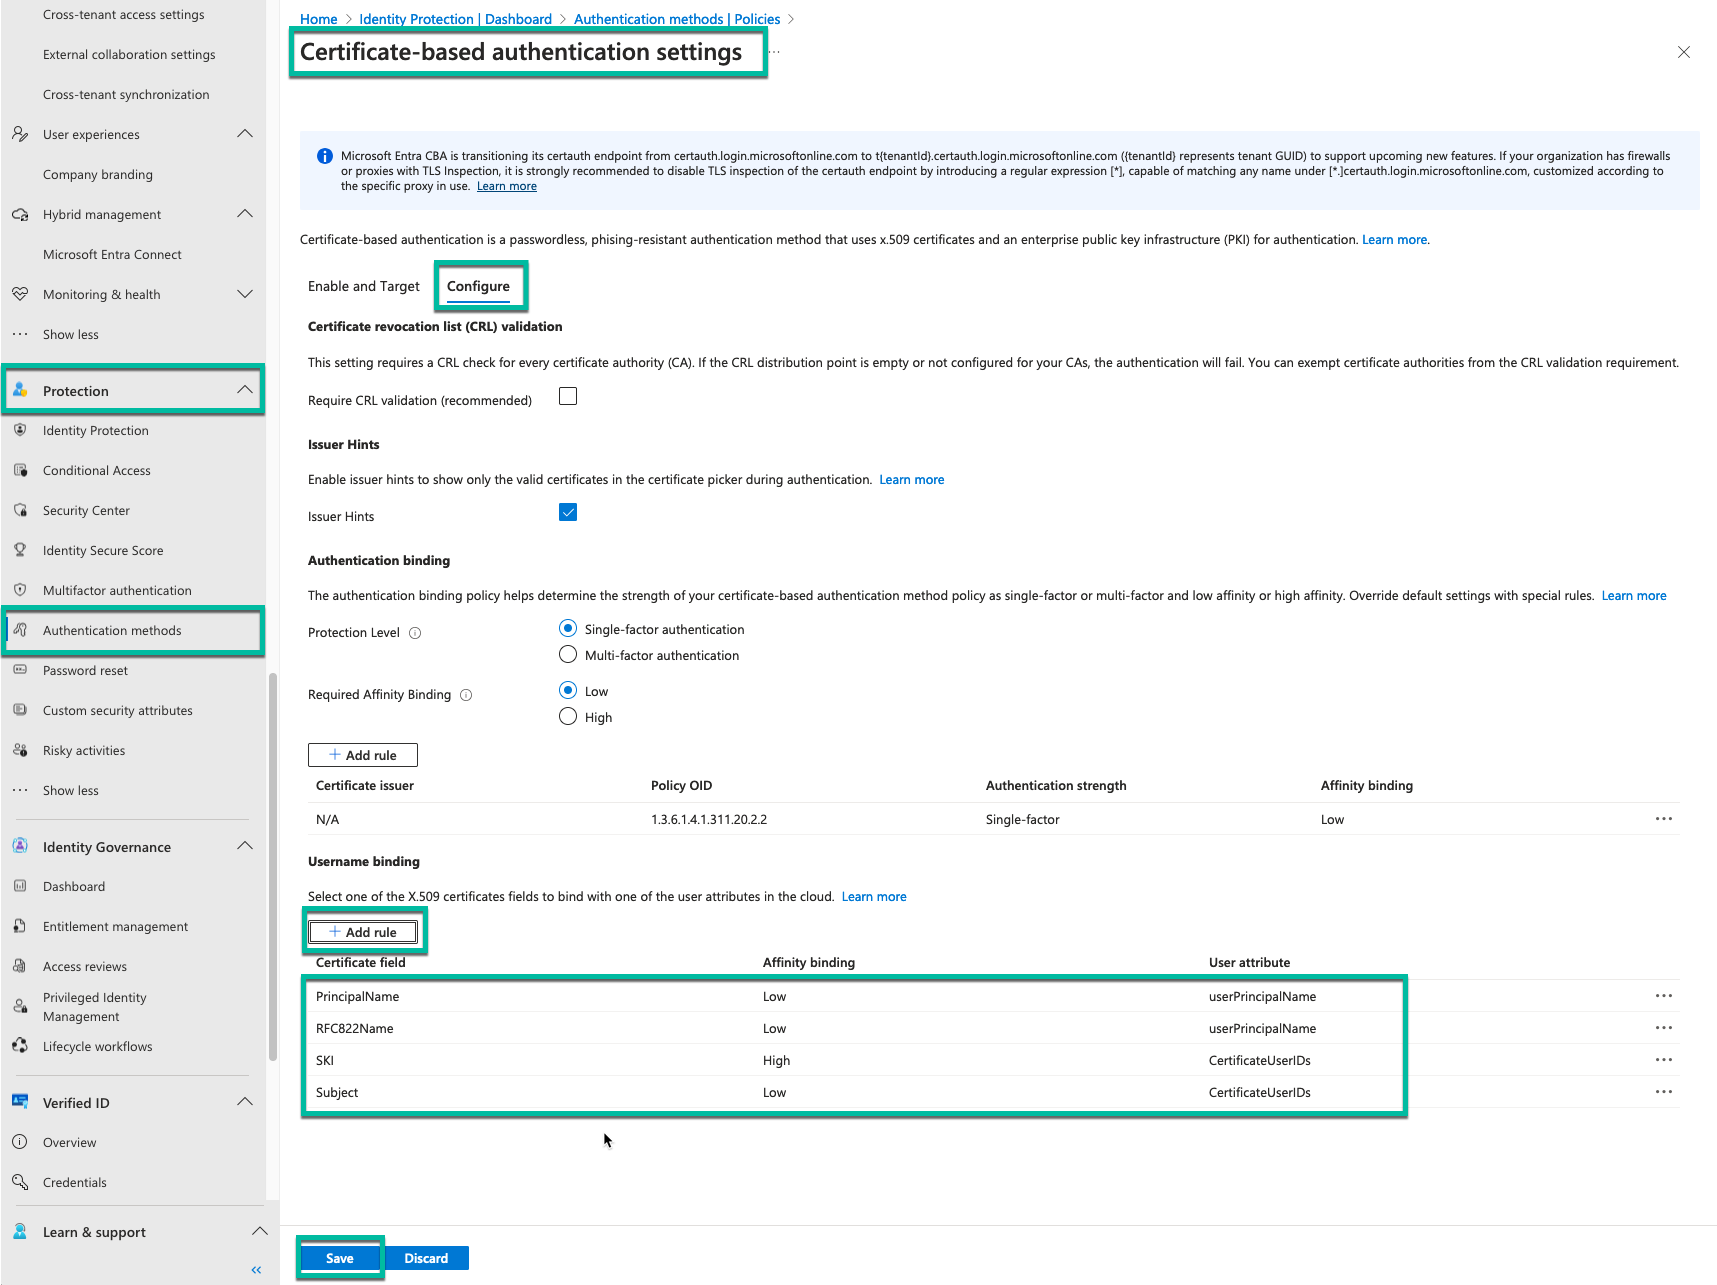
Step 4: Configure Username Binding Policy
- In the same configuration page, scroll to the Username Binding section.
- Create bindings between X.509 certificate fields and user attributes.
- Set the priority order for these bindings.
- Click Save to apply changes.
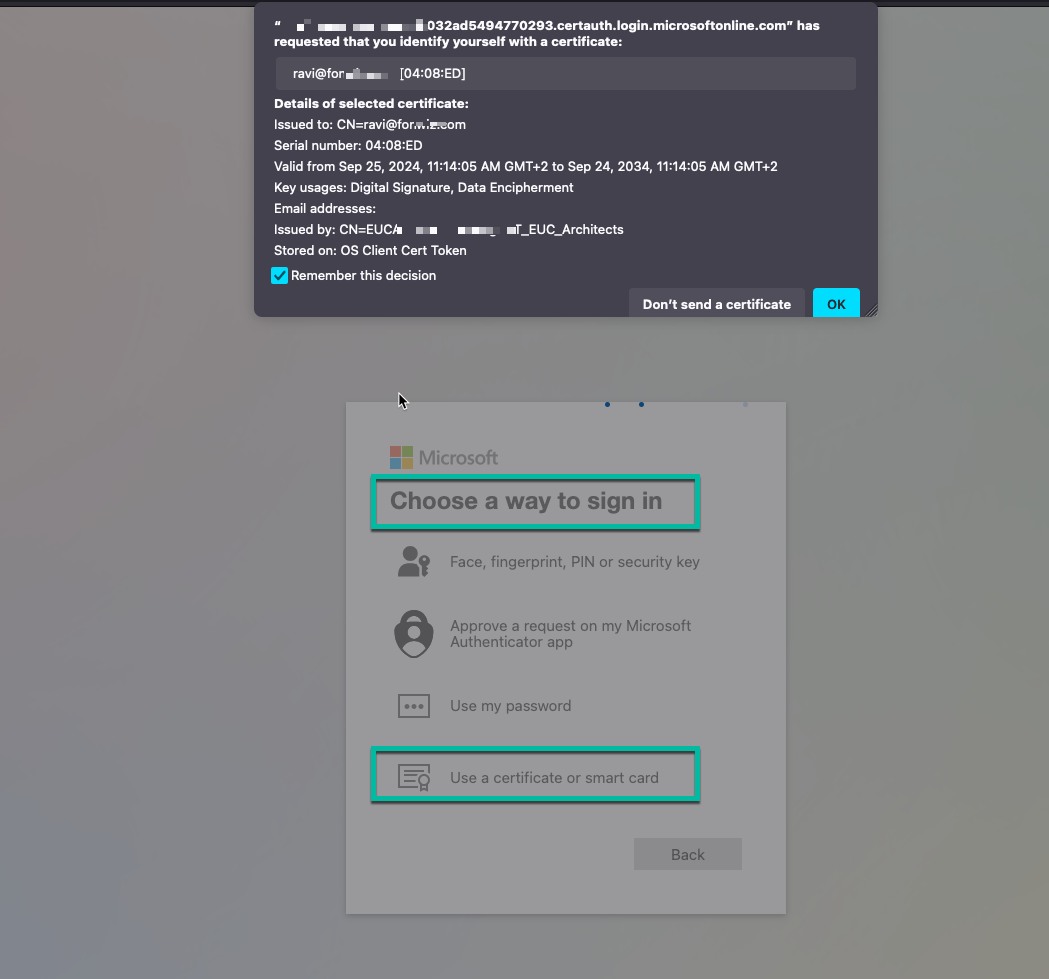
Step 5: Test Your Configuration
- Navigate to the MyApps portal using an on-device browser.
- Enter your User Principal Name (UPN) and select Next.
- Choose Sign in with a certificate.
- Select the appropriate user certificate when prompted.
- Verify successful sign-in to the MyApps portal.
Enforcing CBA with Authentication Strengths and Conditional Access
To ensure the use of certificate-based authentication for Office 365 apps, you can leverage authentication strengths and Conditional Access policies:
- Define an authentication strength for CBA:
- In the Microsoft Entra admin center, go to Protection > Authentication methods> Authentication strengths.
- Create a new strength that includes certificate-based authentication.
- Create a Conditional Access policy:
- Go to Protection > Conditional Access > Policies.
- Create a new policy targeting Office 365 apps.
- Under Access controls, select Require authentication strength and choose the CBA strength you created.
This configuration will enforce the use of certificate-based authentication for accessing Office 365 applications.
Additional Considerations
- Regularly review and update your CA configurations
- Monitor sign-in logs for CBA-related events
- Consider implementing Conditional Access policies in conjunction with CBA
Additional Resources
For more detailed information and limitations of CBA in Microsoft Entra ID, refer to the following Microsoft documentation:
- How to configure certificate-based authentication in Entra ID
- Certificate-based authentication limitations
Sample Script for CA Configuration and CBA Enablement
Here's a basic PowerShell script to demonstrate the process of adding a certificate authority and enabling CBA:
# Create Certificate Authority
Import-Module Microsoft.Graph.Identity.SignIns

# Create params payload
$params = @{
 certificateAuthorities = @(
  @{
   isRootAuthority = $true
   certificate = [System.Text.Encoding]::ASCII.GetBytes("Binary")
  }
 )
}

New-MgOrganizationCertificateBasedAuthConfiguration -OrganizationId $organizationId -BodyParameter $params


# Connect to Microsoft Graph
Connect-MgGraph -Scopes "Policy.ReadWrite.AuthenticationMethod"

# Create a variable for defining group for CBA users
$group = Get-MgGroup -Filter "displayName eq 'CBATestGroup'"

# Define the request body
$body = @{
"@odata.type" = "#microsoft.graph.x509CertificateAuthenticationMethodConfiguration"
"id" = "X509Certificate"
"state" = "enabled"
"certificateUserBindings" = @(
    @{
        "@odata.type" = "#microsoft.graph.x509CertificateUserBinding"
        "x509CertificateField" = "SubjectKeyIdentifier"
        "userProperty" = "certificateUserIds"
        "priority" = 1
    },
    @{
        "@odata.type" = "#microsoft.graph.x509CertificateUserBinding"
        "x509CertificateField" = "PrincipalName"
        "userProperty" = "UserPrincipalName"
        "priority" = 2
    },
    @{
        "@odata.type" = "#microsoft.graph.x509CertificateUserBinding"
        "x509CertificateField" = "RFC822Name"
        "userProperty" = "userPrincipalName"
        "priority" = 3
    }
)
"authenticationModeConfiguration" = @{
    "@odata.type" = "#microsoft.graph.x509CertificateAuthenticationModeConfiguration"
    "x509CertificateAuthenticationDefaultMode" = "x509CertificateMultiFactor"
    "rules" = @(
        @{
            "@odata.type" = "#microsoft.graph.x509CertificateRule"
            "x509CertificateRuleType" = "policyOID"
            "identifier" = "1.3.6.1.4.1.311.21.1"
            "x509CertificateAuthenticationMode" = "x509CertificateMultiFactor"
        }
    )
}
"includeTargets" = @(
    @{
        "targetType" = "group"
        "id" = $group.Id
        "isRegistrationRequired" = $false
    }
) } | ConvertTo-Json -Depth 5

#Execute the PATCH request
Invoke-MgGraphRequest -Method PATCH -Uri "https://graph.microsoft.com/v1.0/policies/authenticationMethodsPolicy/authenticationMethodConfigurations/x509Certificate" -Body $body -ContentType "application/json"
Configuring Workspace ONE UEM to deploy the User certificates
Logging in to Workspace ONE UEM Console
See Logging in to the Console in Omnissa Docs.
Configuring a Certificate Request Template in Workspace ONE UEM
After you have configured certification authentication in Entra, you are ready to configure the certificate request template in Workspace ONE UEM.
- In the Workspace ONE UEM console, navigate to All Settings.
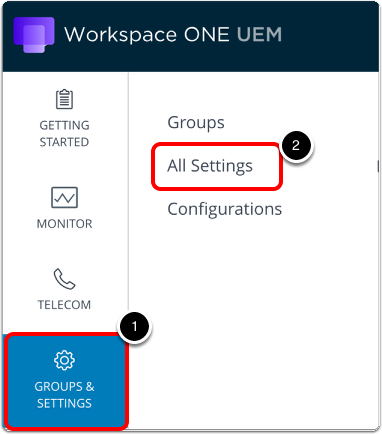
- Click Groups & Settings.
- Click All Settings.
- Add new Certificate Request Template.
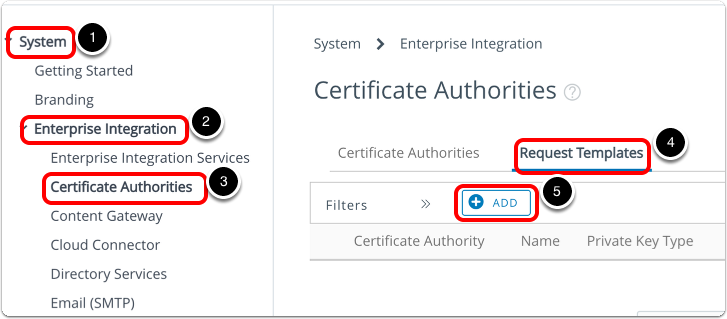
- Navigate to System > Enterprise Integration > Certificate Authorities.
- Select Request Templates.
- Click Add.
- Configure Certificate Request Template.
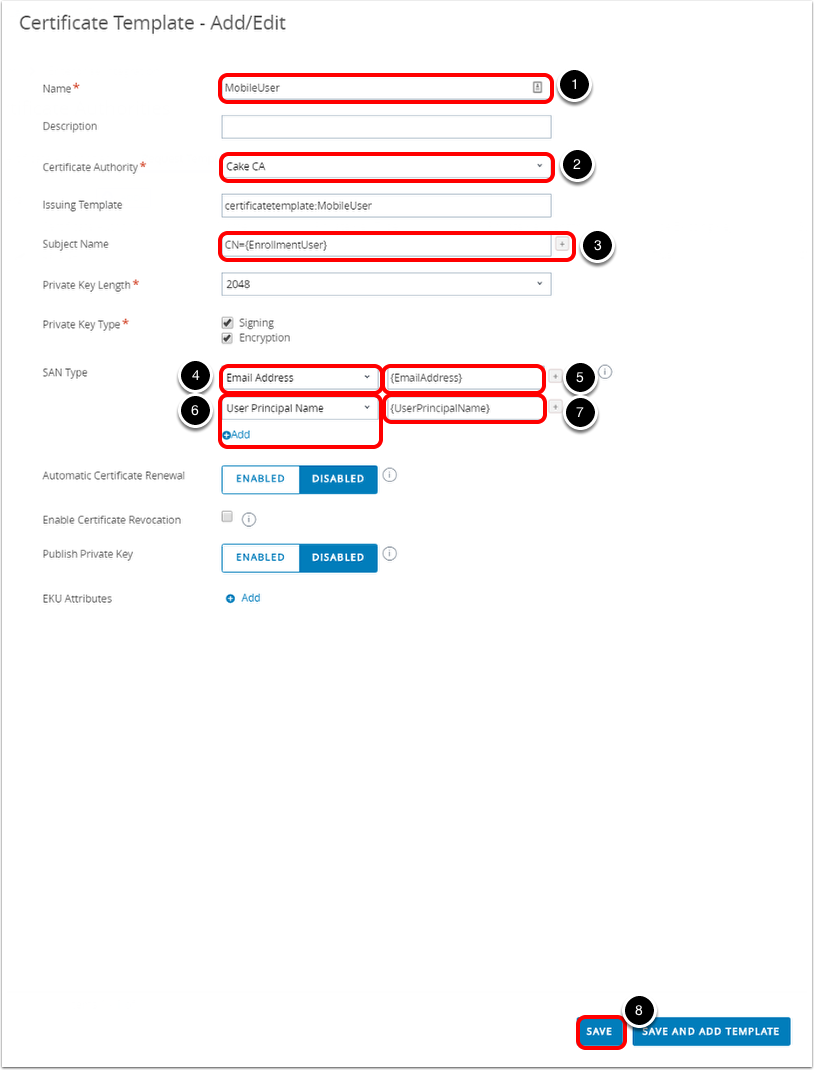
- Enter a name for the new certificate request template. For example,
MobileUser. - Select the configured certificate authority from the drop-down menu. For example,
Cake CA. - For Subject Name, click the + icon and select {EnrollmentUser} from the drop-down menu. The value displayed should be CN={EnrollmentUser}.
- Select Email Address from the SAN Type drop-down menu.
- Select {EmailAddress} from the Lookup value drop-down menu.
- Click Add and select User Principal Name from the SAN Type drop-down menu.
- Select {UserPrincipalName} from the Lookup value drop-down menu.
- Click Save.
Configuring Workspace ONE Boxer for Certificate-Based Authentication with Exchange Online
After you have configured the certificate request template in Workspace ONE UEM, you are ready to add Workspace ONE Boxer in Workspace ONE UEM and configure the app for certificate-based authentication with Exchange Online.
- In the Workspace ONE UEM console, add new public application.
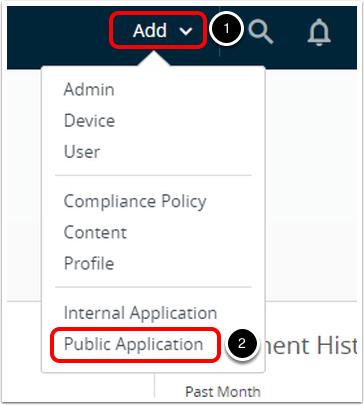
- Click Add > Public Application.
- Search for Workspace ONE Boxer.
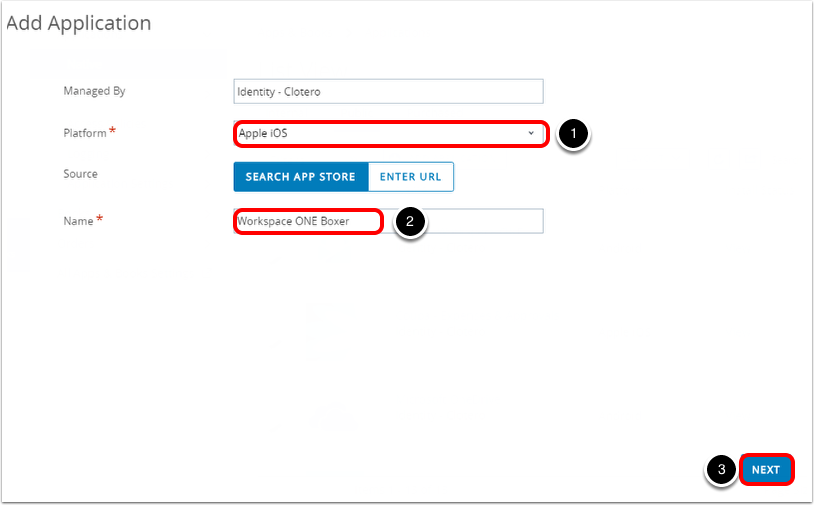
- Select Apple iOS from the Platform drop-down menu.
- Enter
Workspace ONE Boxerin the Name text box. - Click Next.
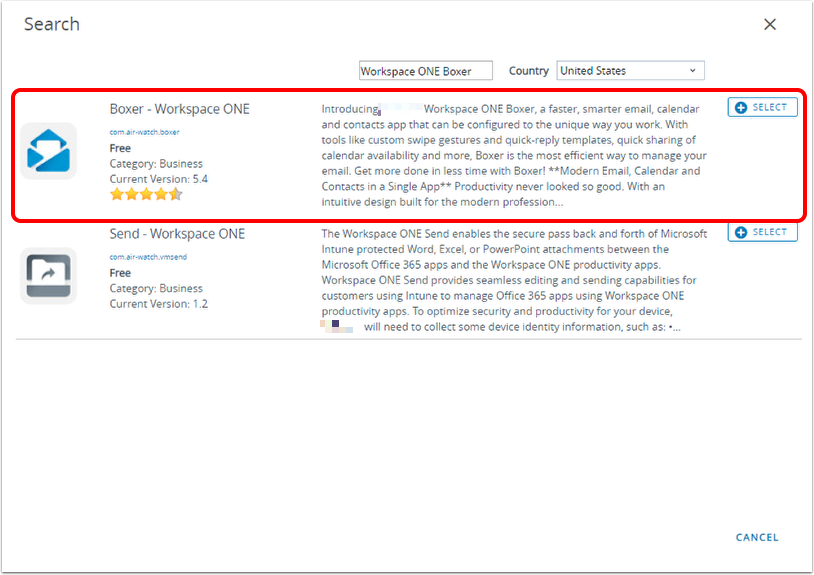
- Click Select to select the Boxer - Workspace ONE application.
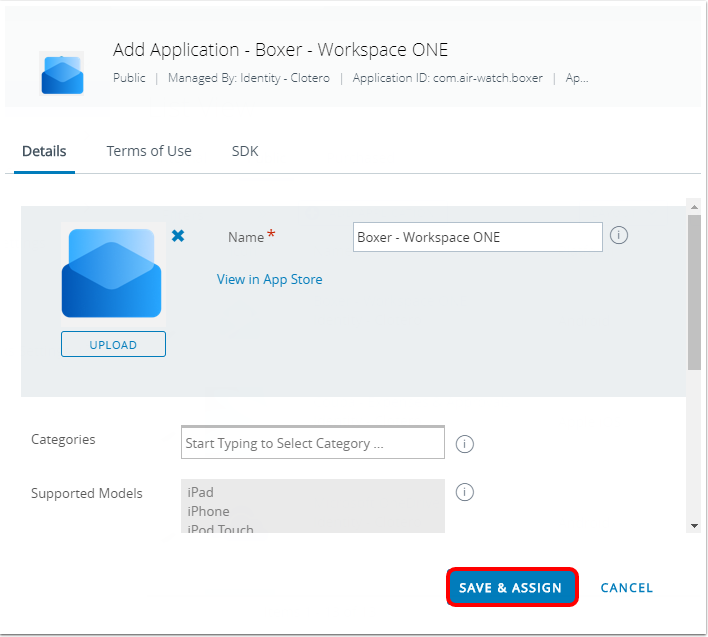
- Click Save & Assign.
- Click Add Assignment to create a new assignment configuration.

- Select smart group assignment.
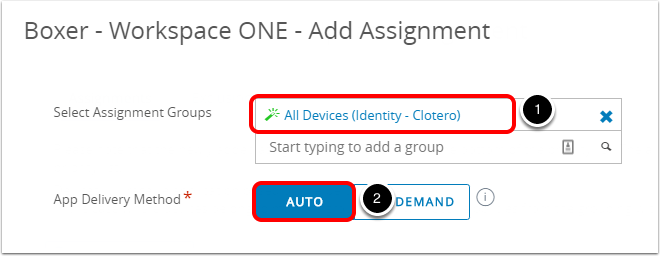
- Select a Smart Group from the Select Assignment Group drop-down menu. For example,
All Devices. - Select Auto as the App Delivery Method.
- Configure email account settings.
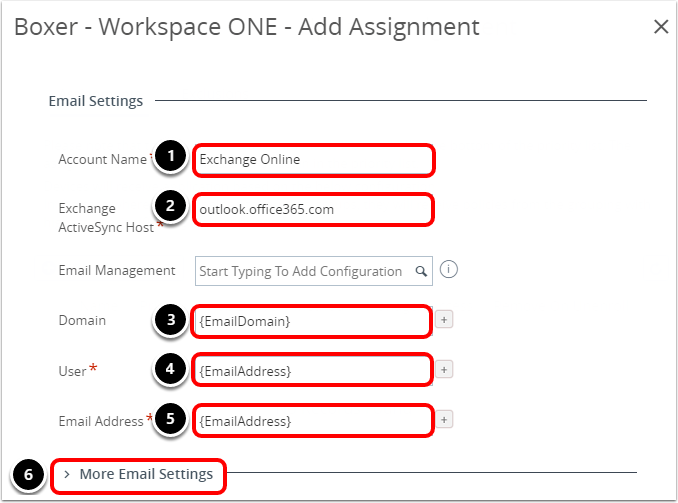
- Enter a name for Account Name. For example,
Exchange Online. - Enter the Exchange Online ActiveSync host address. For example, outlook.office365.com.
- Enter {EmailDomain} as the Domain value.
- Enter {EmailAddress} as the User value.
- Enter {EmailAddress} as the Email Address value.
- Click Authentication.
- Configure email account authentication settings.
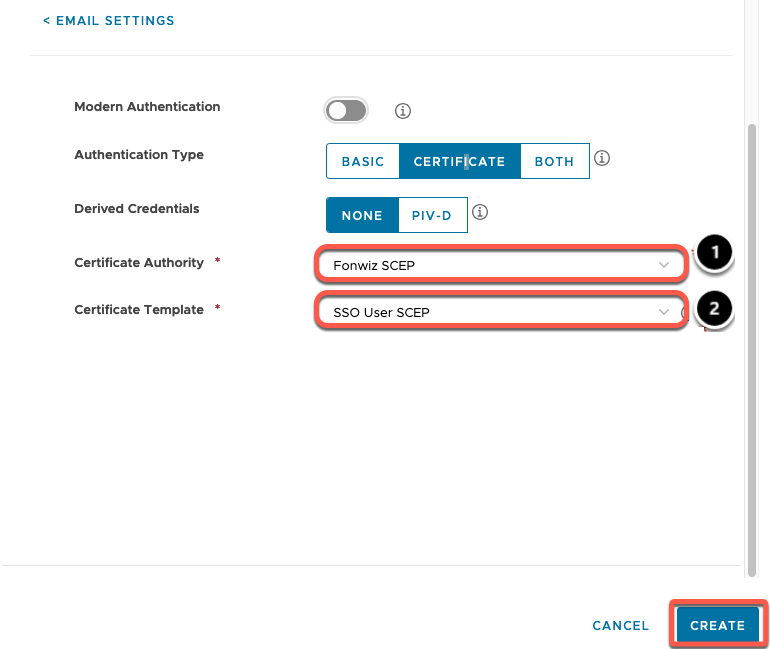
- Select your issuing certificate authority from the Certificate Authority drop-down menu. For example, Cake CA.
- Select the certificate template created for this configuration from the Certificate Template drop-down menu. For example, MobileUser.
- Click Create.
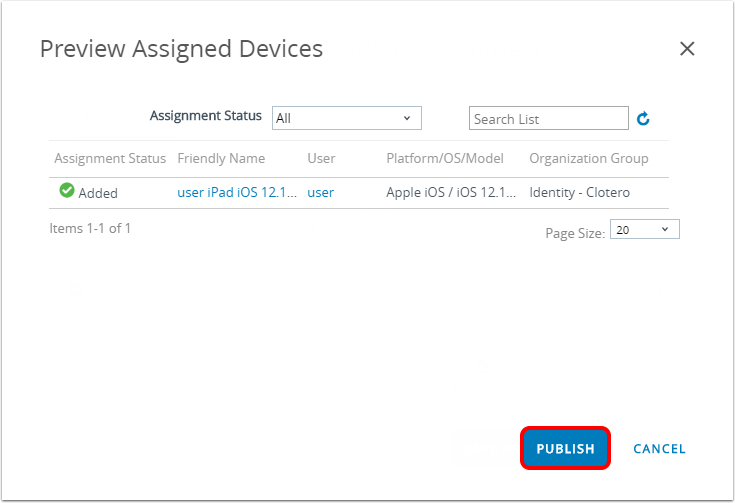
- Click Save & Publish.
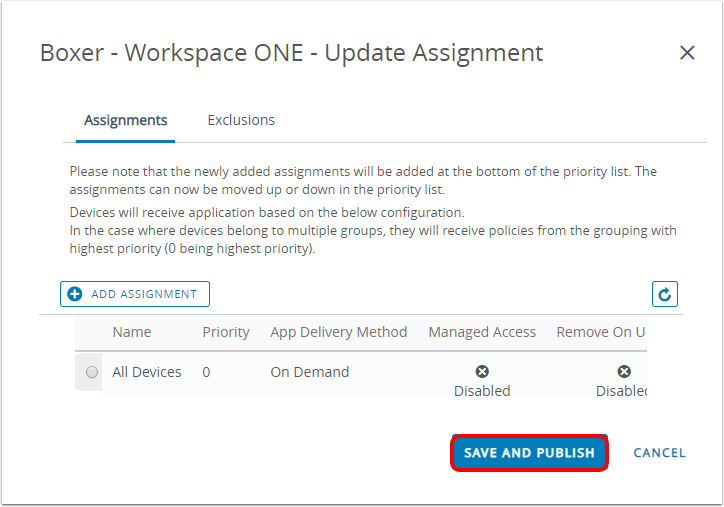
- Review the device assignment and click Publish.
Testing Certificate-Based Authentication to Office 365 Applications
After certificate-based authentication has been configured, you can test authentication to your Office 365 apps. In this activity, you log in to Workspace ONE and launch your Office 365 apps using certificate-based authentication; that is, without entering user credentials a second time.
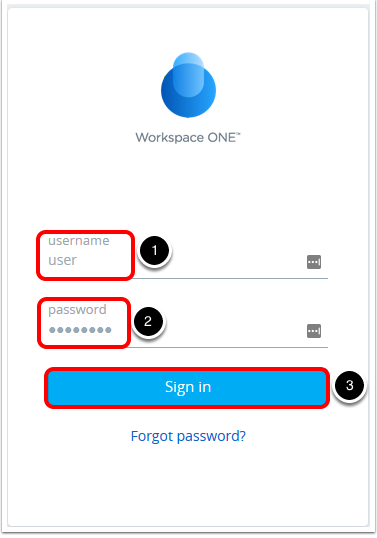
- Navigate to your Workspace ONE UEM tenant and enter the domain credentials for your test user. Click Sign in.
- Click any Office 365 app – it should launch without requiring credentials.

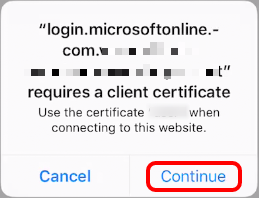
- (Optional) Confirm the prompt to use certificate.
- Click Continue to allow to use the client certificate and your application should start without requiring any username or password.
Creating Authentication Fallback Policy in Federation Provider
Configuring certificate authentication within Entra should be considered optional from Exchange Online's perspective. If the client application cannot present a valid certificate during authentication, Exchange Online falls back to the configured, federation provider as part of the WS-federation active flow or passive flow if moderna authentication was configured.
Log in to the Omnissa Access administration console to perform these steps.
- Add new active flow policy.
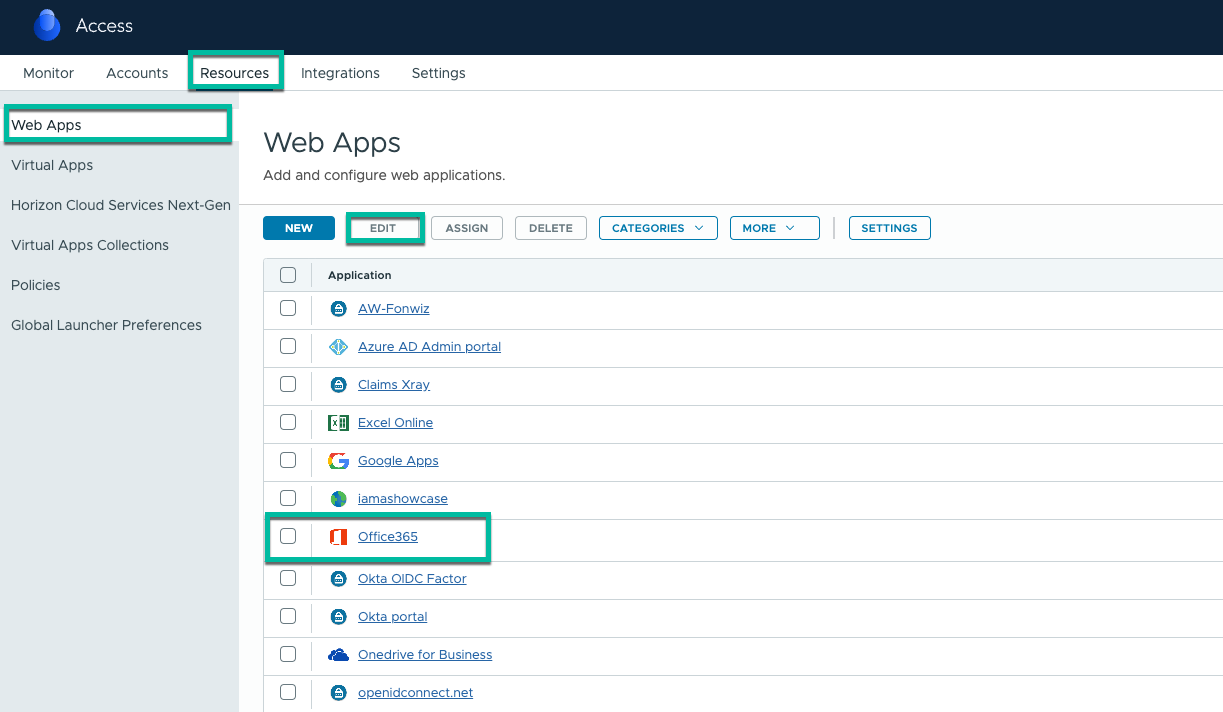
- Select Resources.
- Select Web Apps.
- Edit the Office 365 app.
- Configure Access Policies.
- Click Add Policy Rule.
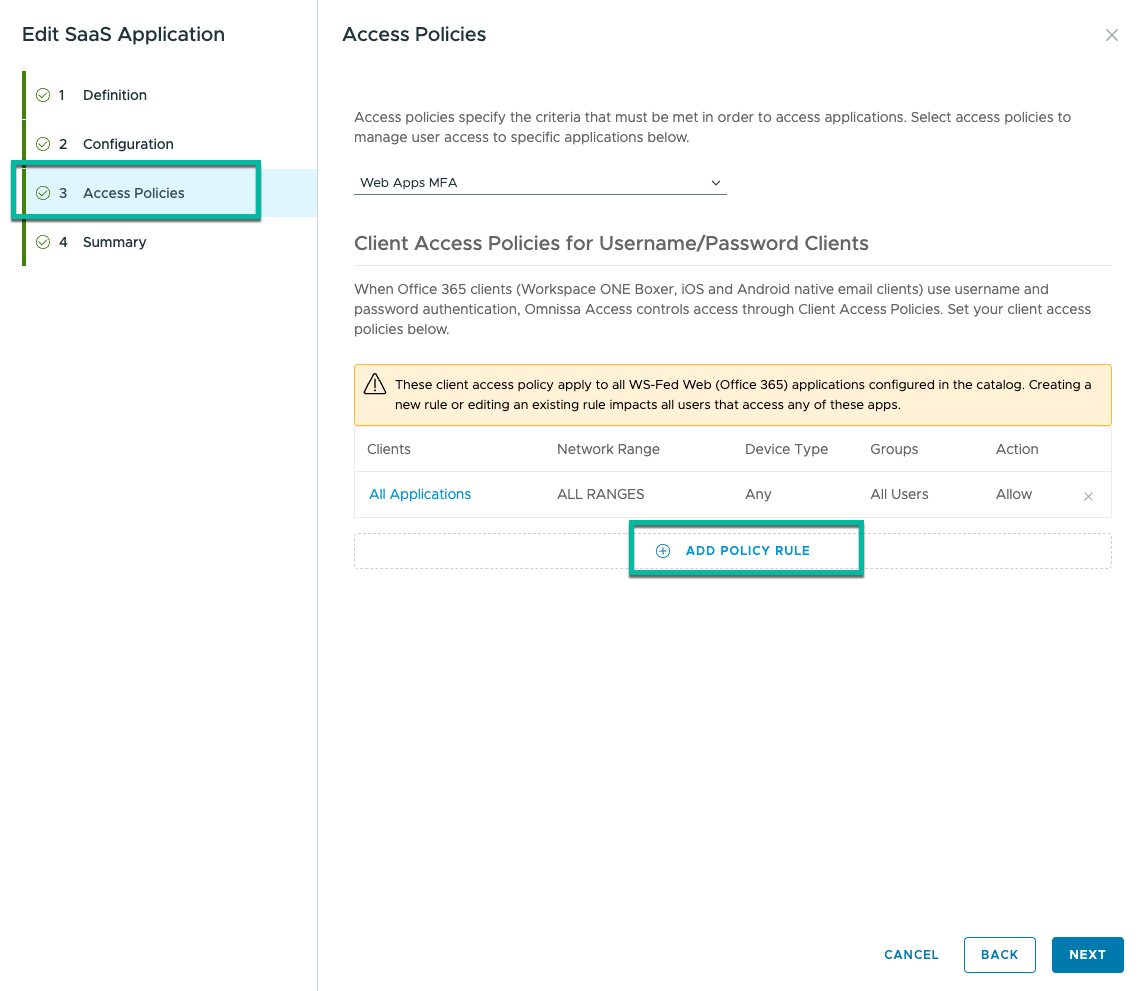
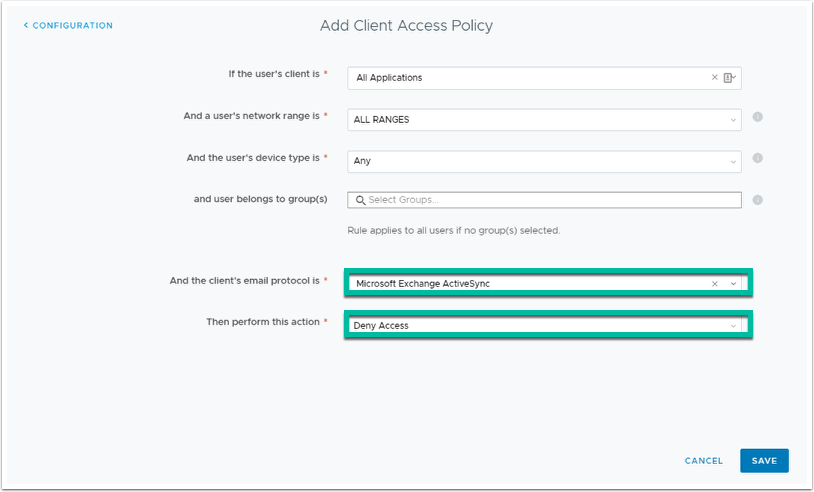
- Configure Policy Rule.
- If you want to block client applications from authentication using basic credentials (username/password), you must create a policy within the federation provider for Exchange Online to block. The screenshot shows an example of this policy where Office 365 is federated with Workspace ONE Access and incoming ActiveSync active client requests are blocked.
Summary and Additional Resources
This operational tutorial provided steps to configure certificate-based authentication in Entra for Office 365 applications.
Procedures included:
- Configuring Certificate-Based Authentication in Entra
- Configuring a Certificate Request Template in Workspace ONE UEM
- Configuring Workspace ONE Boxer for Certificate-Based Authentication with Exchange Online
- Testing Certificate-Based Authentication to Office 365 Applications
Additional Resources
For more information about Workspace ONE, explore the Omnissa Workspace ONE UEM Product page. The activity path provides step-by-step guidance to help you level up in your Workspace ONE knowledge. You will find everything from beginner to advanced curated assets in the form of articles, videos, and labs.
Additionally, you can check out the Omnissa Workspace ONE and Omnissa Horizon Reference Architecture which provides a framework and guidance for architecting an integrated digital workspace using Omnissa Workspace ONE and Omnissa Horizon.
Changelog
Create a new row at the top of the table, and enter a summary of relevant changes. Don’t include reformatting changes, minor rebranding, and other internal changes.
The following updates were made to this guide:
| Date | Description of Changes |
| 2024/11/11 |
|
| 2019/06/13 |
|
About the Author and Contributors
This tutorial was written by:
- Sascha Warno, Staff Architect Identity & Security Solutions
- Shardul Navare, Omnissa alumni.
- Camilo Lotero, Omnissa alumni.
Feedback
Your feedback is valuable.
To comment on this paper, contact End-User-Computing Technical Marketing at tech_content_feedback@omnissa.com.