Workspace ONE ITSM Connector for ServiceNow expands support to multiple UEM and Intelligence tenants

The Workspace ONE ITSM Connector for ServiceNow helps you streamline service desk operations by surfacing Workspace ONE Unified Endpoint Management (UEM) device data and actions and Omnissa Intelligence tools directly in the ServiceNow Incident screen, so access to these other consoles is not required for L1 and L2 support agents, reducing mean time to resolution (MTTR) and training requirements. When released, the ITSM Connector for ServiceNow could only ingest data from a single Workspace ONE UEM tenant. However, many Workspace ONE customers have multiple UEM tenants, for different business units or child companies for example.
Now the Workspace ONE ITSM Connector can ingest data from up to five different UEM and Intelligence tenants. This blog will walk you through how to configure additional UEM and Intelligence tenants in the ITSM Connector for ServiceNow.
Prerequisites
The following steps assume that the Workspace ONE ITSM Connector is already installed in your ServiceNow instance and has been configured to connect to one UEM tenant and one Intelligence tenant. The below steps describe adding the second and subsequent (up to five) UEM and Intelligence tenants.
Also, the steps to add additional UEM tenants will differ slightly depending on the ServiceNow version. The Washington version added steps to access these connection settings, so verify your ServiceNow version before starting. The following steps will only reference the Vancouver and Washington versions of ServiceNow since the latest version of the Workspace ONE ITSM Connector (version 6.0) only supports these two versions of ServiceNow.
How to add Workspace ONE UEM instances to the ITSM Connector
First, we need to enable multi-tenant support in the ITSM Connector. Then we can add additional Workspace ONE UEM tenants.
- Access the Guided Setup screens for the ITSM Connector in ServiceNow. Click the All menu at the top of the ServiceNow console. In the search field, type “Workspace ONE” then find the ITSM Connector and select Setup.

- From the ITSM Connector Welcome screen, click Continue on the top right.

- Scroll down to the Configure application defaults section and click Edit.

- On the Configure application defaults screen, click Configure.

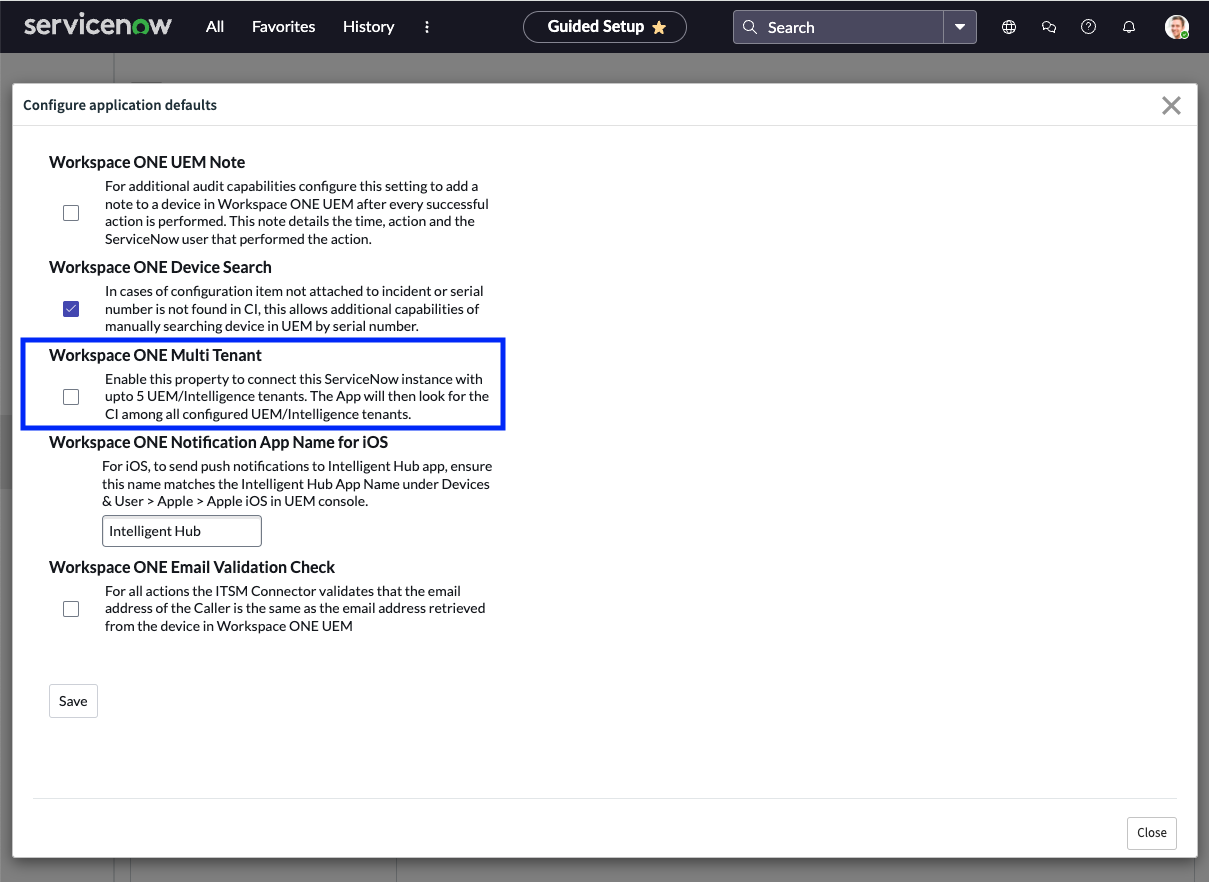
- Select the check box to enable Workspace ONE Multi Tenant. Then click Save and Close.
- Then access the Configure Connections settings by clicking the first navigation circle on the left.
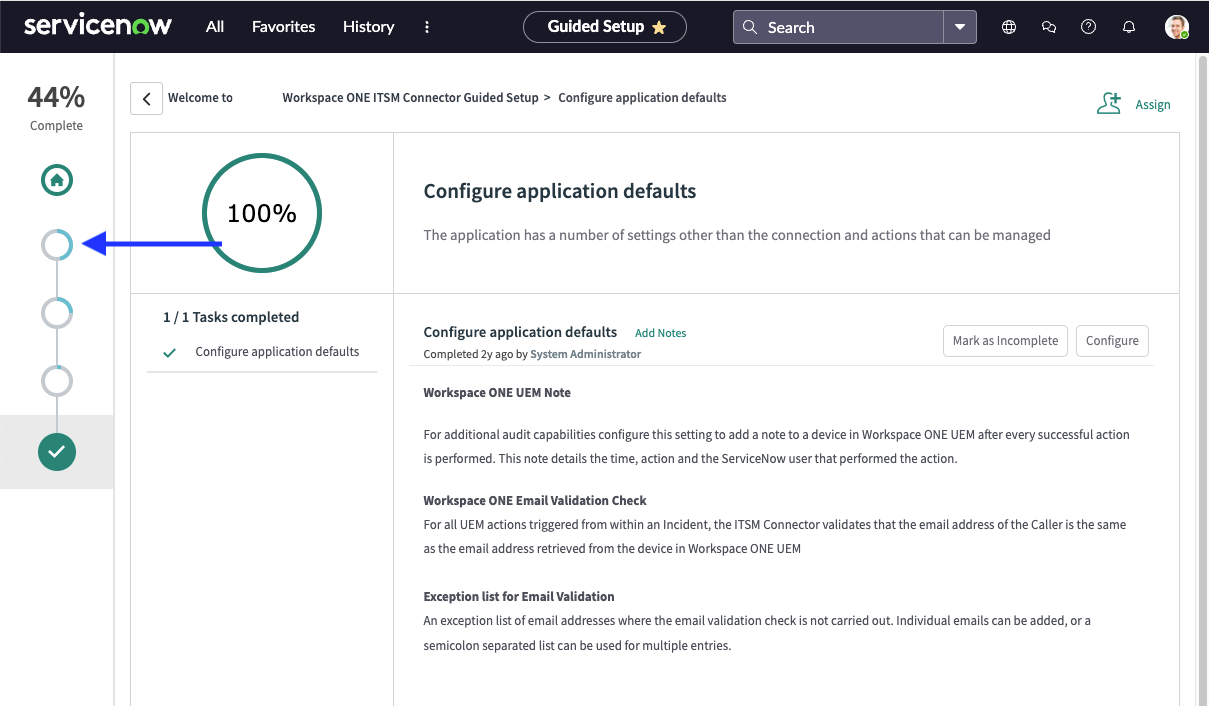
- Click Continue in the Configure connections section at the top.

- Then find the Configure UEM OAuth 2.0 details (optional) section, select the Configure Additional OAuth Connections tab, and click Configure.
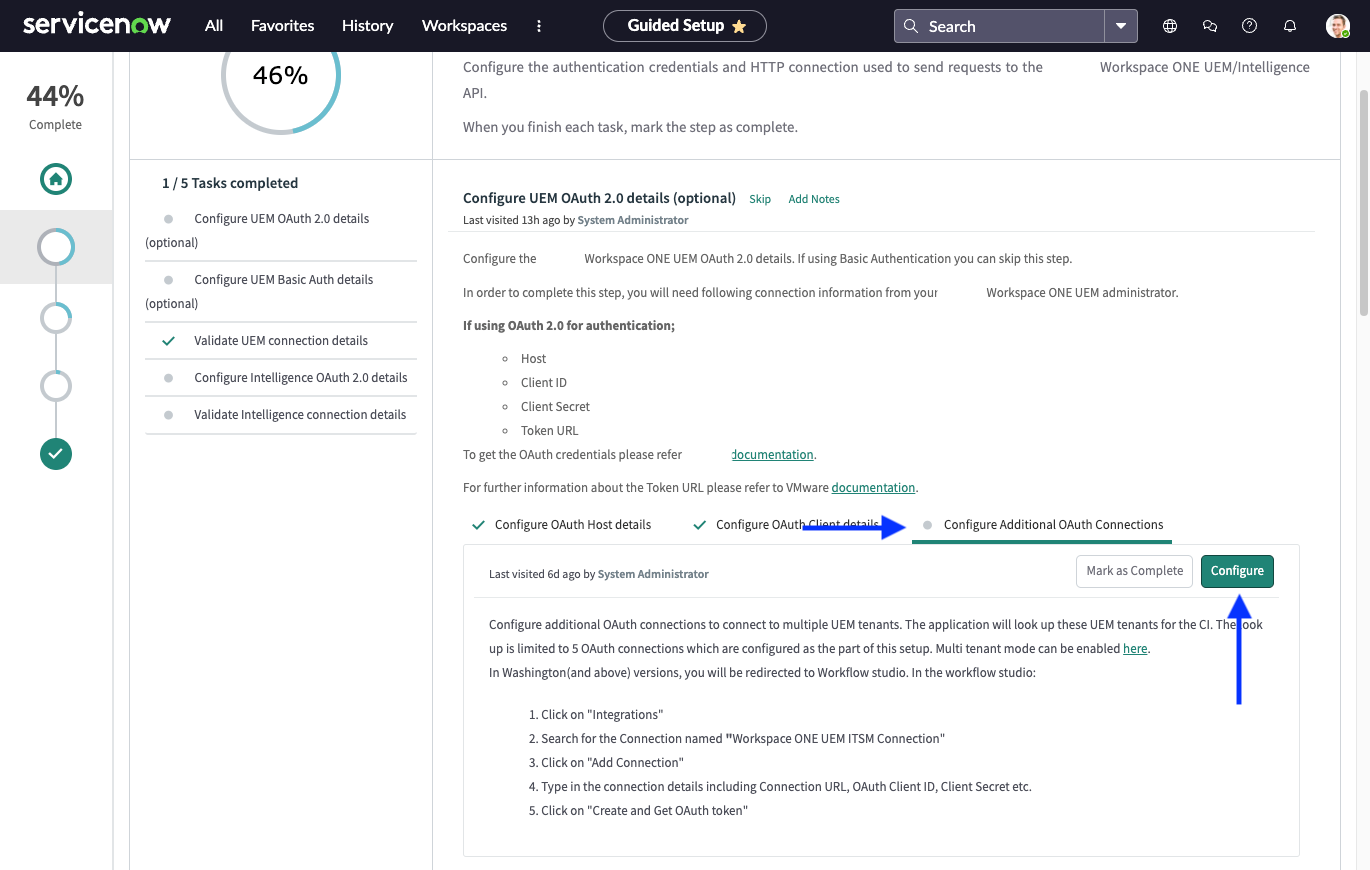
NOTE: Here is where the steps depend on the ServiceNow version. If you have Vancouver, skip to step 11 below. If you have Washington or later, keep going with step 9.
- This takes you to the Workflow Studio. Select the Integrations tab to continue.
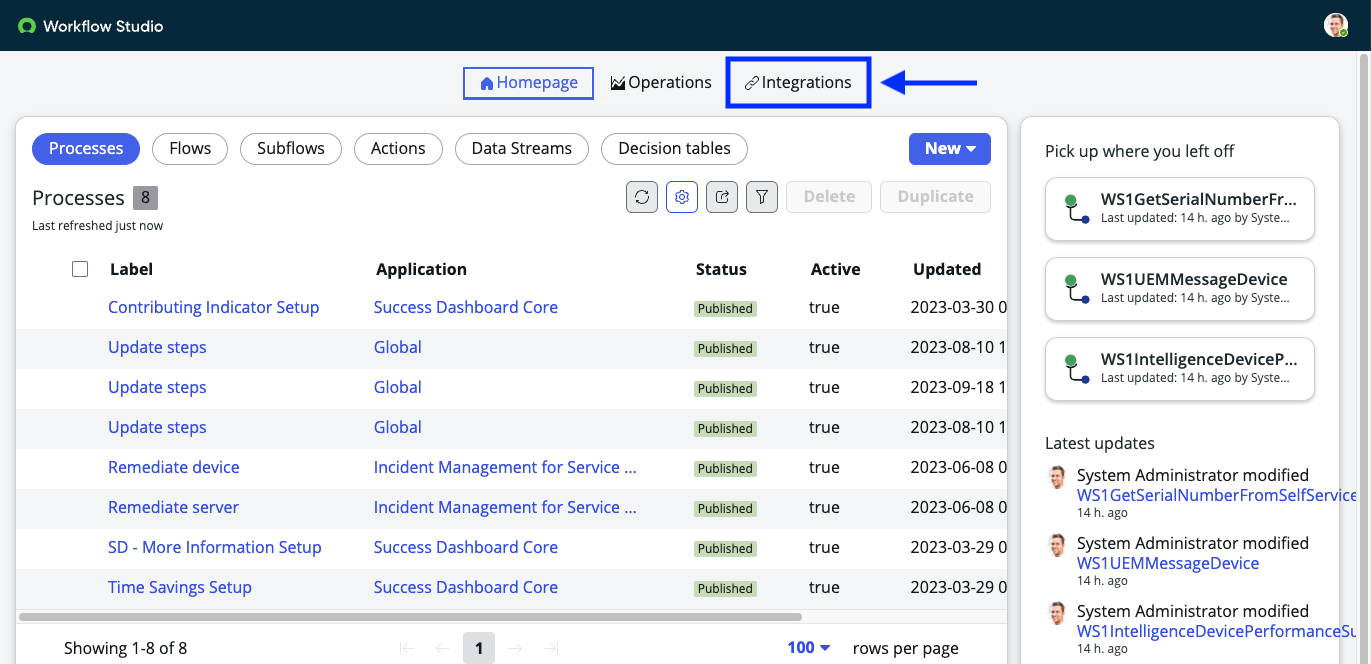
- Use the Search all connections field or scroll down and find the tile with the title Workspace ONE UEM ITSM Connection. Click Add Connection to directly add the information for an additional UEM instance OR click View Details to view and edit the list of UEM connections.

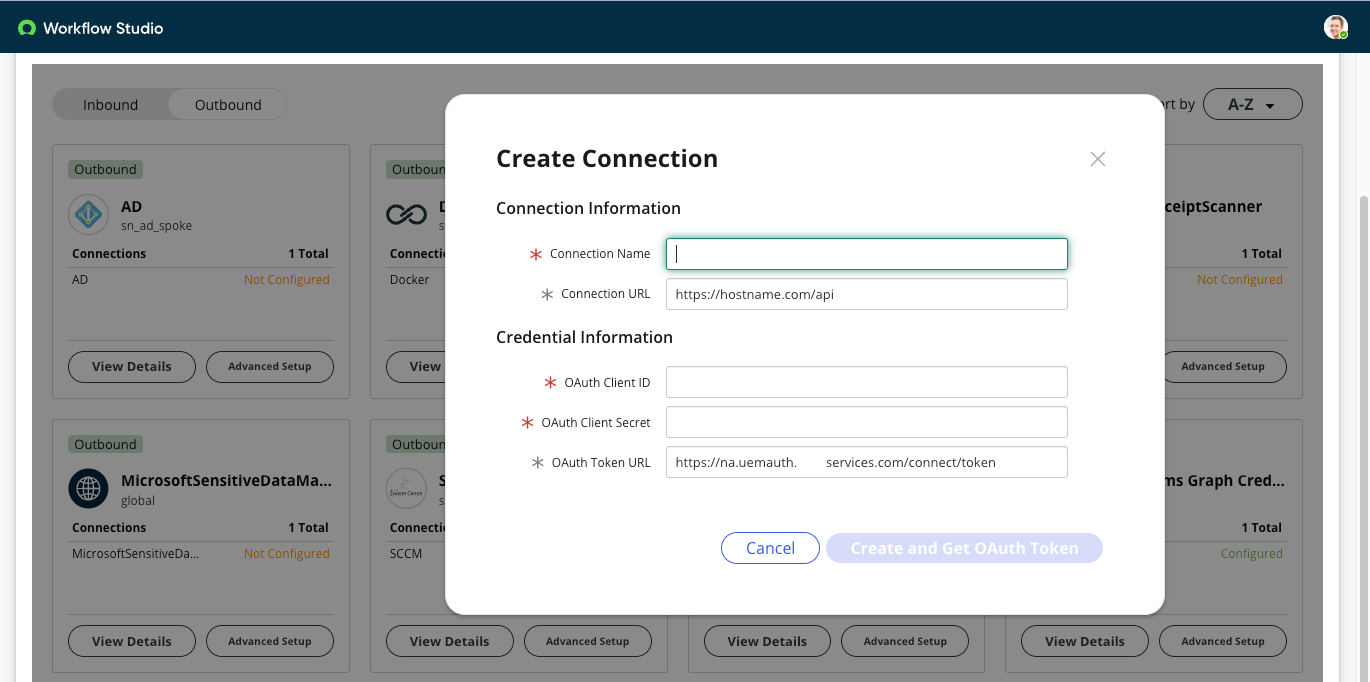
Figure 1: Screen to enter Workspace ONE tenant information after clicking Add Connection on a Connection tile in ServiceNow Workflow Studio
- In ServiceNow Vancouver, you will be taken directly to the Workspace ONE UEM ITSM Connection details screen. Click Add Connection to connect to an additional UEM tenant. This is also where you can edit any existing UEM connections.

How to add Omnissa Intelligence instances to the ITSM Connector
If you add another Workspace ONE UEM tenant to the ITSM Connector, you must add the corresponding Intelligence tenant as well.
- Follow the steps in the UEM section of this guide to access the Workspace ONE ITSM Connector Configure connections screen in ServiceNow. Then scroll down and find the Configure Intelligence OAuth 2.0 details section.
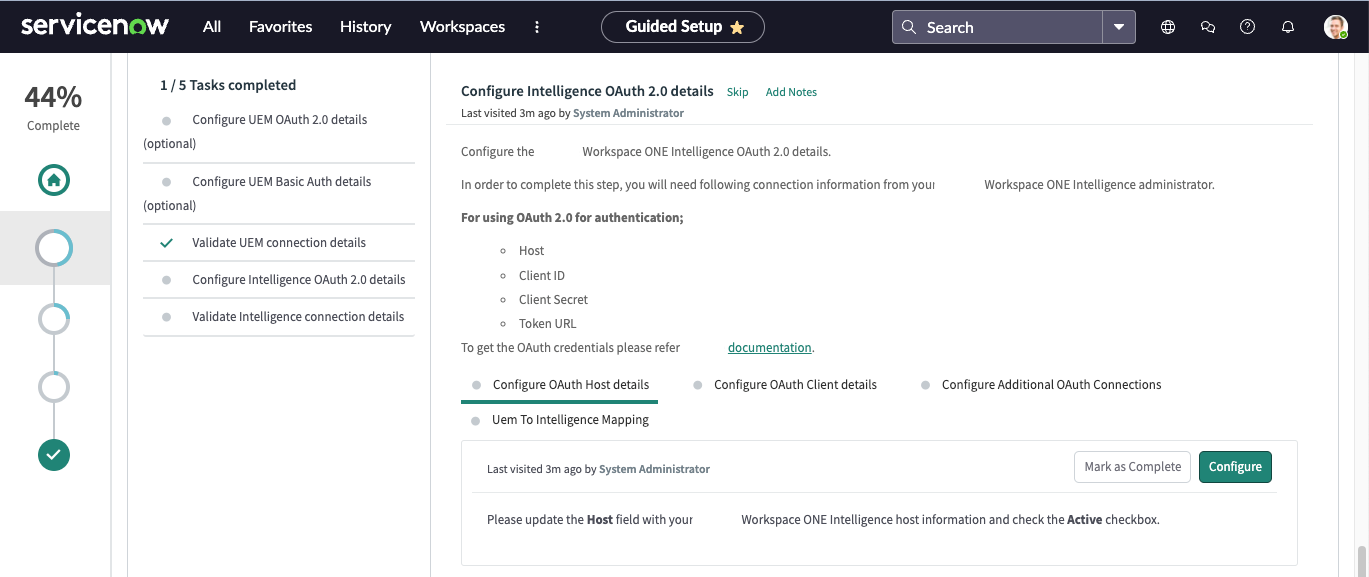
- Select the Configure Additional OAuth Connections tab and click Configure.
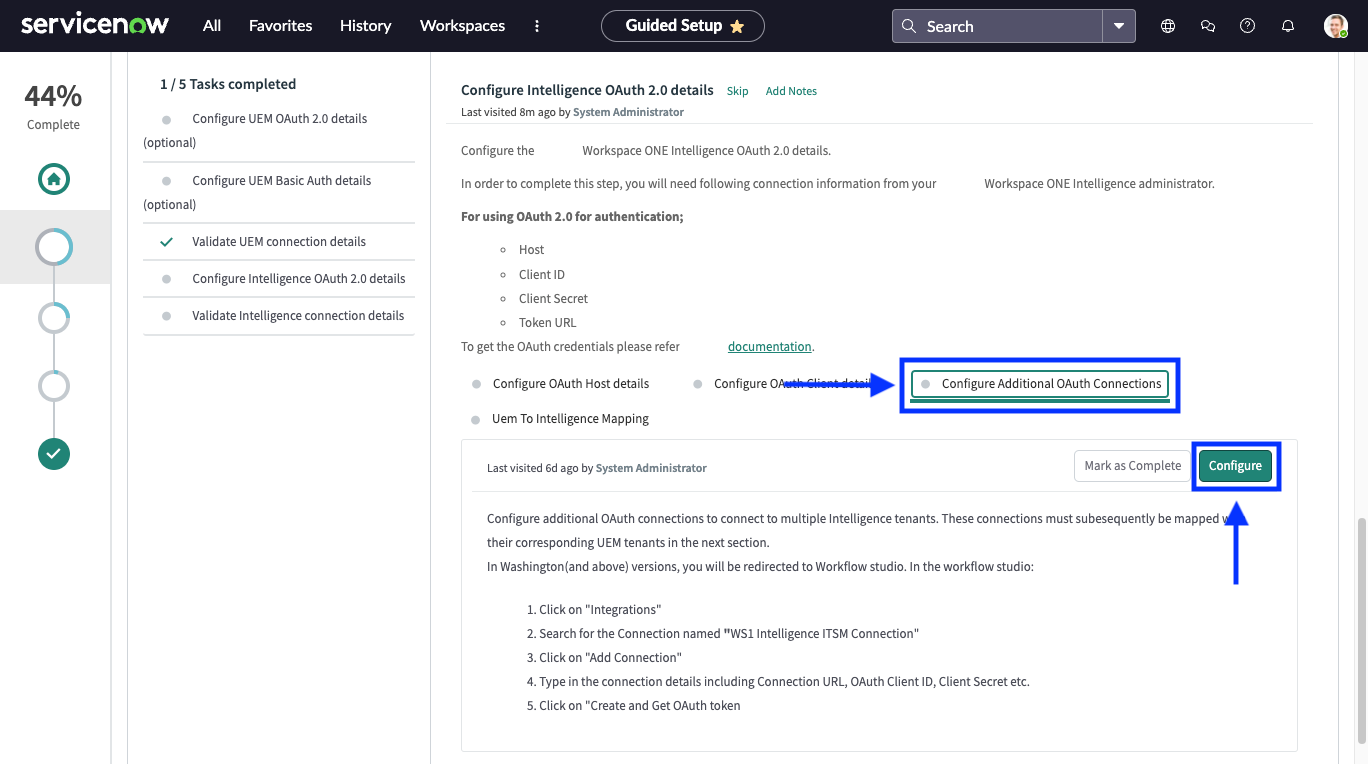
NOTE: Here is where the steps depend on the ServiceNow version. If you have Vancouver, skip to step 5 below. If you have Washington or later, keep going with step 3.
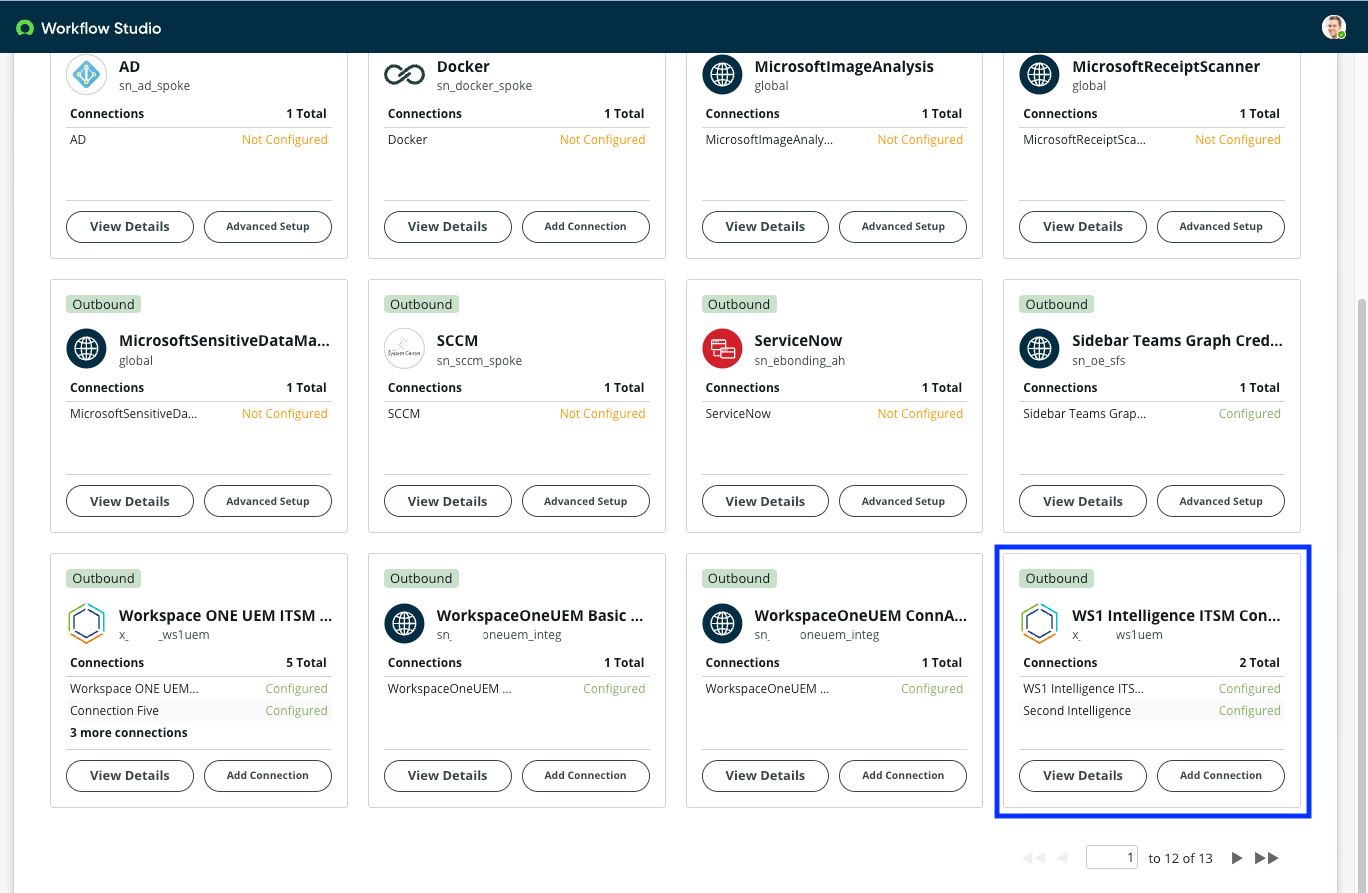
- On the Workflow Studio homepage, select the Integrations tab.
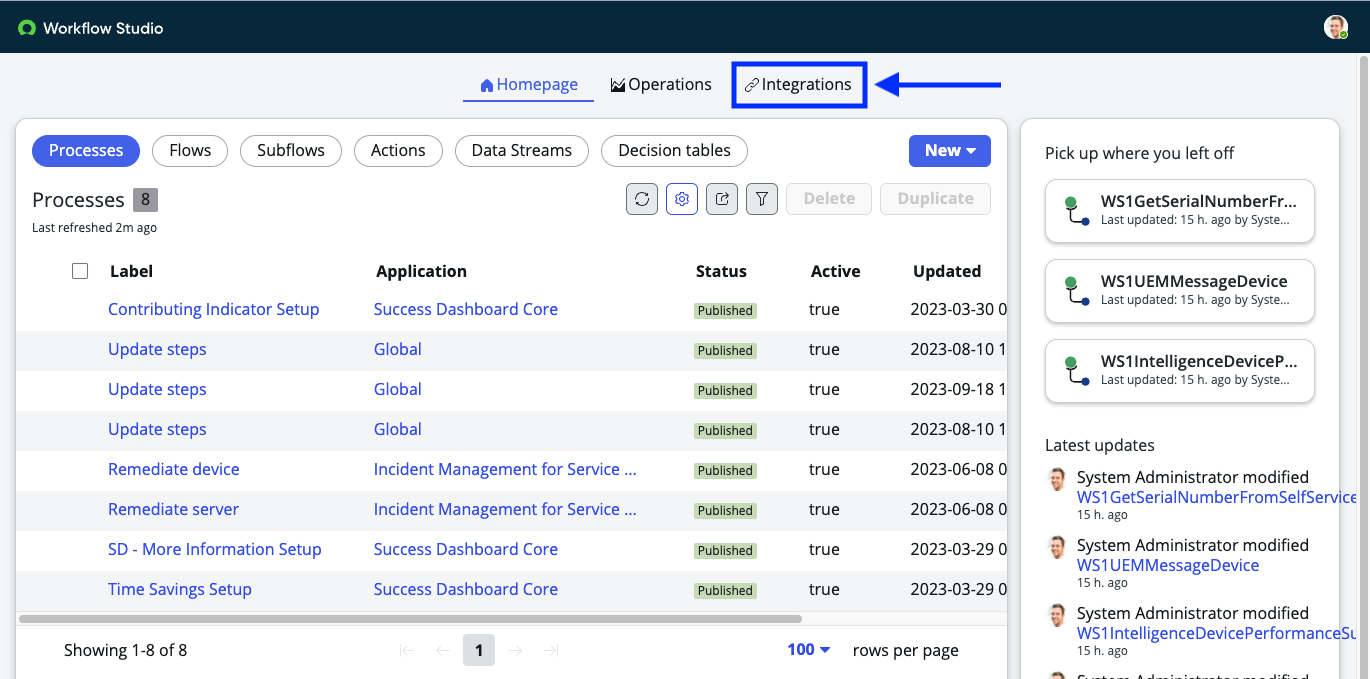
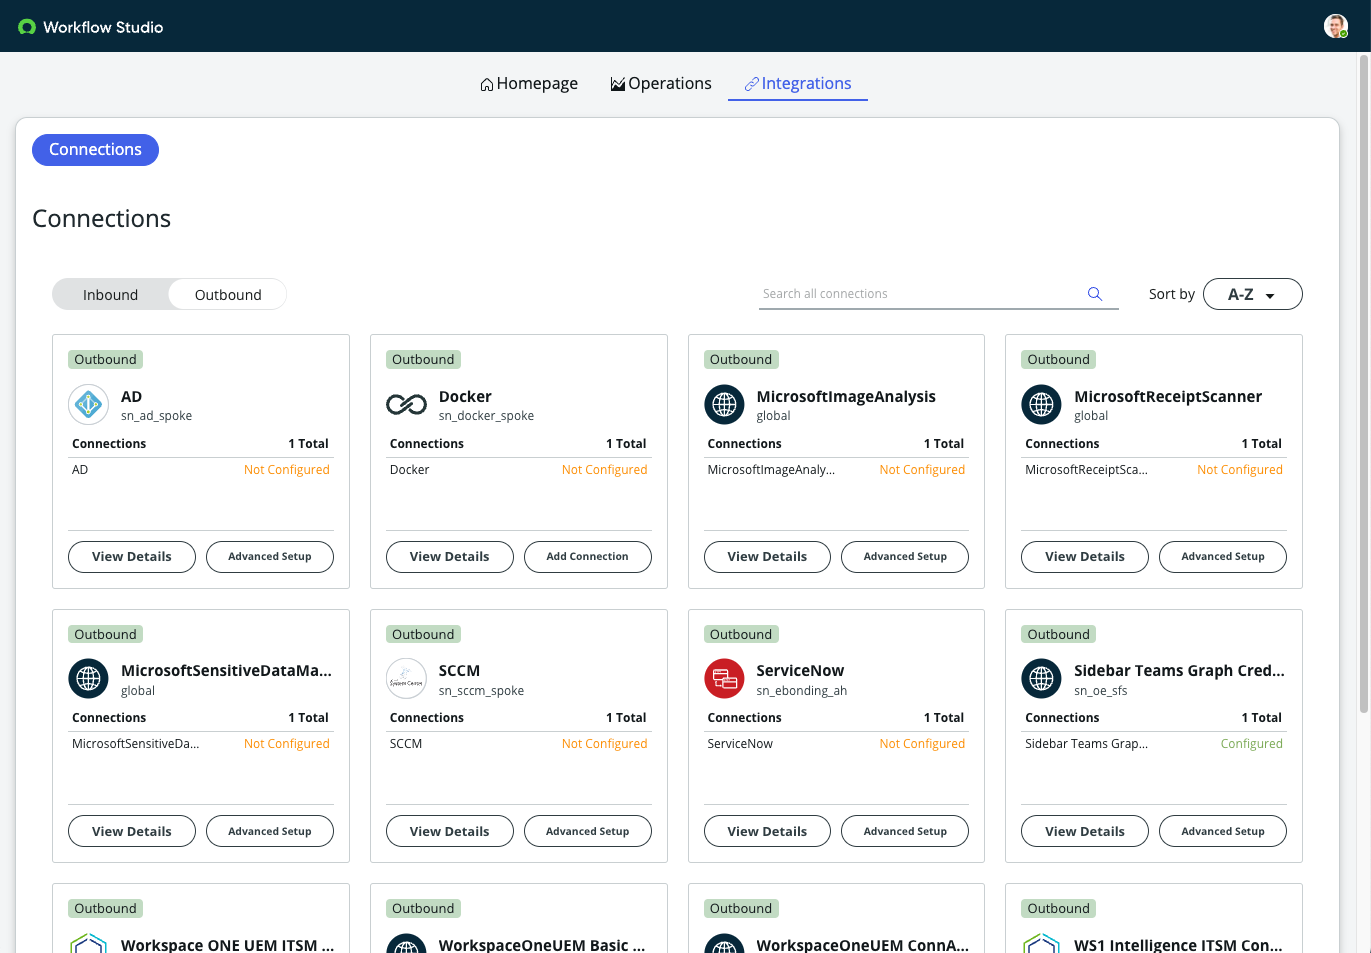
Figure 2: List of integrations in ServiceNow Workflow Studio
- Use the Search all connections bar at the top or scroll down and find the WS1 Intelligence ITSM Connection tile. You can click Add Connection to add another Omnissa Intelligence tenant or click View Details to view and edit the list of Intelligence connections (similar to UEM connections).
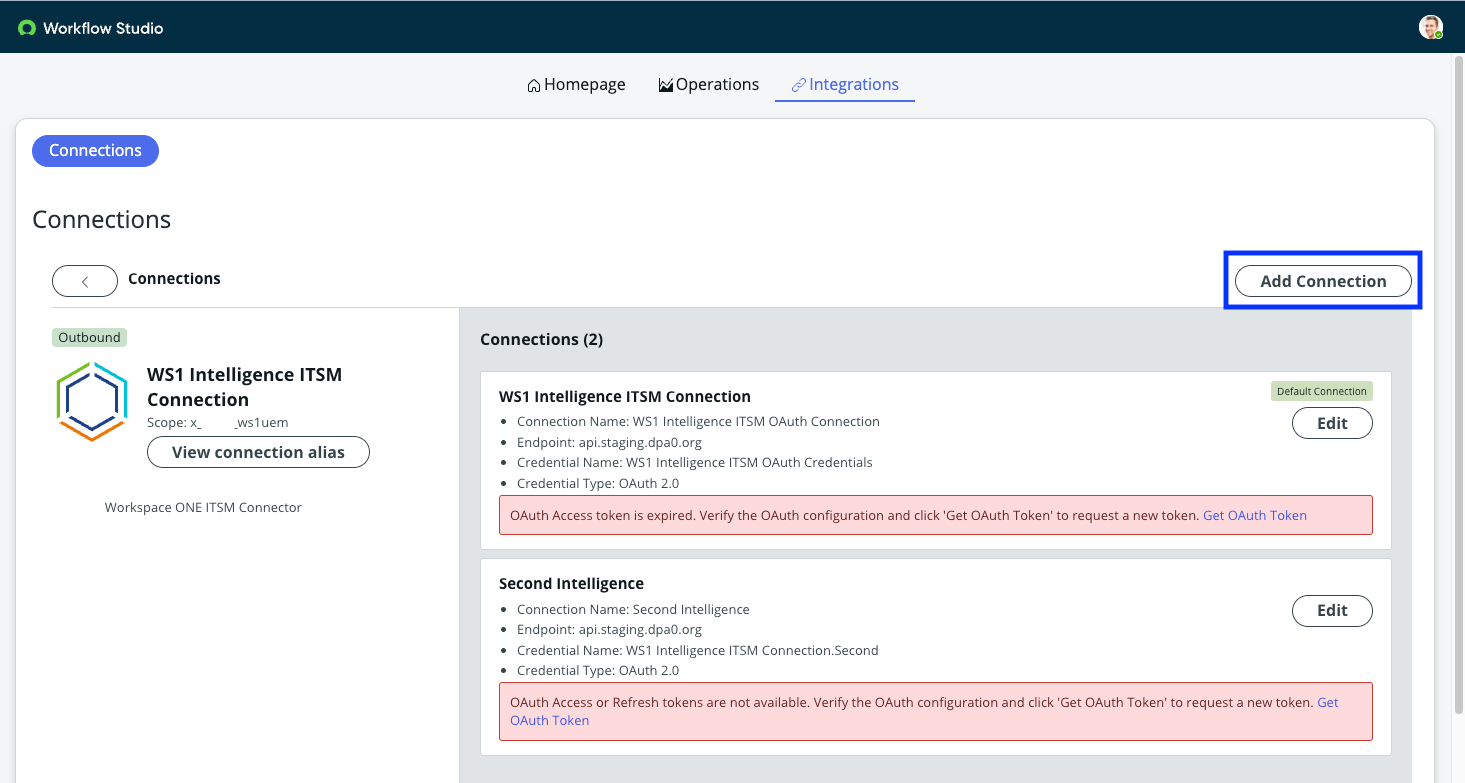
- In ServiceNow Vancouver, you are taken directly to the WS1 Intelligence ITSM Connection details screen. Click Add Connection to add another Omnissa Intelligence instance.
Map UEM instances to Intelligence instances
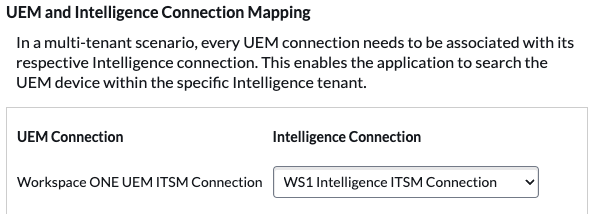
Now that we know where to add additional Workspace ONE UEM and Intelligence tenants, let’s map the UEM tenants to the correct Intelligence tenants in the ITSM Connector configuration.
- Go back to the Configure Intelligence OAuth 2.0 details section of the ITSM Connector setup screens in ServiceNow, but this time select the UEM to Intelligence Mapping tab, then click Configure.
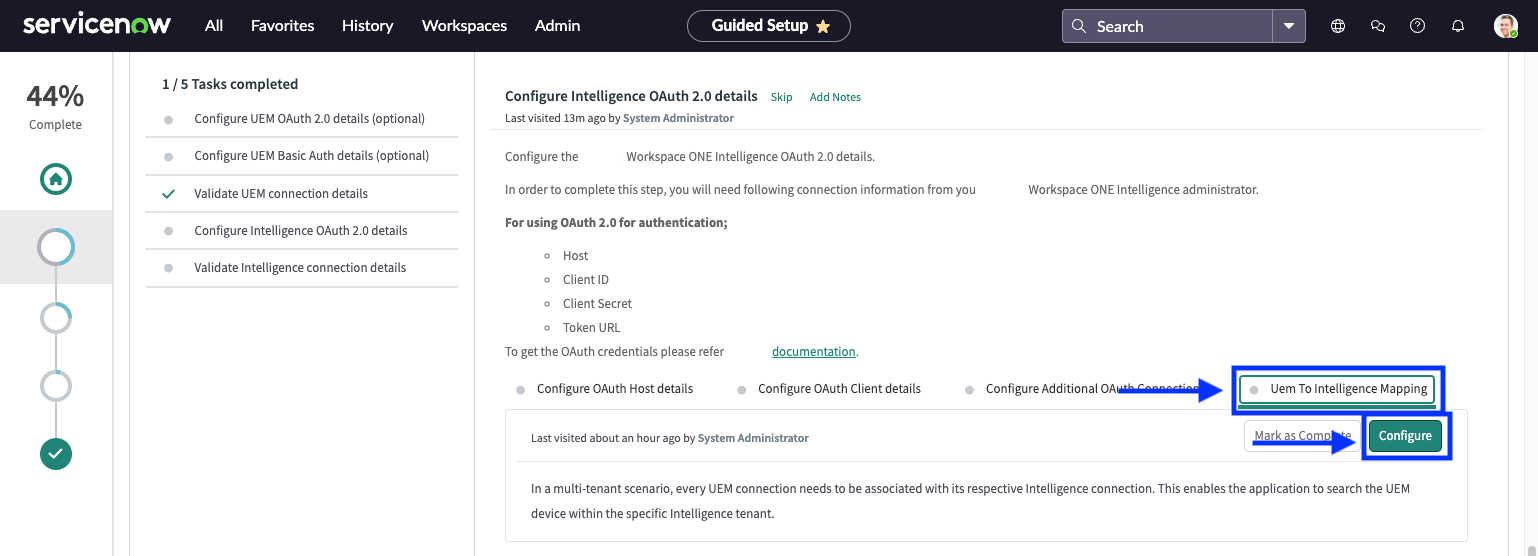
- The pop-up dialog will show two columns: the list of UEM connections on the left and the list of Intelligence connections on the right. Map the correct Intelligence tenant to the UEM tenant, then click Save at the bottom.
Agent experience
Now that ServiceNow can search for device data in multiple Workspace ONE UEM and Intelligence tenants, how does this impact the service desk or helpdesk agent using ServiceNow? The only change is the message shown within the incident the first time ServiceNow searches for the configuration item (device serial number) in UEM or Intelligence. The service desk user can see ServiceNow cycle through each UEM tenant until a match is found. After a match, the correct UEM or Intelligence connection is cached so that every subsequent search goes directly to the cached connection.
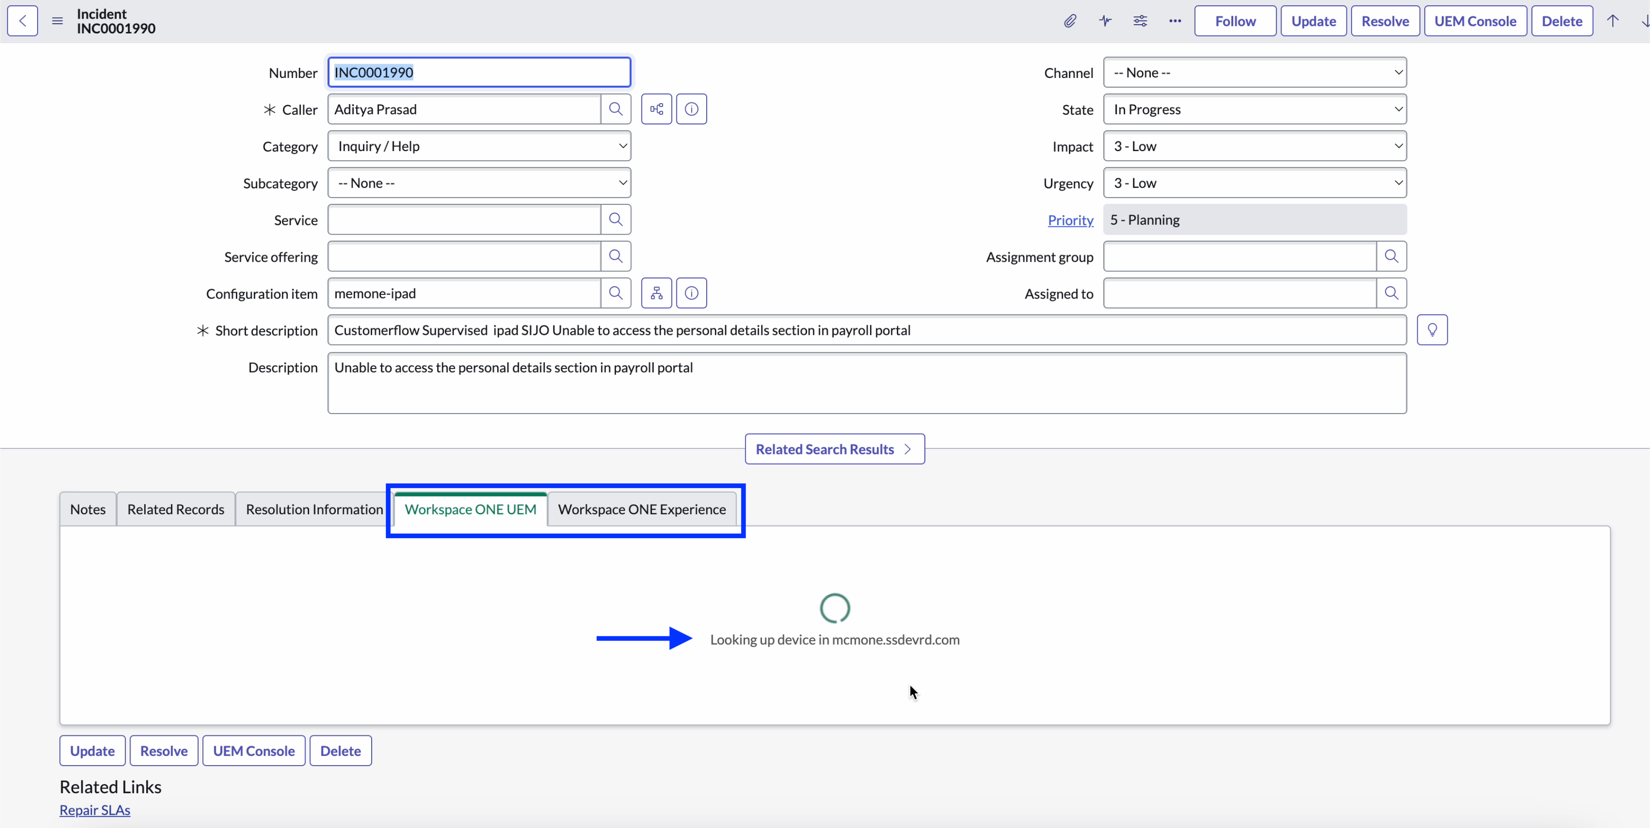
Figure 3: Workspace ONE ITSM Connector in ServiceNow initial search for the configuration item in UEM
Additional resources
To learn more about the Workspace ONE ITSM Connector for ServiceNow, see this documentation.
