Securing your Windows PCs against recall with Workspace ONE UEM

Introduction
With the release of Windows 11 Copilot+ machines, Microsoft introduced the Recall preview feature, designed to improve user experience by allowing the operating system to recall applications and details observed while using your PC. As described by Microsoft, “With Recall, you have an explorable timeline of your PC’s past. Just describe how you remember it and Recall will retrieve the moment you saw it.”
While this feature can be convenient for users, it has raised significant concerns among IT administrators and privacy advocates. The primary issue is that the Recall feature takes snapshots (or screenshots) of the device's screen and indexes all that information in a location that, as of writing, has proven not to be secure. Wired has an article detailing one of the tools available on GitHub called TotalRecall that was able to exfiltrate this data from a Recall-enabled machine in prerelease, even if the other user on the machine is not an administrator. This obviously poses a substantial security risk, as sensitive information could be inadvertently exposed or exfiltrated by malicious software/bad actors. For these reasons, organizations may be looking for ways to turn off this functionality.
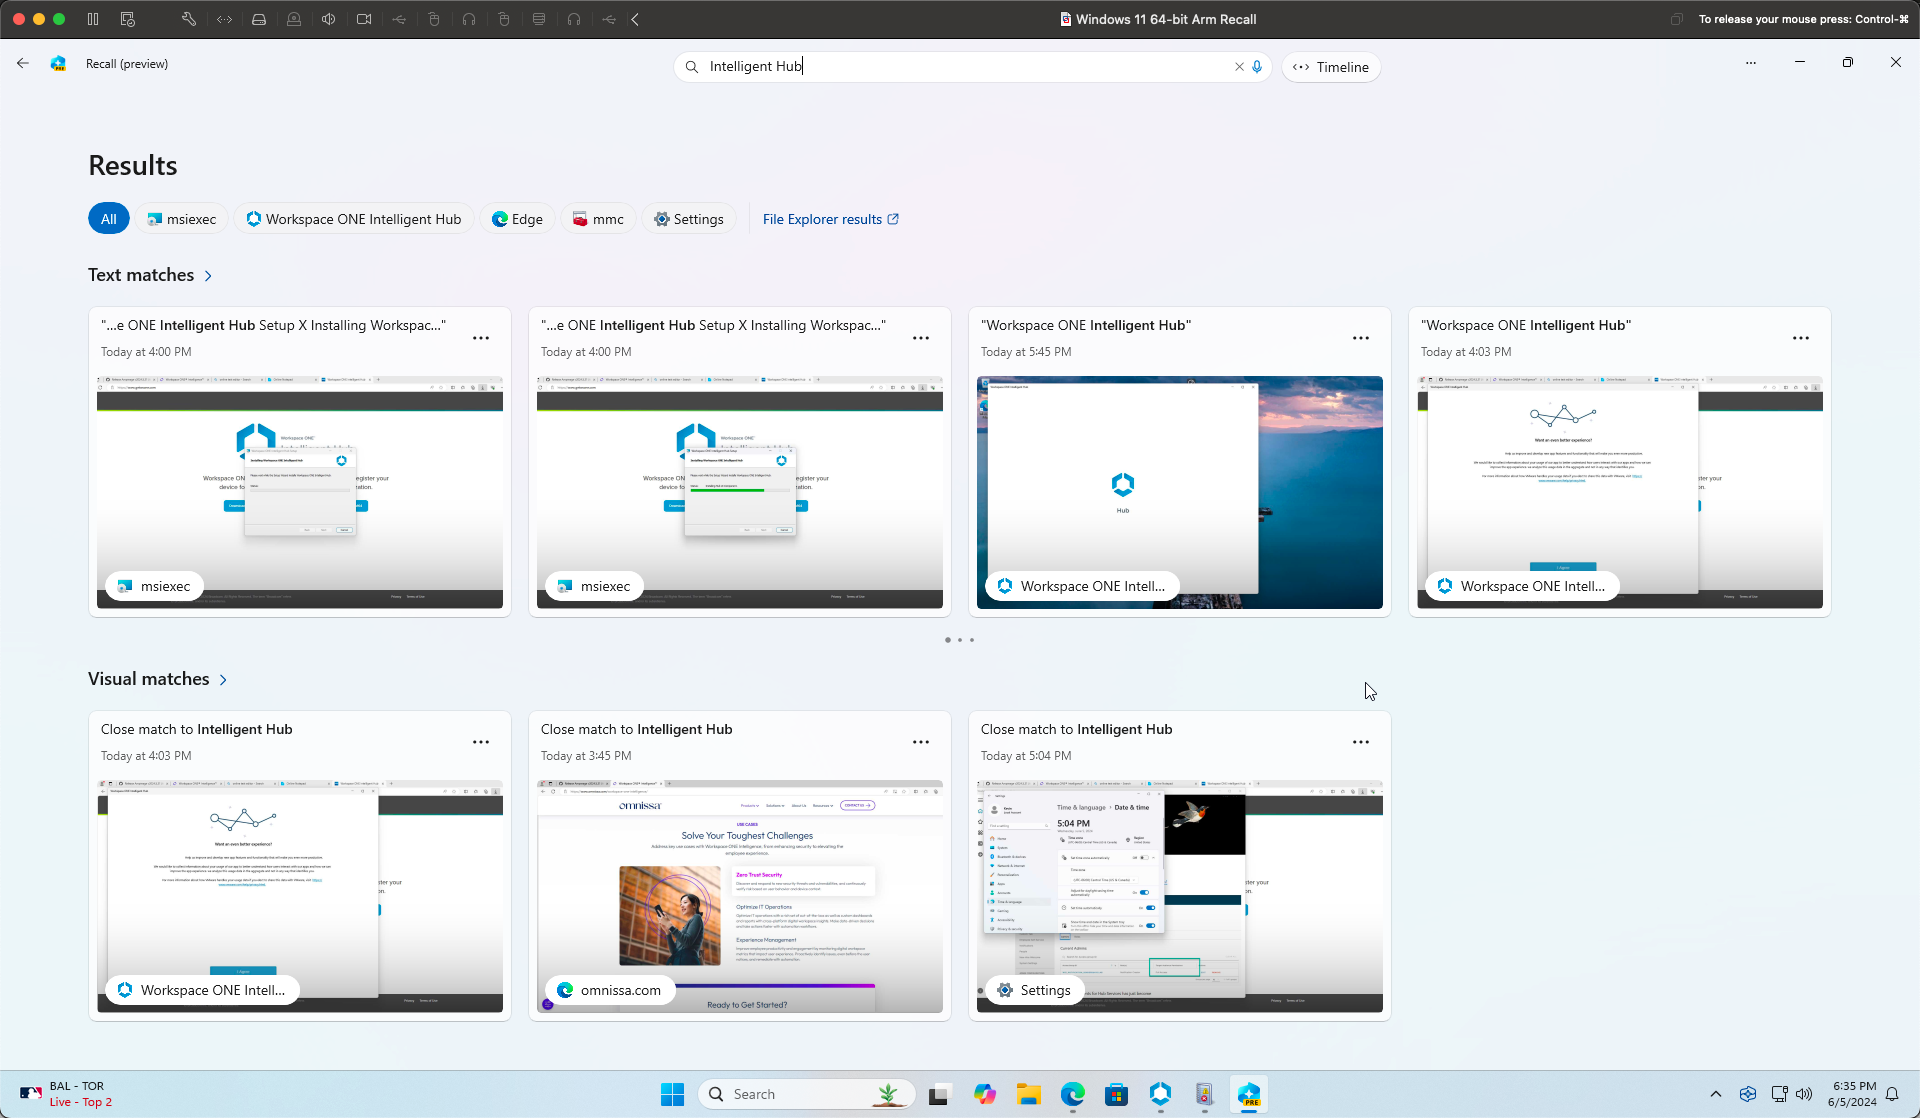
Let’s dive into why this may be concerning with a visual example. In my lab environment, I enabled Recall and installed the Intelligent Hub. During the installation, I had to authenticate, provide enrollment information, etc., and all of this was captured and cataloged by Recall. Now, let’s suppose I had typed in a password, my social security number, or some other sensitive information.

Figure 1. A screenshot showing the phrase ‘Intelligent Hub’ appearing, not just in text, but in images and application details.
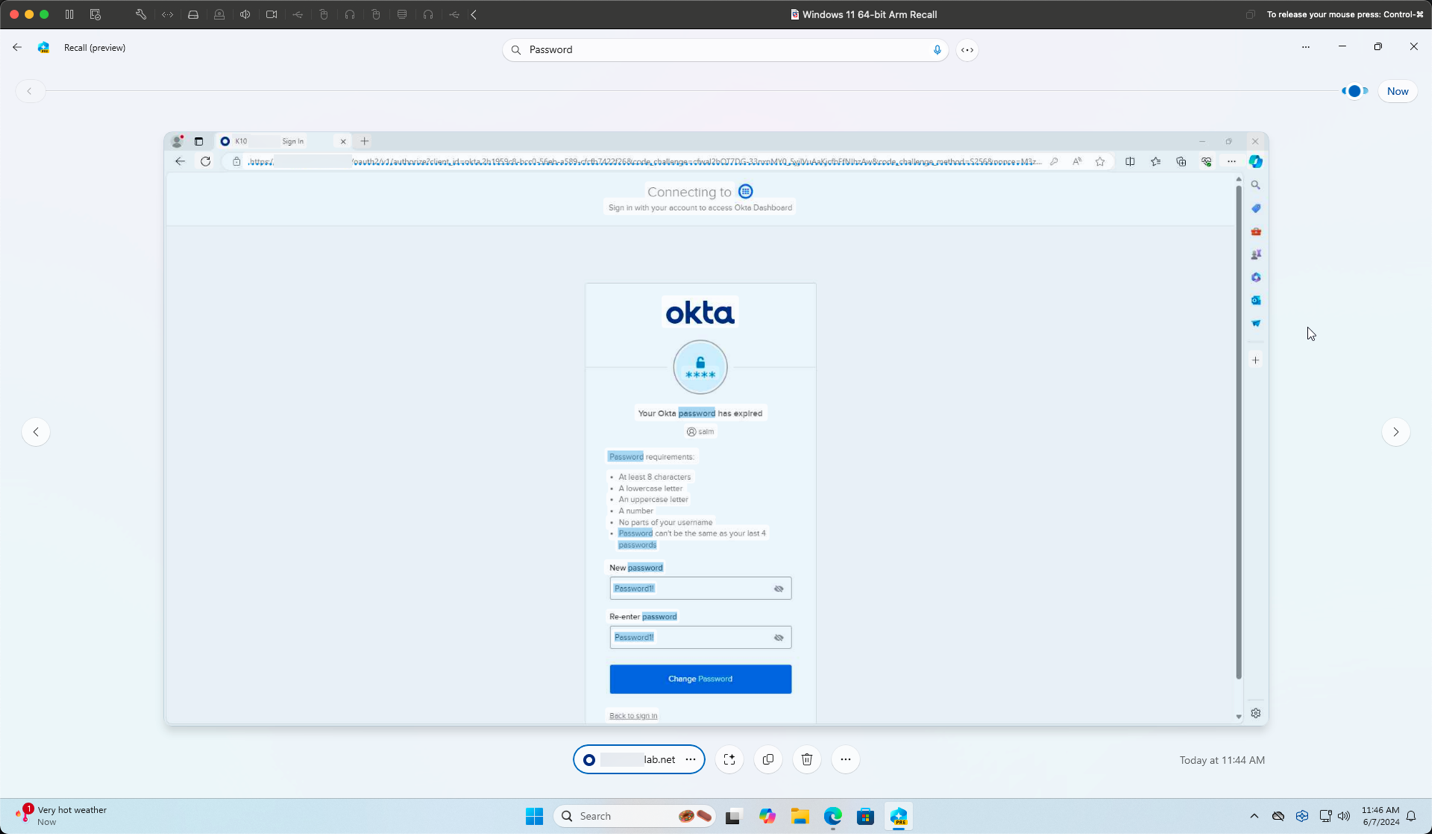
As a concerning example, the user in Figure 2 is shown searching for the phrase “Password” in Recall, and it was able to find the entire process of the user changing their Okta password. If end users choose to unmask their password, or if the web field displays sensitive information in plain text, it will be captured and indexed. Figures 2 and 3 also show the capturing of MFA challenge codes since this is in plain text.

Figure 2. User is shown searching for the phrase “Password” in recall.

Figure 3. Recall capturing MFA challenge codes
Step-by-Step instructions to turn off the recall feature
In this blog post, we walk you through the steps to turn off the Recall feature in Windows 11 using Workspace ONE UEM and a Custom XML Profile, leveraging Microsoft’s Windows AI Policy CSP to turn off the feature on a managed machine.
Understanding Workspace ONE UEM
Workspace ONE UEM is a comprehensive platform allowing IT administrators to manage devices, applications, and user access from a single console. By leveraging Workspace ONE UEM, a customer can create and deploy custom configurations to ensure all devices in their organization adhere to defined security policies.
Creating a custom XML profile
To turn off the Recall feature in Windows 11, the administrator needs to create a Custom XML profile. This profile will contain the necessary settings to turn off the feature across all managed devices. From Workspace ONE UEM Console, perform the following steps to create the profile:
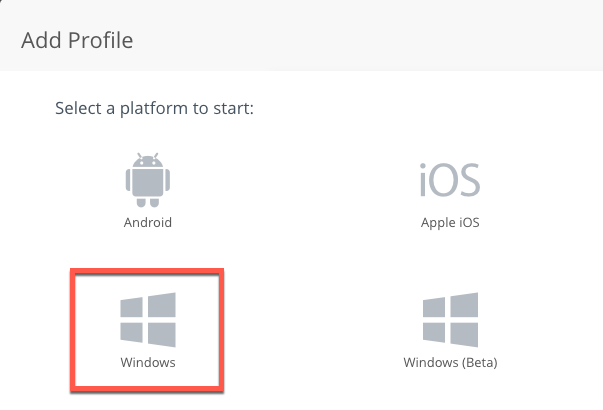
Step 1: Creating Profile for Windows platform
- Navigate to Devices > Profiles & Resources > Profiles.
- Click ADD and select Add Profile.

- Choose Windows as the platform.
- Select Windows Desktop as the profile type.
- Select User Profile.


Step 2: Configure the Profile general settings
- Provide a name for the profile, such as "Disable Recall Feature".
- Optionally, add a description to help identify the purpose of the profile.
- Select the Smart Group to assign this configuration to. Because Windows 11 ARM64 is currently the only platform where the Recall feature is available, the defined Smart Group is specific to Windows 11 with ARM64 architecture.

Step 3: Add custom settings
- Navigate to the Custom Settings section.
- Click Configure to create a new custom settings configuration.

Step 4: Insert the custom XML
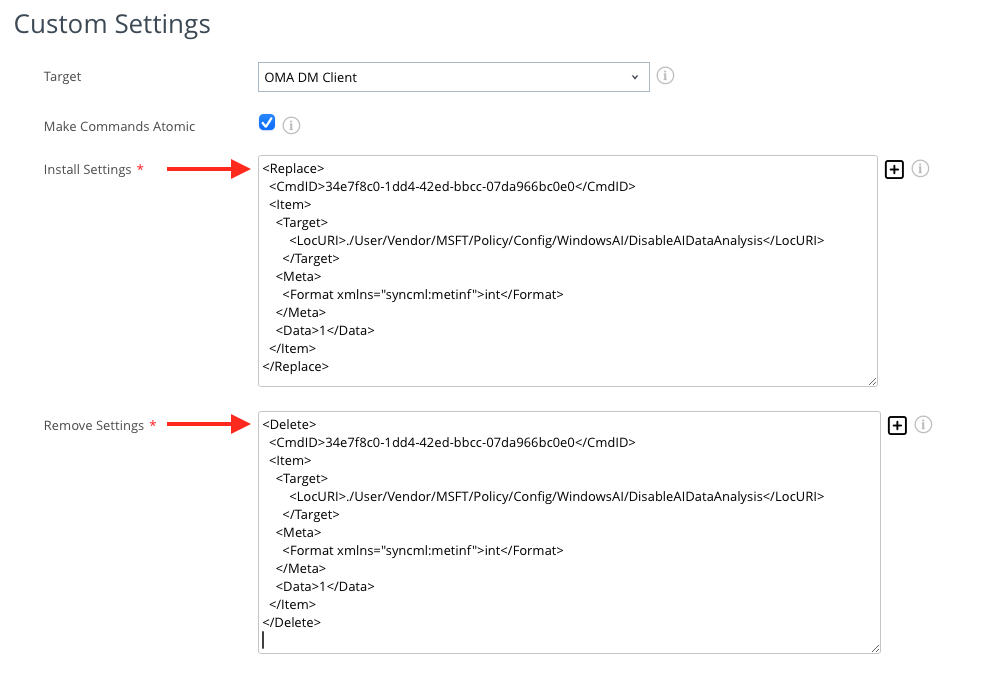
Here, the UEM admin will need to insert two pieces of SyncML data to turn off the Recall feature.
- The first piece, under the “Install Settings” section, turns off the Recall feature.
- The second piece, in the “Remove Settings” section, defines how the configuration is modified when the profile is removed.
The same base SyncML is used but the command is changed from “Replace” for the Install section to “Delete” in the Remove section.
Place the following SyncML in the “Install Settings”
<Replace>
  <CmdID>34e7f8c0-1dd4-42ed-bbcc-07da966bc0e0</CmdID>
  <Item>
    <Target>
        <LocURI>./User/Vendor/MSFT/Policy/Config/WindowsAI/DisableAIDataAnalysis</LocURI>
      </Target>
    <Meta>
      <Format xmlns="syncml:metinf">int</Format>
    </Meta>
    <Data>1</Data>
  </Item>
</Replace>
Then place the following SyncML in the “Remove Settings” section. Notice the action is to delete, so it is removing the settings when the profile is removed, and the default behavior for Recall (in the preview release tested) was enabled, so this should re-enable Recall for end-users when the profile is removed, or at least allow the end-user to turn it back on if they choose.
<Delete>
  <CmdID>34e7f8c0-1dd4-42ed-bbcc-07da966bc0e0</CmdID>
  <Item>
    <Target>
        <LocURI>./User/Vendor/MSFT/Policy/Config/WindowsAI/DisableAIDataAnalysis</LocURI>
      </Target>
    <Meta>
      <Format xmlns="syncml:metinf">int</Format>
    </Meta>
    <Data>1</Data>
  </Item>
</Delete>
Ensure the <Replace> commands exist in the top “Install Settings” section and the <Delete> commands in the “Remove Settings” section. Note that the CmdID is a unique GUID– so if there are issues deploying in a Shared SaaS environment, it is recommended to use a GUID generator utility to make sure the command is unique.

Step 5: Save and publish the profile
- After inserting the SyncML, click Save & Publish.
- Ensure the list of affected devices is expected.
- Click Publish.


Confirm the profile has been installed by looking in UEM at the Install Status, or verify on the Desktop in Intelligent Hub, and verifying that the Recall setting is administratively turned off by policy.

Note: If Recall is turned off, but the GUI is grayed out showing “On” despite not being able to launch Recall, a reboot may be in order. Admins can also potentially pair the deployment of this Profile with a Reboot action from Freestyle in UEM to ensure settings properly take effect.

Summary
Microsoft is reworking Recall after researchers pointed out its security issues, as a response Microsoft published an update on Recall providing details on changes related to the setup, privacy controls, and security approach.
In the meantime, turning off the Recall feature in Windows 11 may be a crucial step for organizations that prioritize security and privacy. By using Workspace ONE UEM, organizations can efficiently manage and deploy this functionality across any Windows 11-managed devices that may have this feature active in their fleet.
To learn more about Workspace ONE UEM, check out the following articles:


